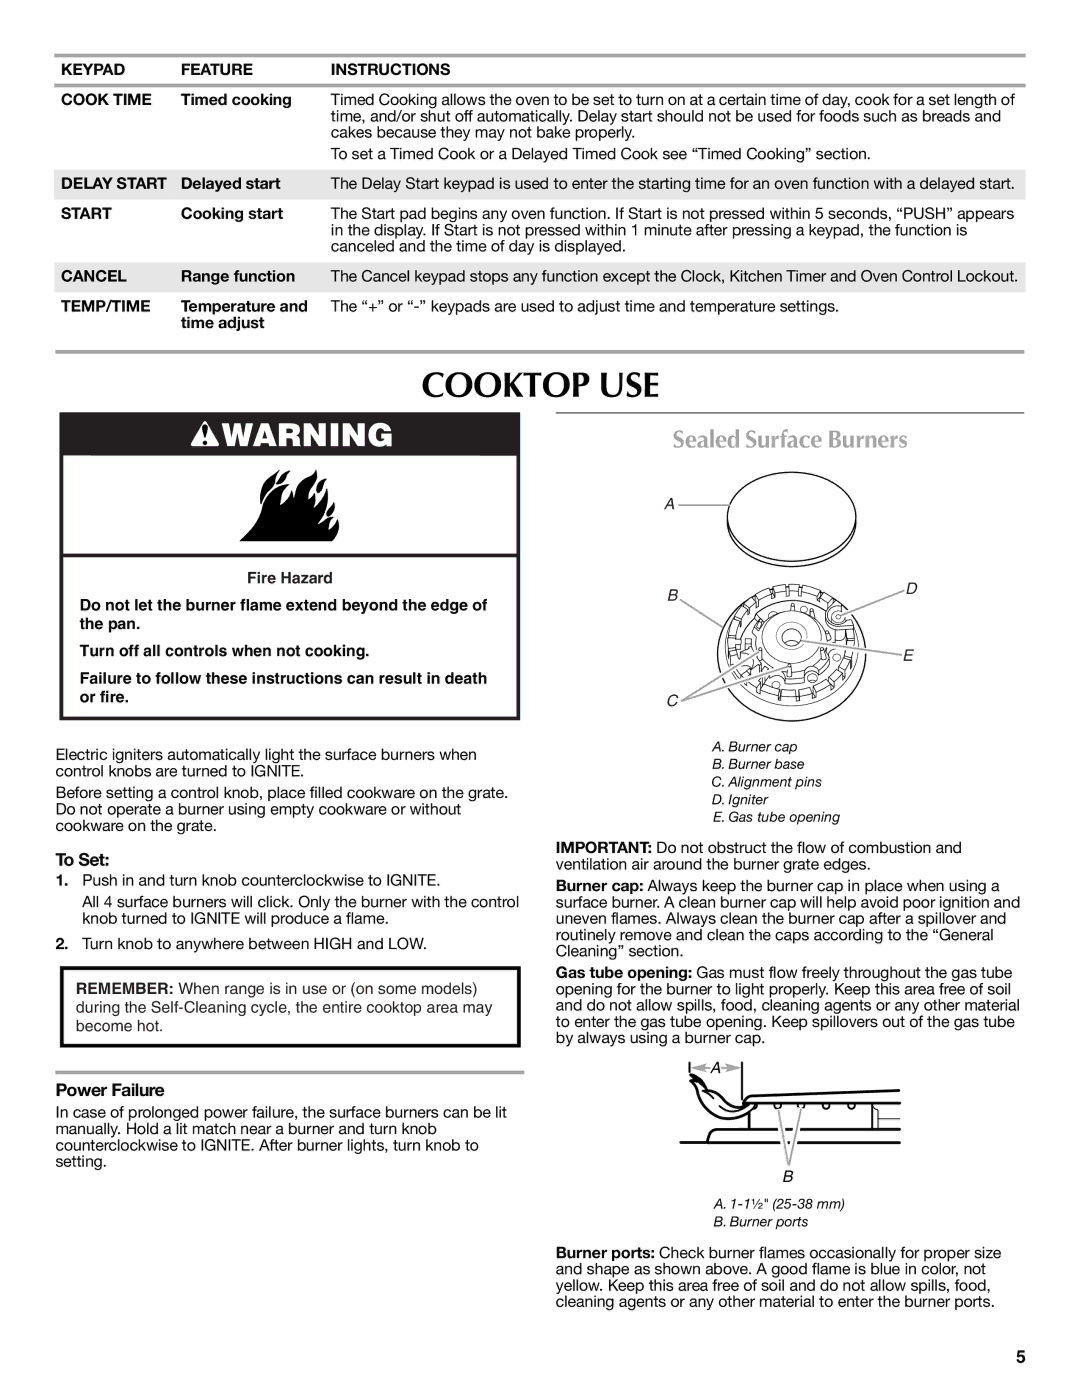
Maytag W10239844A, W10234649A warranty Cooktop USE, Sealed Surface Burners, To Set, Power Failure

Models: W10239844A W10234649A

1 28
Download 28 pages 20.75 Kb
Page 5
Image 5

KEYPAD

FEATURE

INSTRUCTIONS

COOK TIME

Timed cooking

Timed Cooking allows the oven to be set to turn on at a certain time of day, cook for a set length of


time, and/or shut off automatically. Delay start should not be used for foods such as breads and


cakes because they may not bake properly.


To set a Timed Cook or a Delayed Timed Cook see “Timed Cooking” section.


DELAY START

Delayed start

The Delay Start keypad is used to enter the starting time for an oven function with a delayed start.


START

Cooking start

The Start pad begins any oven function. If Start is not pressed within 5 seconds, “PUSH” appears


in the display. If Start is not pressed within 1 minute after pressing a keypad, the function is


canceled and the time of day is displayed.


CANCEL

Range function

The Cancel keypad stops any function except the Clock, Kitchen Timer and Oven Control Lockout.


TEMP/TIME

Temperature and

The “+” or “-” keypads are used to adjust time and temperature settings.


time adjust


COOKTOP USE

WARNING

Fire Hazard

Do not let the burner flame extend beyond the edge of the pan.

Turn off all controls when not cooking.

Failure to follow these instructions can result in death or fire.

Electric igniters automatically light the surface burners when control knobs are turned to IGNITE.

Before setting a control knob, place filled cookware on the grate. Do not operate a burner using empty cookware or without cookware on the grate.

To Set:

1.Push in and turn knob counterclockwise to IGNITE.

All 4 surface burners will click. Only the burner with the control knob turned to IGNITE will produce a flame.

2.Turn knob to anywhere between HIGH and LOW.

REMEMBER: When range is in use or (on some models) during the Self-Cleaning cycle, the entire cooktop area may become hot.

Power Failure

In case of prolonged power failure, the surface burners can be lit manually. Hold a lit match near a burner and turn knob counterclockwise to IGNITE. After burner lights, turn knob to setting.

Sealed Surface Burners

A

B D

E

C

A. Burner cap

B. Burner base

C. Alignment pins

D.Igniter

E.Gas tube opening

IMPORTANT: Do not obstruct the flow of combustion and ventilation air around the burner grate edges.

Burner cap: Always keep the burner cap in place when using a surface burner. A clean burner cap will help avoid poor ignition and uneven flames. Always clean the burner cap after a spillover and routinely remove and clean the caps according to the “General Cleaning” section.

Gas tube opening: Gas must flow freely throughout the gas tube opening for the burner to light properly. Keep this area free of soil and do not allow spills, food, cleaning agents or any other material to enter the gas tube opening. Keep spillovers out of the gas tube by always using a burner cap.

A

B

A.1-1¹⁄₂" (25-38 mm)

B.Burner ports

Burner ports: Check burner flames occasionally for proper size and shape as shown above. A good flame is blue in color, not yellow. Keep this area free of soil and do not allow spills, food, cleaning agents or any other material to enter the burner ports.

5

Page 5
Image 5
Maytag W10239844A, W10234649A warranty Cooktop USE, Sealed Surface Burners, To Set, Power Failure

W10239844A, W10234649A specifications

The Maytag W10234649A and W10239844A are two prominent appliance components that represent advanced engineering and design in modern home kitchen technology. These models primarily serve as essential parts in the user experience, ensuring reliability and efficiency in daily tasks.

The Maytag W10234649A is primarily recognized as a high-quality dishwasher spray arm. This part is specifically designed to enhance the performance of dishwashing units by distributing water effectively throughout the dishwasher interior. One of its notable features is its robust construction, aimed at withstanding high-pressure water flows while preventing clogs and leaks. The spray arm utilizes a unique design that rotates smoothly, ensuring thorough cleaning of dishes from multiple angles, thus maximizing the washing coverage and minimizing the need for pre-rinsing.

On the other hand, the W10239844A is renowned as a dishwasher door latch assembly. This vital component plays a significant role in ensuring the safe operation of the dishwasher. It secures the door during washing cycles, preventing any leaks and maintaining the unit’s efficiency. The door latch features a user-friendly design that allows for easy installation and replacement. Constructed from durable materials, it guarantees longevity and reliability, even with frequent use. The W10239844A is designed to comply with safety standards, providing peace of mind and ensuring that the dishwasher operates effectively without interruptions.

Both the W10234649A and W10239844A reflect Maytag's commitment to innovation and quality. They are engineered for compatibility with a variety of Maytag dishwasher models, making them versatile choices for users looking to replace worn parts or improve their kitchen appliance's performance. Their ease of installation and strong build quality not only enhance the functionality of the dishwashers but also contribute to Maytag's reputation for producing long-lasting, reliable home appliances.

In conclusion, whether you're looking at the W10234649A spray arm or the W10239844A door latch assembly, both parts exemplify the spirit of Maytag's design philosophy, prioritizing efficiency, durability, and user satisfaction in every home. These components ensure that your dishwashing experience is seamless and effective, allowing you to focus on what truly matters—enjoying time with family and friends.