Water Pressure

A cold water supply with water pressure of between 35 and 120 psi (241 and 827 kPa) is required to operate the water dispenser and ice maker. If you have questions about your water pressure, call a licensed, qualified plumber.

Reverse Osmosis Water Supply

IMPORTANT: The pressure of the water supply coming out of a reverse osmosis system going to the water inlet valve of the refrigerator needs to be between 35 and 120 psi (241 and

827 kPa).

If a reverse osmosis water filtration system is connected to your cold water supply, the water pressure to the reverse osmosis system needs to be a minimum of 40 to 60 psi (276 to 414 kPa).

If the water pressure to the reverse osmosis system is less than

40 to 60 psi (276 to 414 kPa):

Check to see whether the sediment filter in the reverse osmosis system is blocked. Replace the filter if necessary.

Allow the storage tank on the reverse osmosis system to refill after heavy usage.

If your refrigerator has a water filter, it may further reduce the water pressure when used in conjunction with a reverse osmosis system. Remove the water filter. See “Water Filtration System.”

If you have questions about your water pressure, call a licensed, qualified plumber.

Connect the Water Supply

Read all directions before you begin.

IMPORTANT: If you turn the refrigerator on before the water line is connected, turn the ice maker OFF.

Connect to Water Line

1.Unplug refrigerator or disconnect power.

2.Turn OFF main water supply. Turn ON nearest faucet long enough to clear line of water.

3.Find a ¹⁄₂" to 1¹⁄₄" (12.7 mm to 31.8 mm) vertical cold water pipe near the refrigerator.

IMPORTANT:

Make sure it is a cold water pipe.

Horizontal pipe will work, but the following procedure must be followed: Drill on the top side of the pipe, not the bottom. This will help keep water away from the drill. This also keeps normal sediment from collecting in the valve.

4.Determine the length of copper tubing you need. Measure from the connection on the rear of the refrigerator to the water pipe. Add 7 ft (2.1 m) to allow for cleaning. Use ¹⁄₄" (6.35 mm) O.D. (outside diameter) copper tubing. Be sure both ends of copper tubing are cut square.

5.Using a cordless drill, drill a ¹⁄₄" hole in the cold water pipe you have selected.


A


B


C


D


E


F


G

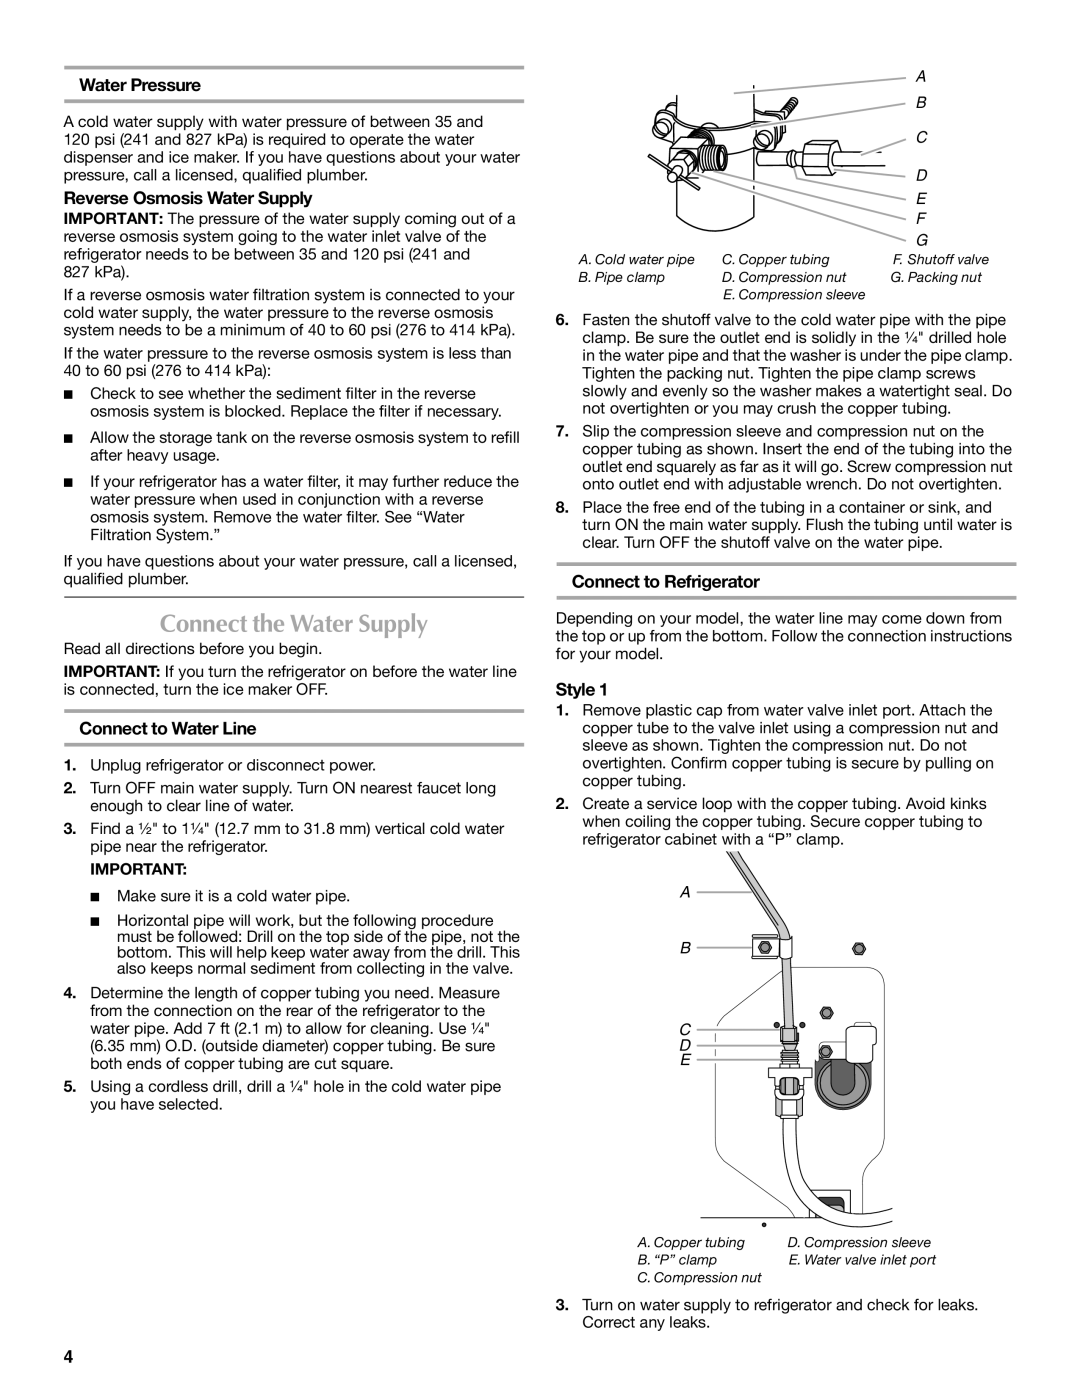
A. Cold water pipe

C. Copper tubing

F. Shutoff valve

B. Pipe clamp

D. Compression nut

G. Packing nut


E. Compression sleeve


6.Fasten the shutoff valve to the cold water pipe with the pipe clamp. Be sure the outlet end is solidly in the ¹⁄₄" drilled hole in the water pipe and that the washer is under the pipe clamp. Tighten the packing nut. Tighten the pipe clamp screws slowly and evenly so the washer makes a watertight seal. Do not overtighten or you may crush the copper tubing.

7.Slip the compression sleeve and compression nut on the copper tubing as shown. Insert the end of the tubing into the outlet end squarely as far as it will go. Screw compression nut onto outlet end with adjustable wrench. Do not overtighten.

8.Place the free end of the tubing in a container or sink, and turn ON the main water supply. Flush the tubing until water is clear. Turn OFF the shutoff valve on the water pipe.

Connect to Refrigerator

Depending on your model, the water line may come down from the top or up from the bottom. Follow the connection instructions for your model.

Style 1

1.Remove plastic cap from water valve inlet port. Attach the copper tube to the valve inlet using a compression nut and sleeve as shown. Tighten the compression nut. Do not overtighten. Confirm copper tubing is secure by pulling on copper tubing.

2.Create a service loop with the copper tubing. Avoid kinks when coiling the copper tubing. Secure copper tubing to refrigerator cabinet with a “P” clamp.

A

B

C

D

E

A. Copper tubing

D. Compression sleeve

B. “P” clamp

E. Water valve inlet port

C. Compression nut


3. Turn on water supply to refrigerator and check for leaks. Correct any leaks.

4

Page 4
Image 4
Maytag W10297791 manual Connect the Water Supply

W10297791 specifications

The Maytag W10297791 is a highly regarded appliance part, specifically designed for use in various Maytag washing machines. This part is commonly recognized as a washer door lock assembly, playing a critical role in the functionality of front-loading washers. Its primary responsibility is to ensure that the washing machine door remains securely closed during the wash cycle, preventing any incidents of water leakage and ensuring optimal safety while the machine operates.

One of the notable features of the W10297791 is its durability. Made from high-quality materials, the assembly is built to withstand the rigors of regular use, providing reliability over time. The component is engineered to resist wear and tear, which is essential for maintaining the washing machine's efficiency and longevity.

The installation of the W10297791 is user-friendly, making it an ideal choice for both professional technicians and DIY enthusiasts. Understanding that home maintenance can be daunting, the design allows for straightforward replacement. Many customers have reported success in installing the part without the need for extensive technical knowledge, saving both time and money on repairs.

Another significant characteristic of the W10297791 is its compatibility. This door lock assembly is designed to fit a range of Maytag washer models, ensuring a wide application across various appliances. This versatility not only makes it an essential component for existing Maytag users but also reinforces Maytag's commitment to quality and customer satisfaction.

Moreover, the W10297791 features an advanced locking mechanism that enhances overall safety. By securely locking the door during operation, it minimizes the risk of accidental openings that could lead to spills or injuries. This technology enables users to operate their washing machines with confidence, knowing that the appliance will function safely and effectively.

In conclusion, the Maytag W10297791 washer door lock assembly is an essential component for any Maytag washer, characterized by its durability, user-friendly installation, and broad compatibility. With its advanced locking mechanism, it ensures safety and reliability, making it a valuable addition to any household. Whether you are replacing a broken part or conducting maintenance, the W10297791 promises to deliver excellent performance and peace of mind, keeping your laundry routine efficient and hassle-free.