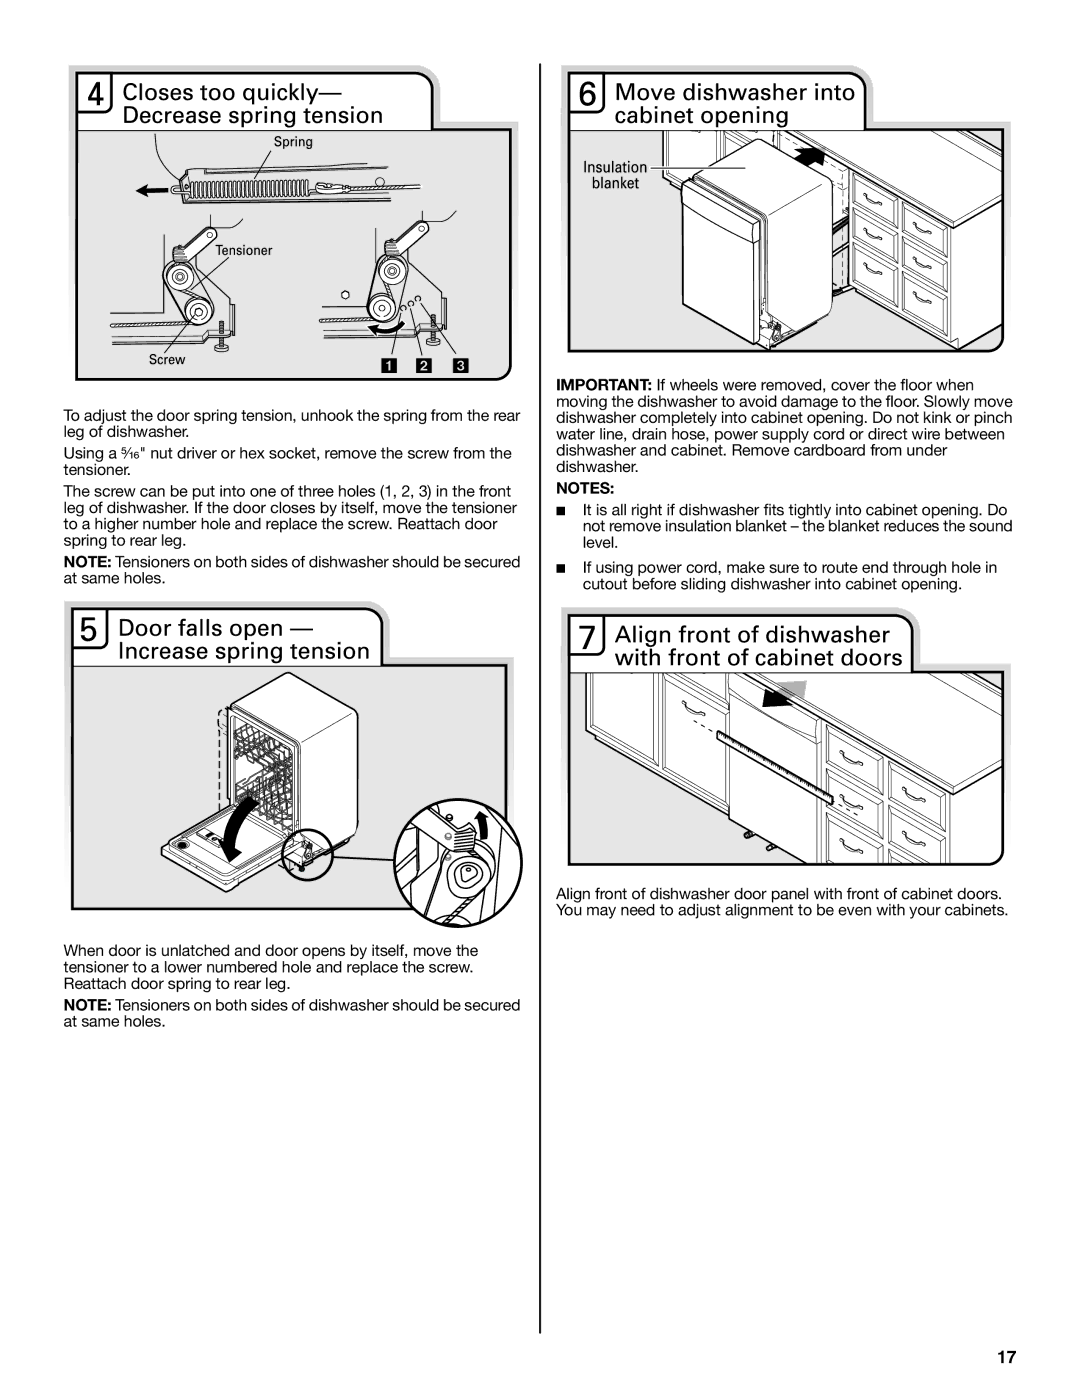
To adjust the door spring tension, unhook the spring from the rear leg of dishwasher.
Using a ⁵⁄₁₆" nut driver or hex socket, remove the screw from the tensioner.
The screw can be put into one of three holes (1, 2, 3) in the front leg of dishwasher. If the door closes by itself, move the tensioner to a higher number hole and replace the screw. Reattach door spring to rear leg.
NOTE: Tensioners on both sides of dishwasher should be secured at same holes.
When door is unlatched and door opens by itself, move the tensioner to a lower numbered hole and replace the screw. Reattach door spring to rear leg.
NOTE: Tensioners on both sides of dishwasher should be secured at same holes.
IMPORTANT: If wheels were removed, cover the floor when moving the dishwasher to avoid damage to the floor. Slowly move dishwasher completely into cabinet opening. Do not kink or pinch water line, drain hose, power supply cord or direct wire between dishwasher and cabinet. Remove cardboard from under dishwasher.
NOTES:
■It is all right if dishwasher fits tightly into cabinet opening. Do not remove insulation blanket – the blanket reduces the sound level.
■If using power cord, make sure to route end through hole in cutout before sliding dishwasher into cabinet opening.
Align front of dishwasher door panel with front of cabinet doors. You may need to adjust alignment to be even with your cabinets.
17