|
|
|
Lighting the Grill Using the Igniter |
| Manual Lighting of the Grill |
|
|
|
·Open Hood before lighting the grill to prevent an explosion from gas
·Always inspect the gas hose and regulator assembly before each use. If the hose is cut, damaged, or shows signs of excessive abrasion or wear, do not use the LP gas grill. Contact the manufacturer, as the hose and regulator assembly must be replaced with an assembly specified by the manufacturer prior to further use of the LP gas grill.
How to light your LP gas grill using the ignitor
1)Open the Hood. Make sure LP Cylinder is connected and Control Knobs are “Off”.
2)If using a 20 lb. LP Cylinder instead of 1 lb LP Cylinder, open the LP gas cylinder valve by turning the valve handle
3)From the “OFF” position, push in and turn the Control Knob counterclockwise to “I” when you feel resistance.
(FIG. 20B)
4)Pause 4 seconds, then push in and turn the Control Knob until a click is heard and the burner is lit. Check through the grill body opening and the Cooking Surface to see if burner is lit. (FIG. 20C)
5)Repeat Step 3 until burner is lit.
6)If burner does not light or ignitor does not work, turn Control Knob to “OFF”. Close the valve on the 20 lb. LP gas cylinder. Remove the Cooking Surfaces to dissipate the gas. Wait five minutes, then repeat Steps 2 thru 4.
7)If burner still fails to light, repeat step 5, wait five minutes and refer to the Troubleshooting page. If it fails to light, the burner can be lit manually, see Manual Lighting of the Grill.
8)After ignition, preheat the Grill and Cooling Surface by turning the Control Knob to “High” for about 8 minutes.
![]() WARNING: If the burner goes out while cooking, turn the Control Knob to the “OFF” position. Wait five minutes before attempting to relight the grill.
WARNING: If the burner goes out while cooking, turn the Control Knob to the “OFF” position. Wait five minutes before attempting to relight the grill.
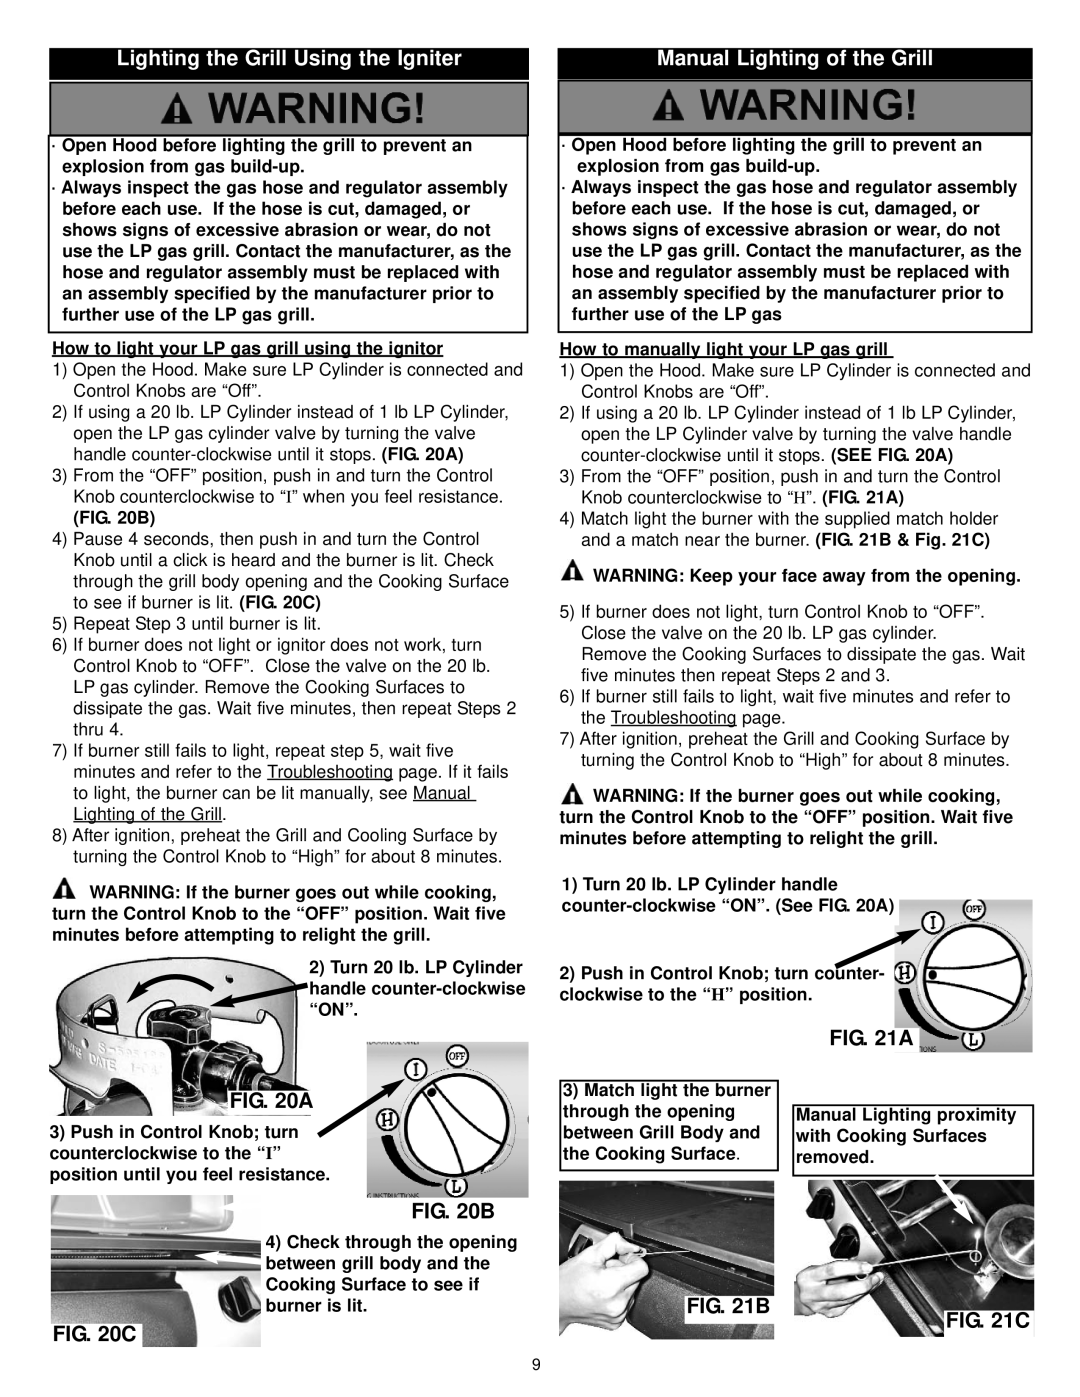
2) Turn 20 lb. LP Cylinder handle
FIG. 20A
3)Push in Control Knob; turn counterclockwise to the “I” position until you feel resistance.
FIG. 20B
·Open Hood before lighting the grill to prevent an explosion from gas
·Always inspect the gas hose and regulator assembly before each use. If the hose is cut, damaged, or shows signs of excessive abrasion or wear, do not use the LP gas grill. Contact the manufacturer, as the hose and regulator assembly must be replaced with an assembly specified by the manufacturer prior to further use of the LP gas
How to manually light your LP gas grill
1)Open the Hood. Make sure LP Cylinder is connected and Control Knobs are “Off”.
2)If using a 20 lb. LP Cylinder instead of 1 lb LP Cylinder, open the LP Cylinder valve by turning the valve handle
3)From the “OFF” position, push in and turn the Control Knob counterclockwise to “H”. (FIG. 21A)
4)Match light the burner with the supplied match holder and a match near the burner. (FIG. 21B & Fig. 21C)
![]() WARNING: Keep your face away from the opening.
WARNING: Keep your face away from the opening.
5)If burner does not light, turn Control Knob to “OFF”. Close the valve on the 20 lb. LP gas cylinder.
Remove the Cooking Surfaces to dissipate the gas. Wait five minutes then repeat Steps 2 and 3.
6)If burner still fails to light, wait five minutes and refer to the Troubleshooting page.
7)After ignition, preheat the Grill and Cooking Surface by turning the Control Knob to “High” for about 8 minutes.
![]() WARNING: If the burner goes out while cooking, turn the Control Knob to the “OFF” position. Wait five minutes before attempting to relight the grill.
WARNING: If the burner goes out while cooking, turn the Control Knob to the “OFF” position. Wait five minutes before attempting to relight the grill.
1)Turn 20 lb. LP Cylinder handle
2)Push in Control Knob; turn counter- clockwise to the “H” position.
|
|
|
|
|
|
|
| FIG. 21A | |
|
|
|
|
|
3) Match light the burner |
|
|
|
|
through the opening |
|
| ||
| Manual Lighting proximity | |||
between Grill Body and |
| with Cooking Surfaces | ||
the Cooking Surface. |
| removed. | ||
|
|
|
|
|
4)Check through the opening between grill body and the Cooking Surface to see if burner is lit.
FIG. 20C
FIG. 21B
FIG. 21C
9