|
|
|
SETUP MENU |
|
|
The Setup menu lets you customize this digital frame by allowing you to | ||
select the source for your media files, set the effects between your photos, | ||
adjust the speed of the Slideshow and more! |
| |
Use the following instructions to navigate and change the options which | ||
are described on the following page. |
|
|
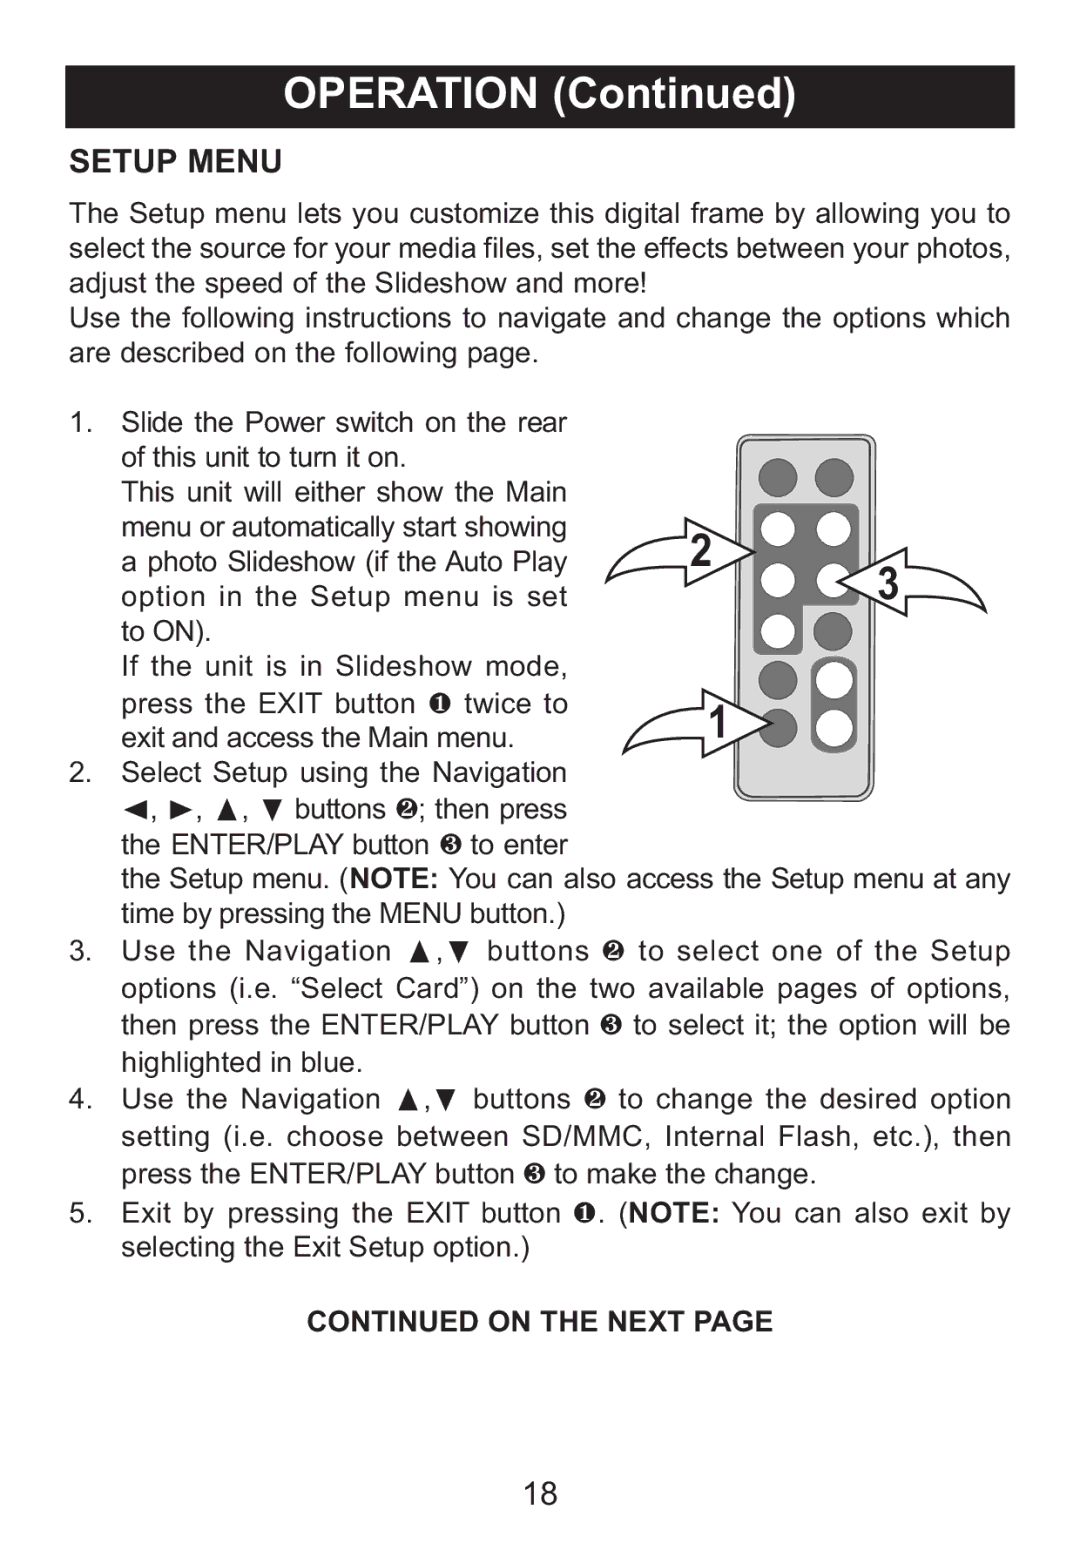
1. Slide the Power switch on the rear |
|
|
of this unit to turn it on. |
|
|
This unit will either show the Main |
|
|
menu or automatically start showing | 2 |
|
a photo Slideshow (if the Auto Play | 3 | |
option in the Setup menu is set |
| |
to ON). |
|
|
If the unit is in Slideshow mode, |
|
|
press the EXIT button 1 twice to | 1 |
|
exit and access the Main menu. |
| |
2. Select Setup using the Navigation |
|
|
√, ®, π, † buttons 2; then press |
|
|
the ENTER/PLAY button 3 to enter |
|
|
the Setup menu. (NOTE: You can also access the Setup menu at any | ||
time by pressing the MENU button.) |
| of the Setup |
3. Use the Navigation π,† buttons 2 to select one | ||
options (i.e. “Select Card”) on the two available pages | of options, | |
then press the ENTER/PLAY button 3 to select it; the option will be | ||
highlighted in blue. |
| desired option |
4. Use the Navigation π,† buttons 2 to change the | ||
setting (i.e. choose between SD/MMC, Internal Flash, | etc.), then | |
press the ENTER/PLAY button 3 to make the change. |
| |
5. Exit by pressing the EXIT button | 1. (NOTE: You can also exit by | |
selecting the Exit Setup option.) |
|
|
CONTINUED ON THE NEXT PAGE
18
