AUDIO / VIDEO JACK CONNECTIONS | (CONTINUED) |
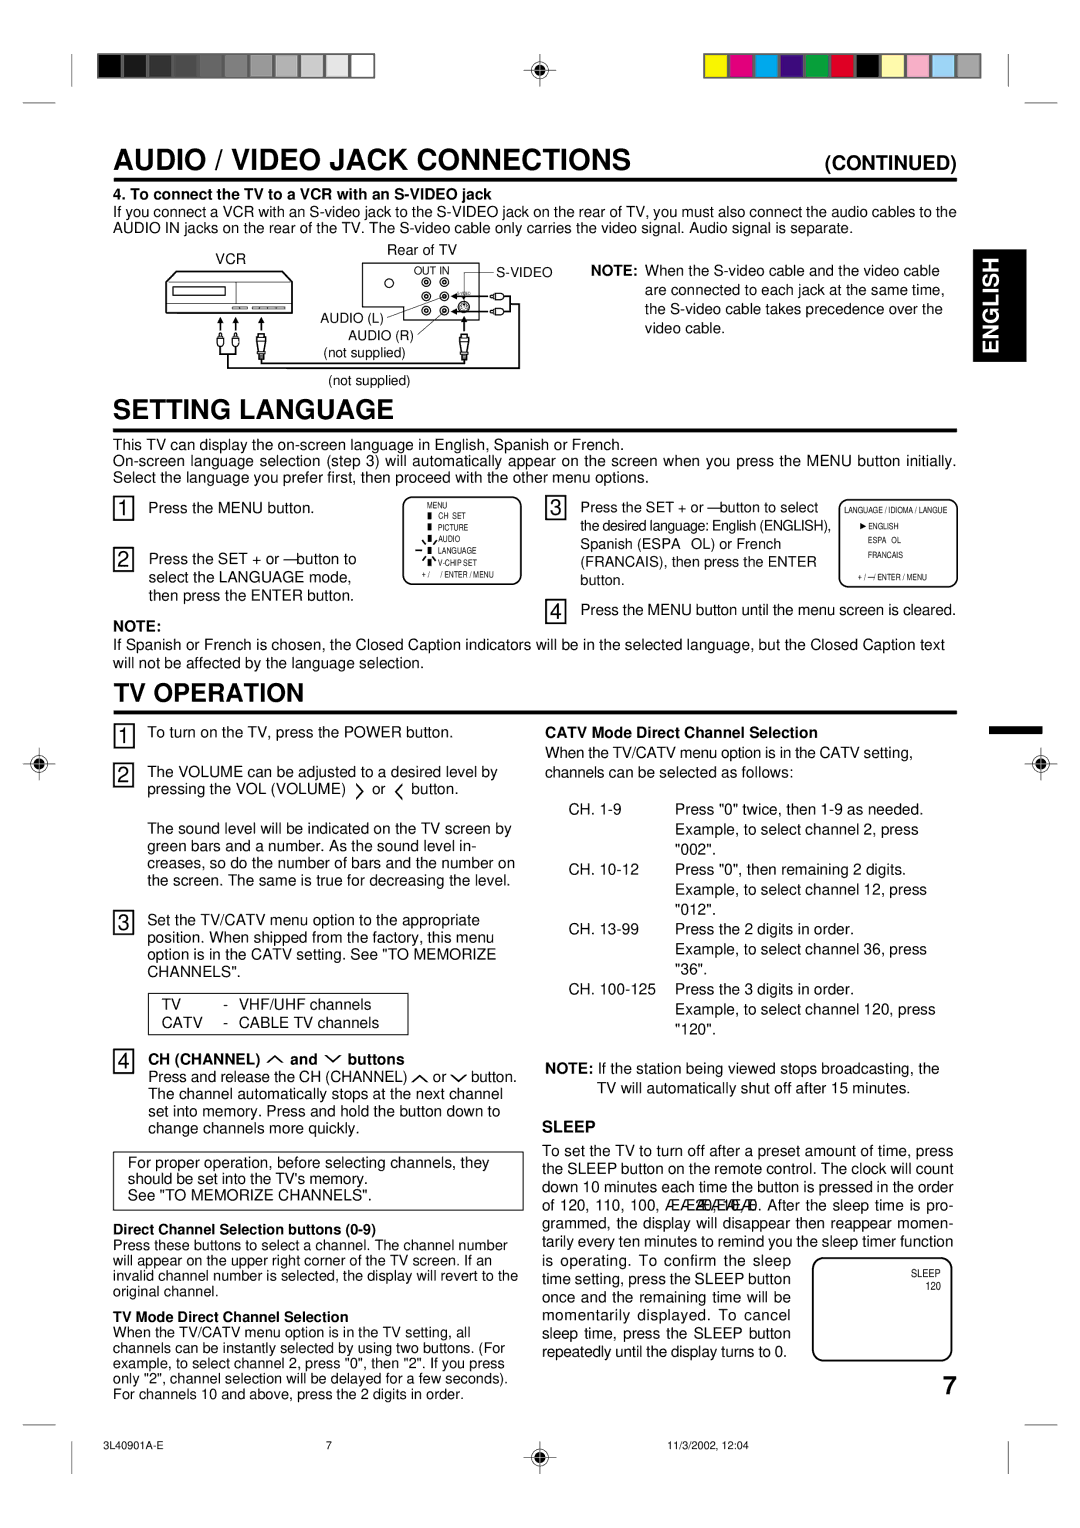
4. To connect the TV to a VCR with an S-VIDEO jack
If you connect a VCR with an
VCR | Rear of TV |
|
| |
OUT IN | NOTE: When the | |||
| ||||
|
| are connected to each jack at the same time, | ||
| AUDIO (L) |
| the | |
|
| video cable. | ||
| AUDIO (R) |
| ||
|
|
| ||
| (not supplied) |
|
|
(not supplied)
SETTING LANGUAGE
This TV can display the
1 | Press the MENU button. |
| CH SET | 3 | Press the SET + or – button to select | LANGUAGE / IDIOMA / LANGUE |
|
| MENU |
|
|
| |
|
|
| PICTURE |
| the desired language: English (ENGLISH), | ENGLISH |
|
|
|
| |||
|
|
|
| |||
|
|
|
| |||
|
|
| AUDIO |
| Spanish (ESPAÑ OL) or French | ESPAÑ OL |
|
|
|
| |||
2 | Press the SET + or – button to |
| LANGUAGE |
| FRANCAIS | |
|
| (FRANCAIS), then press the ENTER | ||||
|
|
| ||||
|
|
| ||||
| select the LANGUAGE mode, | 〈 + / |
| button. | 〈 + / | |
|
|
|
|
| ||
| then press the ENTER button. |
|
|
|
|
|
|
|
|
| 4 | Press the MENU button until the menu screen is cleared. | |
NOTE:
If Spanish or French is chosen, the Closed Caption indicators will be in the selected language, but the Closed Caption text will not be affected by the language selection.
TV OPERATION
ENGLISH
1 | To turn on the TV, press the POWER button. |
2 | The VOLUME can be adjusted to a desired level by |
| pressing the VOL (VOLUME) or button. |
The sound level will be indicated on the TV screen by green bars and a number. As the sound level in- creases, so do the number of bars and the number on the screen. The same is true for decreasing the level.
3 | Set the TV/CATV menu option to the appropriate | ||||
| position. When shipped from the factory, this menu | ||||
| option is in the CATV setting. See "TO MEMORIZE | ||||
| CHANNELS". | ||||
|
|
|
|
|
|
|
| TV | - | VHF/UHF channels |
|
|
| CATV | - | CABLE TV channels |
|
|
|
|
| ||
|
| CH (CHANNEL) and buttons | |||
4 |
| ||||
Press and release the CH (CHANNEL) ![]() or
or ![]() button. The channel automatically stops at the next channel set into memory. Press and hold the button down to change channels more quickly.
button. The channel automatically stops at the next channel set into memory. Press and hold the button down to change channels more quickly.
For proper operation, before selecting channels, they should be set into the TV's memory.
See "TO MEMORIZE CHANNELS".
Direct Channel Selection buttons (0-9)
Press these buttons to select a channel. The channel number will appear on the upper right corner of the TV screen. If an invalid channel number is selected, the display will revert to the original channel.
TV Mode Direct Channel Selection
When the TV/CATV menu option is in the TV setting, all channels can be instantly selected by using two buttons. (For example, to select channel 2, press "0", then "2". If you press only "2", channel selection will be delayed for a few seconds). For channels 10 and above, press the 2 digits in order.
CATV Mode Direct Channel Selection
When the TV/CATV menu option is in the CATV setting, channels can be selected as follows:
CH.
CH.
CH.
Example, to select channel 36, press "36".
CH.
Example, to select channel 120, press "120".
NOTE: If the station being viewed stops broadcasting, the TV will automatically shut off after 15 minutes.
SLEEP
To set the TV to turn off after a preset amount of time, press the SLEEP button on the remote control. The clock will count down 10 minutes each time the button is pressed in theSLEEPorder120 of 120, 110, 100, ······20, 10, 0. After the sleep time is pro- grammed, the display will disappear then reappear momen- tarily every ten minutes to remind you the sleep timer function is operating. To confirm the sleep
time setting, press the SLEEP button once and the remaining time will be momentarily displayed. To cancel sleep time, press the SLEEP button repeatedly until the display turns to 0.
7
7 | 11/3/2002, 12:04 |