PROPELLER INSTALLATION INSTRUCTIONS
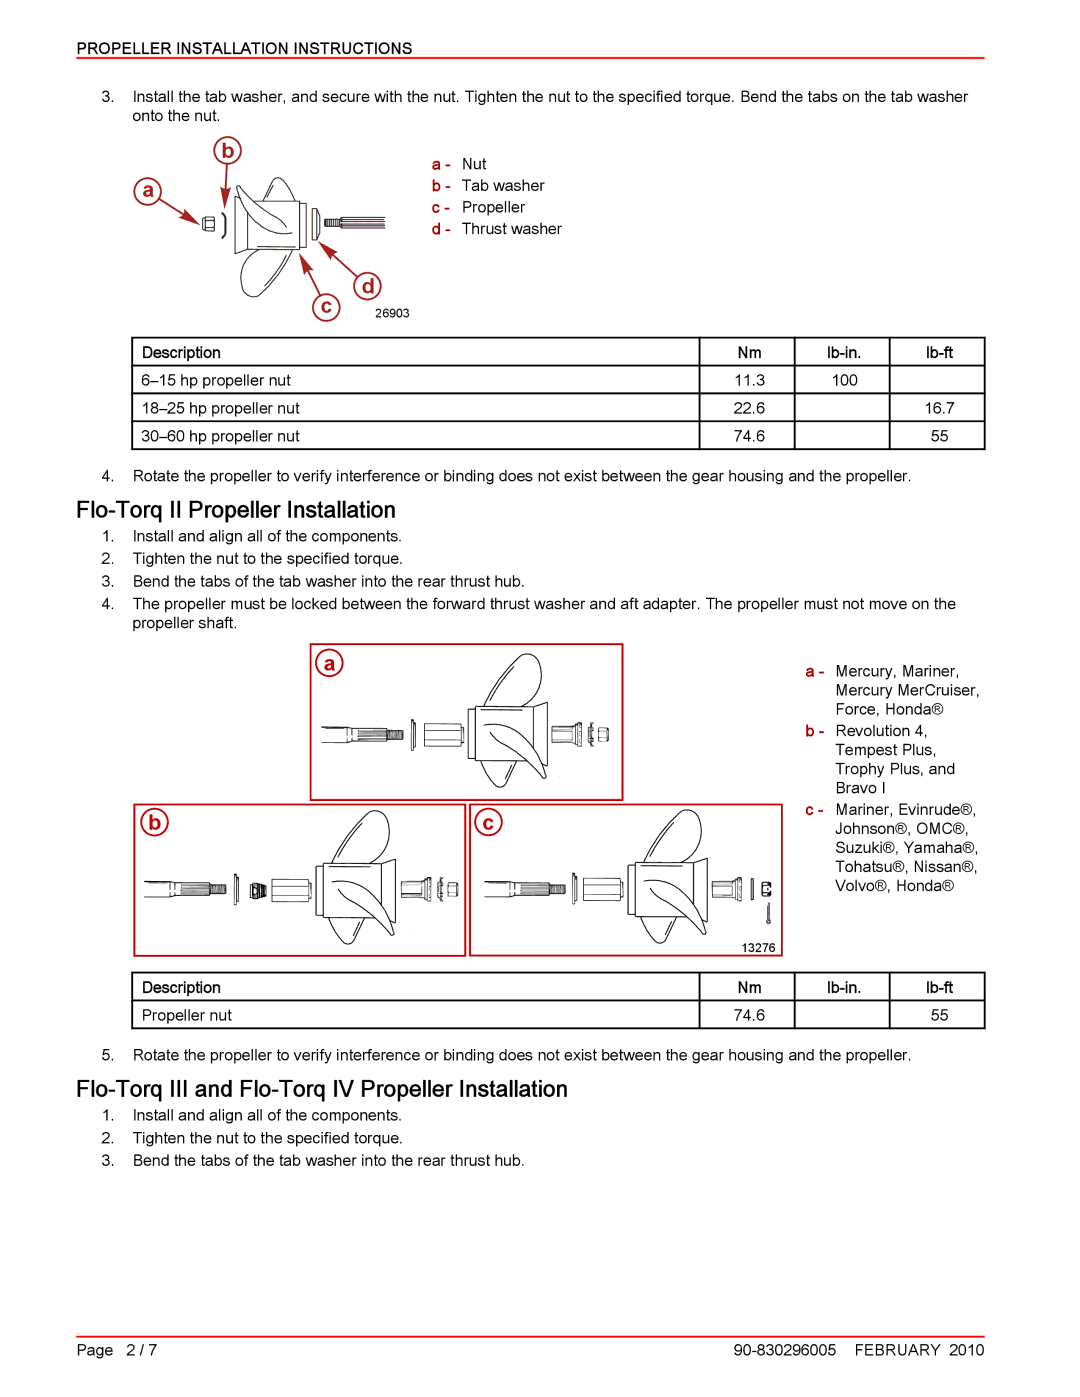
3.Install the tab washer, and secure with the nut. Tighten the nut to the specified torque. Bend the tabs on the tab washer onto the nut.
| b | a - | Nut |
|
| ||
a |
| b - | Tab washer |
|
| c - | Propeller |
|
| d - | Thrust washer |
d
c26903
Description
Nm
11.3
22.6
74.6
lb‑in.
100
lb‑ft
16.7
55
4.Rotate the propeller to verify interference or binding does not exist between the gear housing and the propeller.
Flo‑Torq II Propeller Installation
1.Install and align all of the components.
2.Tighten the nut to the specified torque.
3.Bend the tabs of the tab washer into the rear thrust hub.
4.The propeller must be locked between the forward thrust washer and aft adapter. The propeller must not move on the propeller shaft.
a
b
c
a - Mercury, Mariner,
Mercury MerCruiser,
Force, Honda®
b - Revolution 4,
Tempest Plus,
Trophy Plus, and
Bravo I
c - Mariner, Evinrude®,
Johnson®, OMC®,
Suzuki®, Yamaha®,
Tohatsu®, Nissan®,
Volvo®, Honda®
13276
Description
Propeller nut
Nm
74.6
lb‑in.
lb‑ft
55
5.Rotate the propeller to verify interference or binding does not exist between the gear housing and the propeller.
Flo‑Torq III and Flo‑Torq IV Propeller Installation
1.Install and align all of the components.
2.Tighten the nut to the specified torque.
3.Bend the tabs of the tab washer into the rear thrust hub.
Page 2 / 7 |