2. Installation
2.5Connections with a FlexPDU (Power Distribution Unit) module (optional)
|
| 8 |
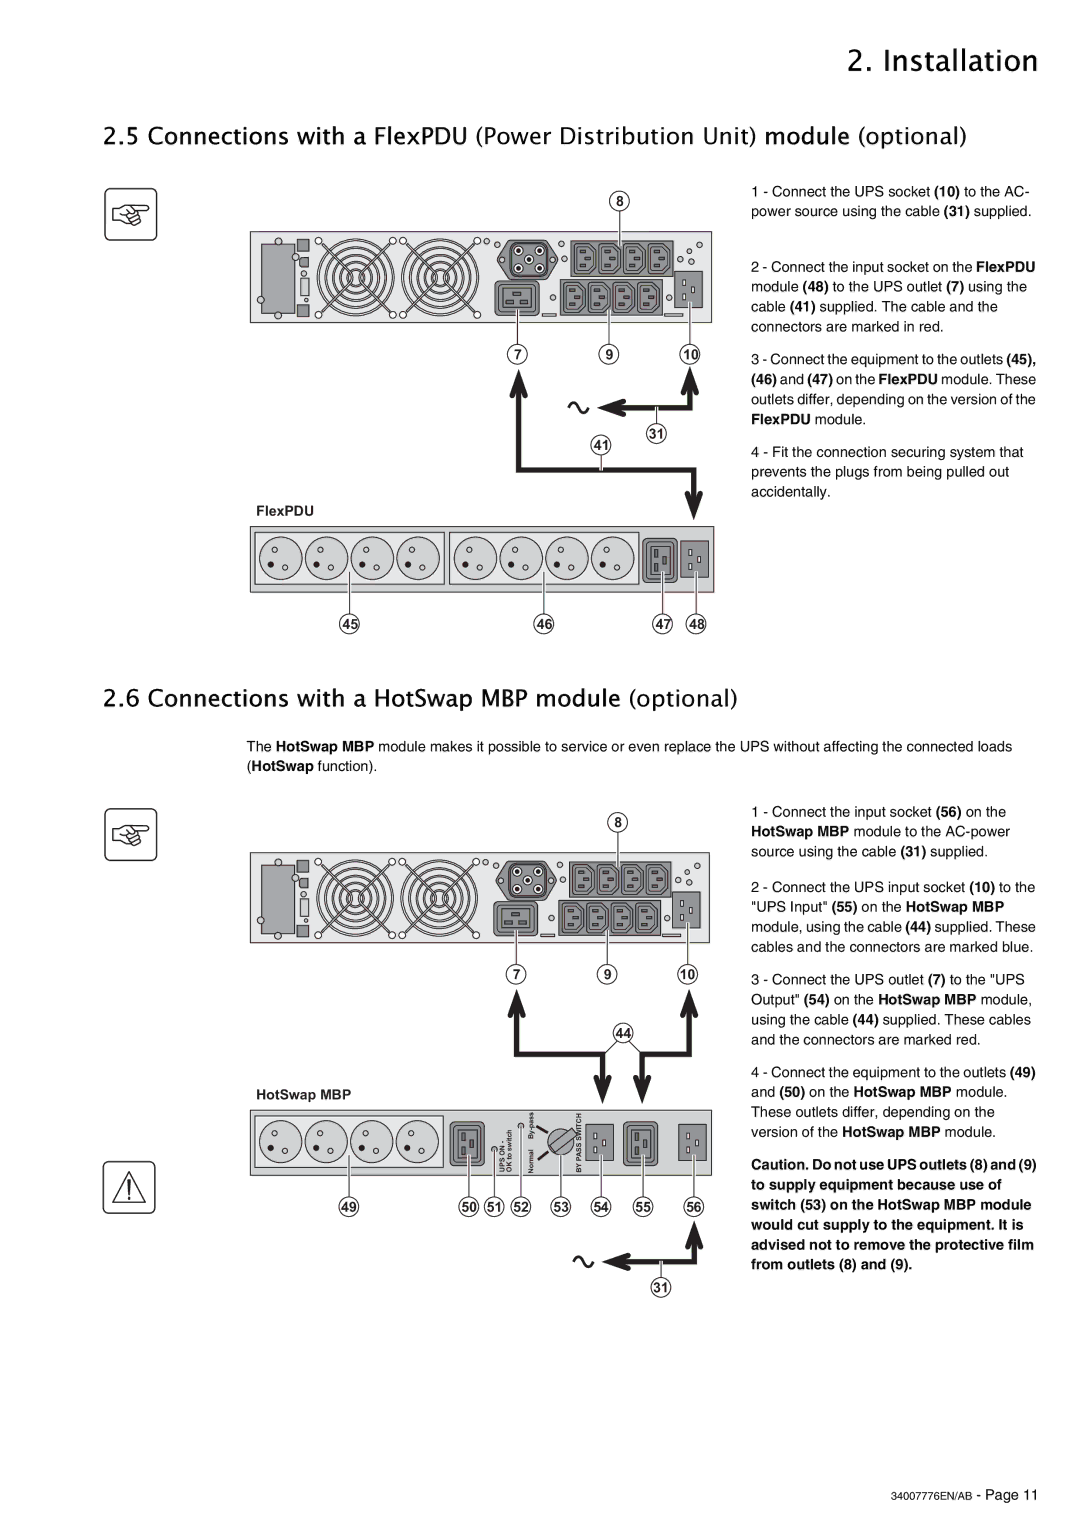
| 1 - Connect the UPS socket (10) to the AC- |
|
|
| power source using the cable (31) supplied. | |
|
|
|
| |
|
|
|
| 2 - Connect the input socket on the FlexPDU |
|
|
|
| module (48) to the UPS outlet (7) using the |
|
|
|
| cable (41) supplied. The cable and the |
|
|
|
| connectors are marked in red. |
7 | 9 |
| 10 | 3 - Connect the equipment to the outlets (45), |
|
|
|
| |
|
|
|
| (46) and (47) on the FlexPDU module. These |
|
|
|
| outlets differ, depending on the version of the |
|
|
| 31 | FlexPDU module. |
| 41 |
|
| |
|
|
| 4 - Fit the connection securing system that | |
|
|
|
| |
|
|
|
| prevents the plugs from being pulled out |
|
|
|
| accidentally. |
FlexPDU
45 | 46 | 47 | 48 |
2.6 Connections with a HotSwap MBP module (optional)
The HotSwap MBP module makes it possible to service or even replace the UPS without affecting the connected loads (HotSwap function).
8
7 | 9 | 10 |
44
HotSwap MBP
UPS ON - OK to switch | Normal | BY PASS SWITCH |
49 | 50 | 51 | 52 | 53 | 54 | 55 | 56 |
31
1 - Connect the input socket (56) on the HotSwap MBP module to the
2 - Connect the UPS input socket (10) to the "UPS Input" (55) on the HotSwap MBP module, using the cable (44) supplied. These cables and the connectors are marked blue.
3 - Connect the UPS outlet (7) to the "UPS Output" (54) on the HotSwap MBP module, using the cable (44) supplied. These cables and the connectors are marked red.
4 - Connect the equipment to the outlets (49) and (50) on the HotSwap MBP module. These outlets differ, depending on the version of the HotSwap MBP module.
Caution. Do not use UPS outlets (8) and (9) to supply equipment because use of switch (53) on the HotSwap MBP module would cut supply to the equipment. It is advised not to remove the protective film from outlets (8) and (9).