MAXON
REMOVING & REPLACING THE MAIN BOARD
To remove the Main Board:
1.Remove the Battery (Refer to Removing & Replac- ing the Battery).
2.Remove the PTT Assembly (Refer to Removing & Replacing the PTT Assembly).
3.Remove the Dust Cap (Refer to Removing & Replacing the Dust Cap).
4.Remove the Antenna & Control Knobs (Refer to Removing & Replacing the Antenna & Control Knobs).
![]()
![]() 7
7
6 ![]()
![]()
![]()
![]()
![]()
5.Remove the Back Cover (Refer to Removing & Replacing the Back Cover).
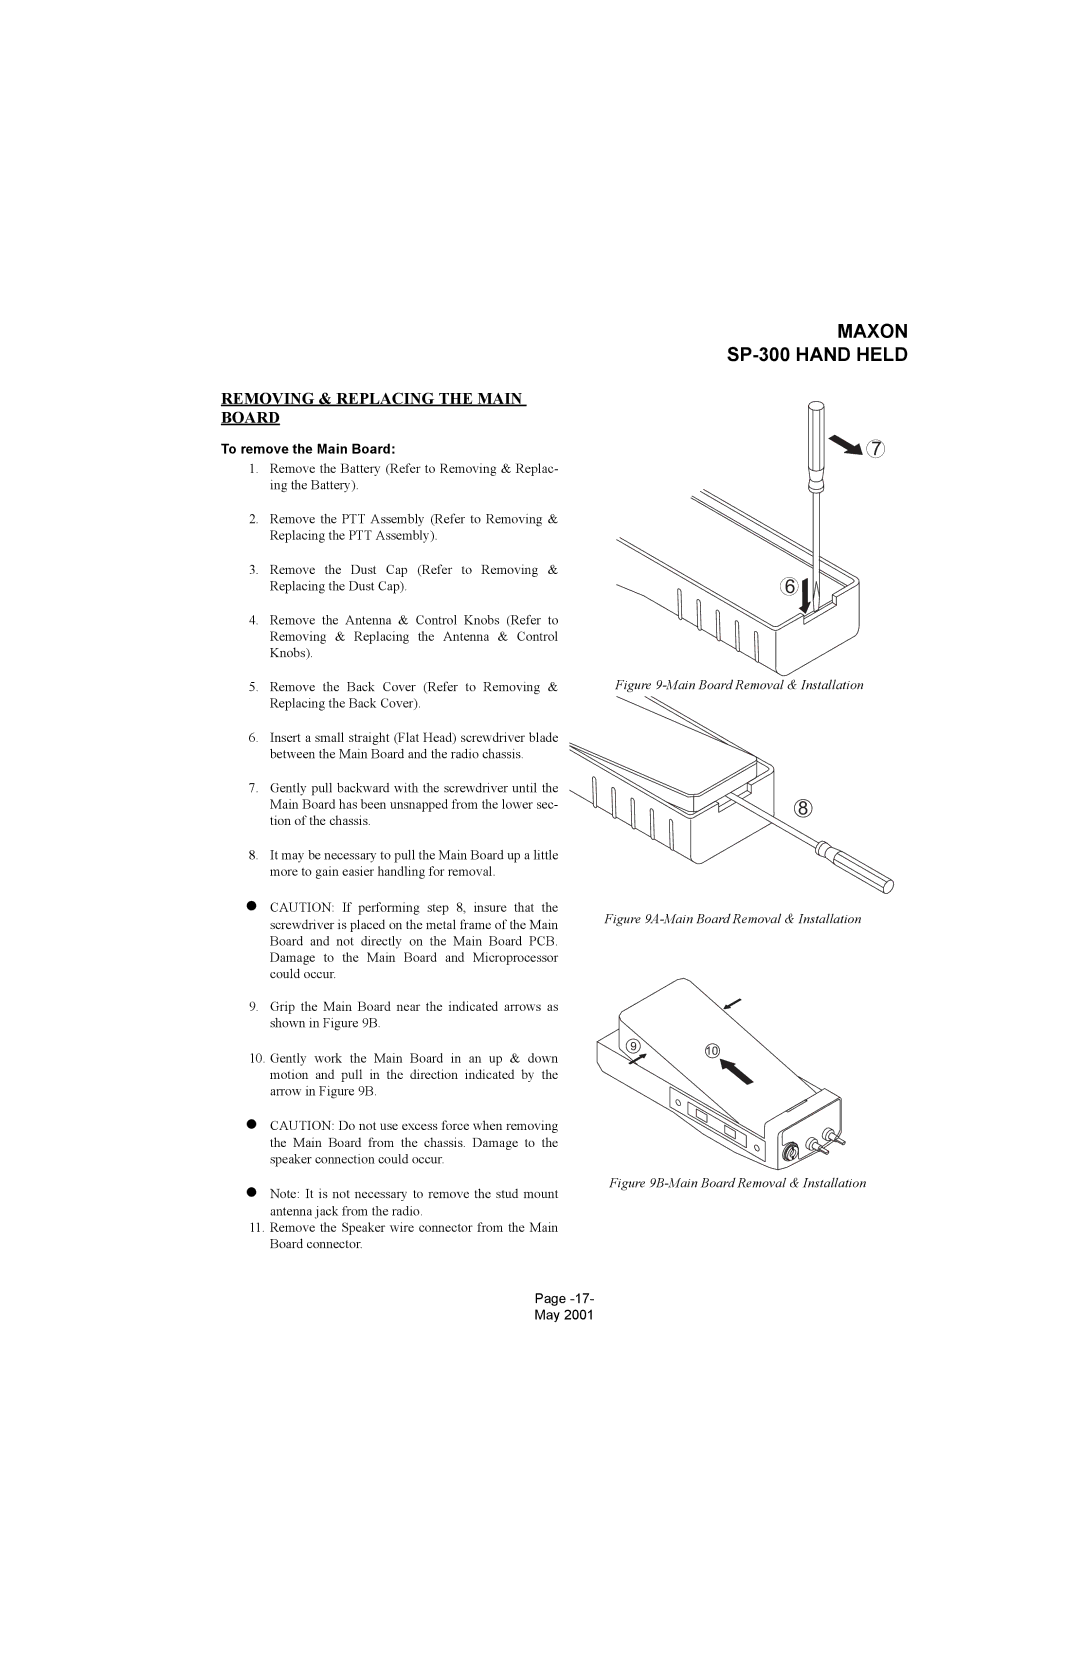
6.Insert a small straight (Flat Head) screwdriver blade between the Main Board and the radio chassis.
7.Gently pull backward with the screwdriver until the
Main Board has been unsnapped from the lower sec- tion of the chassis.
8.It may be necessary to pull the Main Board up a little more to gain easier handling for removal.
zCAUTION: If performing step 8, insure that the screwdriver is placed on the metal frame of the Main Board and not directly on the Main Board PCB. Damage to the Main Board and Microprocessor could occur.
9.Grip the Main Board near the indicated arrows as shown in Figure 9B.
10. Gently work the Main Board in an up & down motion and pull in the direction indicated by the arrow in Figure 9B.
zCAUTION: Do not use excess force when removing the Main Board from the chassis. Damage to the speaker connection could occur.
zNote: It is not necessary to remove the stud mount antenna jack from the radio.
11.Remove the Speaker wire connector from the Main Board connector.
Page
May 2001
Figure 9-Main Board Removal & Installation
8
Figure 9A-Main Board Removal & Installation
910
