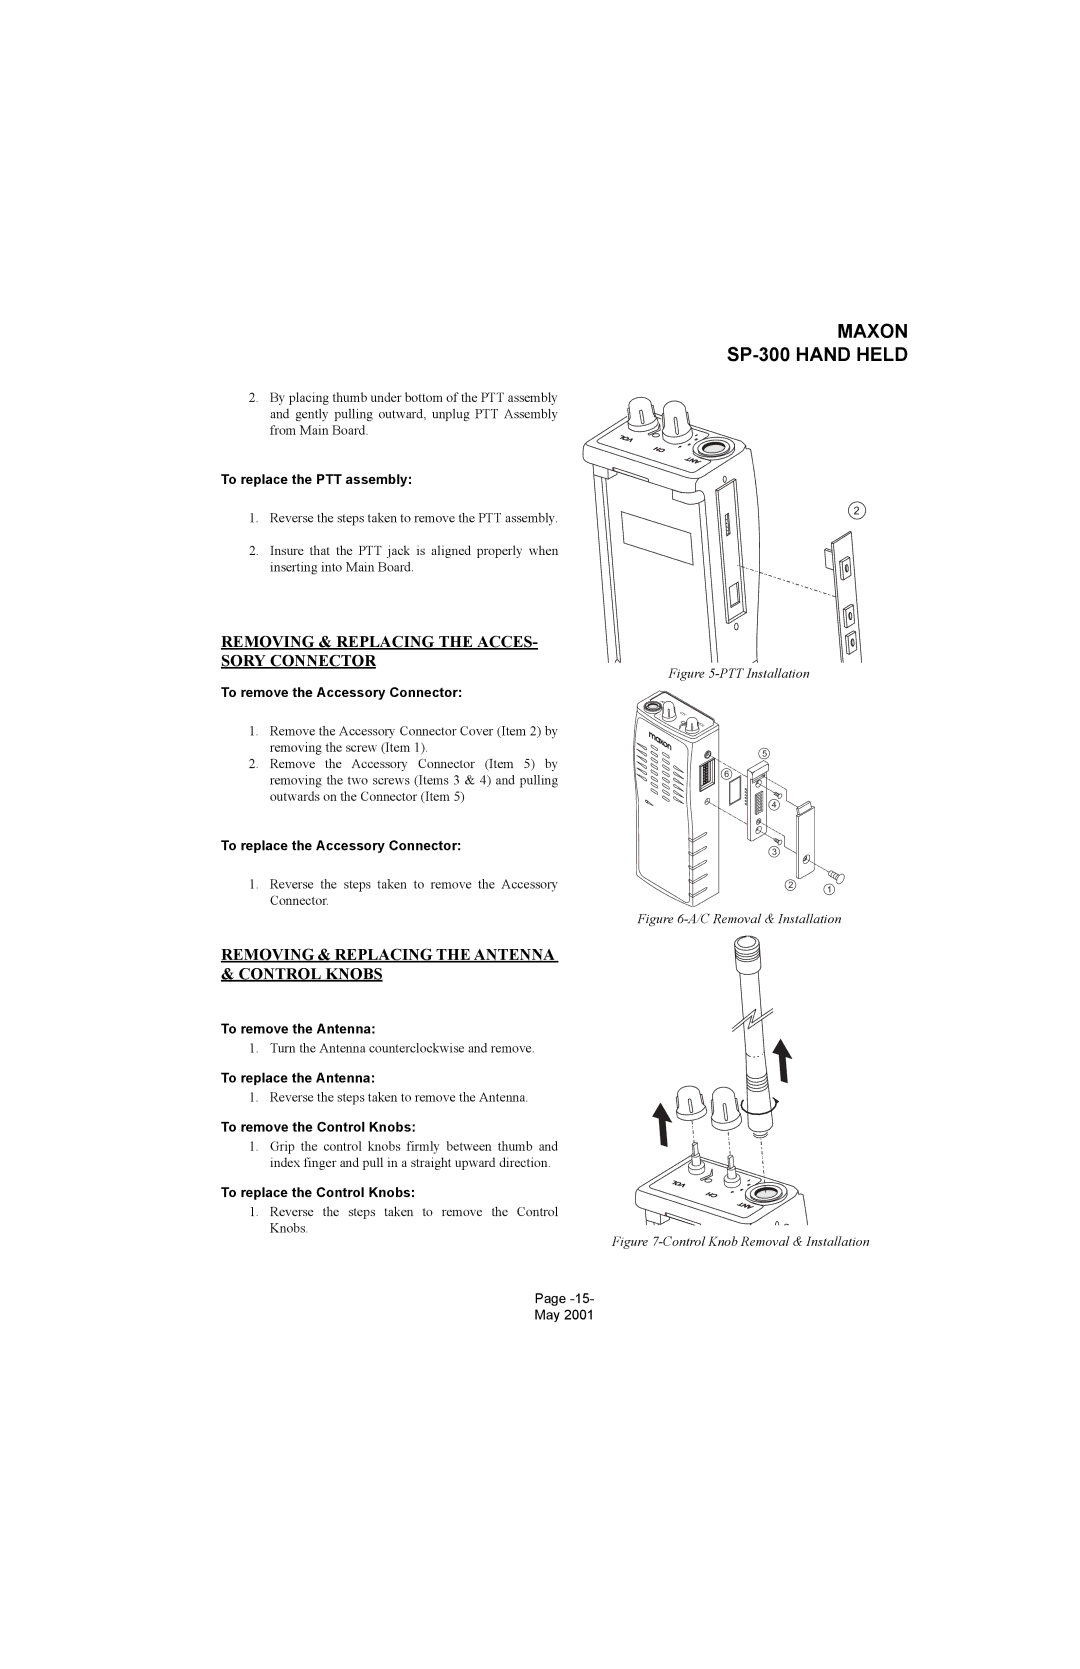
2.By placing thumb under bottom of the PTT assembly and gently pulling outward, unplug PTT Assembly from Main Board.
To replace the PTT assembly:
1.Reverse the steps taken to remove the PTT assembly.
2.Insure that the PTT jack is aligned properly when inserting into Main Board.
REMOVING & REPLACING THE ACCES- SORY CONNECTOR
To remove the Accessory Connector:
MAXON
VOL |
| 1 |
| 2 | |
|
| 3 |
| CH | 4 |
|
| |
|
| ANT |
2
Figure 5-PTT Installation
1. Remove the Accessory Connector Cover (Item 2) by |
removing the screw (Item 1). |
![]()
![]()
![]() Al
Al![]()
2 1
CH
V
![]() OL
OL
2. Remove the Accessory Connector (Item 5) by |
removing the two screws (Items 3 & 4) and pulling |
outwards on the Connector (Item 5) |
To replace the Accessory Connector:
1.Reverse the steps taken to remove the Accessory Connector.
![]() 5
5 ![]()
![]() 6
6 ![]()
![]() 4
4 ![]()
![]() 3
3 ![]()
![]() 2
2![]()
![]() 1
1![]()
Figure 6-A/C Removal & Installation
REMOVING & REPLACING THE ANTENNA & CONTROL KNOBS
To remove the Antenna:
1. Turn the Antenna counterclockwise and remove.
To replace the Antenna:
1. Reverse the steps taken to remove the Antenna.
To remove the Control Knobs:
1.Grip the control knobs firmly between thumb and index finger and pull in a straight upward direction.
To replace the Control Knobs:
1.Reverse the steps taken to remove the Control Knobs.
Page
May 2001
VOL |
| 1 |
| 2 | |
|
| 3 |
|
| 4 |
| H |
|
| C |
|
|
| ANT |
