SERVICING AND REPAIRS
Use only genuine Miele replacement parts.
DISCONNECT THE CLEANER FROM THE ELECTRICAL SUPPLY
If you have any questions, contact your local dealer / service agent.
Any service needed other than that described in these Operating Instructions should be performed by a Miele Service Center, only.
To replace any of the following parts, place the vacuum cleaner in the horizontal position by using the pedal. Then turn it over exposing the underside.
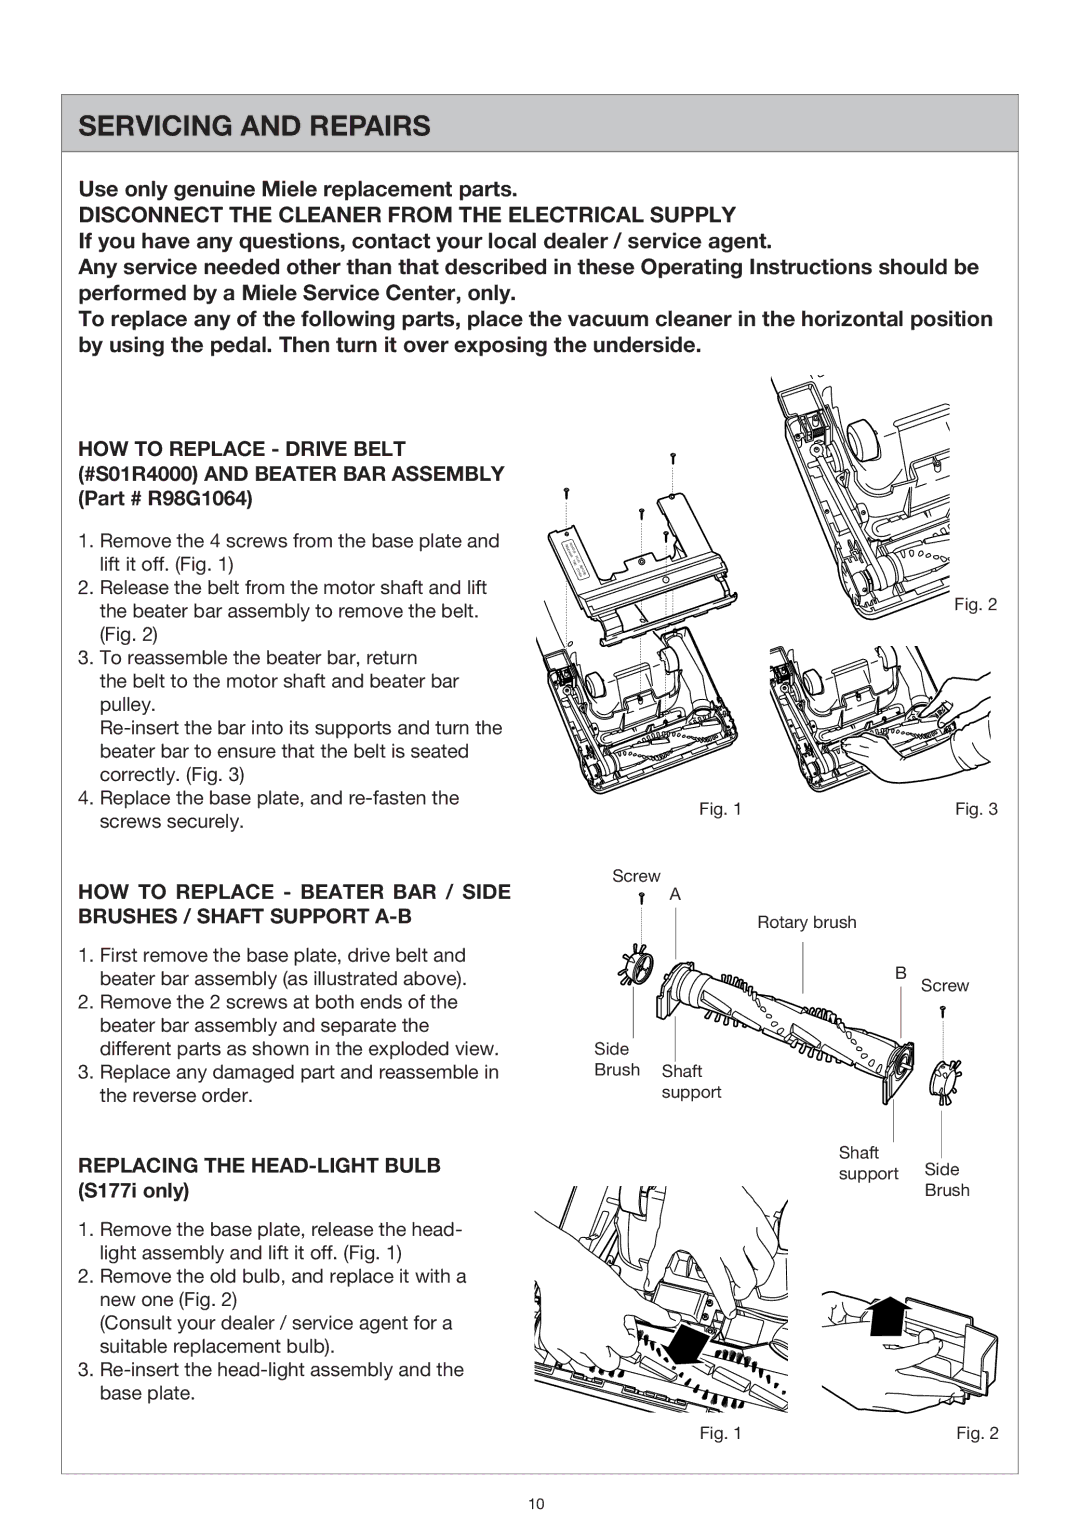
HOW TO REPLACE - DRIVE BELT (#S01R4000) AND BEATER BAR ASSEMBLY (Part # R98G1064)
1.Remove the 4 screws from the base plate and lift it off. (Fig. 1)
2.Release the belt from the motor shaft and lift the beater bar assembly to remove the belt. (Fig. 2)
3.To reassemble the beater bar, return
the belt to the motor shaft and beater bar pulley.
4.Replace the base plate, and
R
R
E
E
M
M
O
O
V
VE
IN
G
P
L
U
T
G
H
IS
B
E
C F
O
O
VR
E E
R
Fig. 2
Fig. 1 |
| Fig. 3 |
HOW TO REPLACE - BEATER BAR / SIDE BRUSHES / SHAFT SUPPORT
1.First remove the base plate, drive belt and beater bar assembly (as illustrated above).
2.Remove the 2 screws at both ends of the beater bar assembly and separate the different parts as shown in the exploded view.
3.Replace any damaged part and reassemble in the reverse order.
Screw
A
Rotary brush
B
Side
Brush Shaft
support
Shaft
Screw
REPLACING THE HEAD-LIGHT BULB (S177i only)
1.Remove the base plate, release the head- light assembly and lift it off. (Fig. 1)
2.Remove the old bulb, and replace it with a new one (Fig. 2)
(Consult your dealer / service agent for a suitable replacement bulb).
3.
support Side Brush
Fig. 1 | Fig. 2 |
10