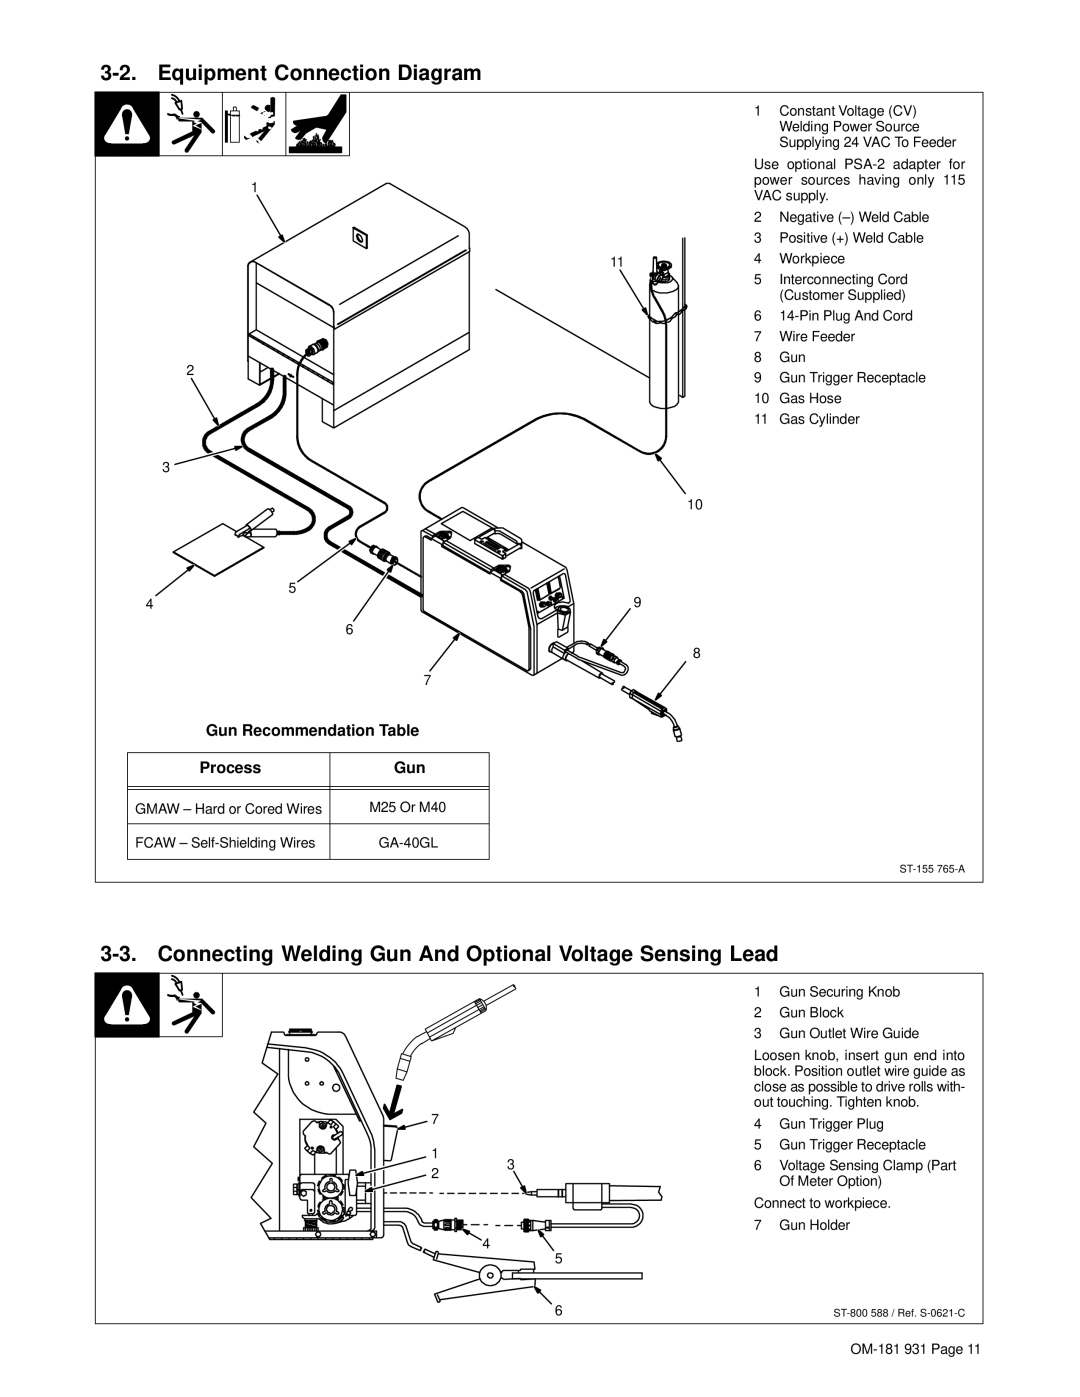
3-2. Equipment Connection Diagram
1
2
3
5
4
6
7
Gun Recommendation Table
Process | Gun |
|
|
|
|
GMAW – Hard or Cored Wires | M25 Or M40 |
|
|
FCAW – | |
|
|
11
10
9
8
1Constant Voltage (CV) Welding Power Source Supplying 24 VAC To Feeder
Use optional
2Negative
3Positive (+) Weld Cable
4Workpiece
5Interconnecting Cord (Customer Supplied)
6
7Wire Feeder
8Gun
9Gun Trigger Receptacle
10Gas Hose
11Gas Cylinder
3-3. Connecting Welding Gun And Optional Voltage Sensing Lead
7
1
2
3
1Gun Securing Knob
2Gun Block
3Gun Outlet Wire Guide
Loosen knob, insert gun end into block. Position outlet wire guide as close as possible to drive rolls with- out touching. Tighten knob.
4Gun Trigger Plug
5Gun Trigger Receptacle
6Voltage Sensing Clamp (Part Of Meter Option)
Connect to workpiece.
7 Gun Holder
4
5
6 |
