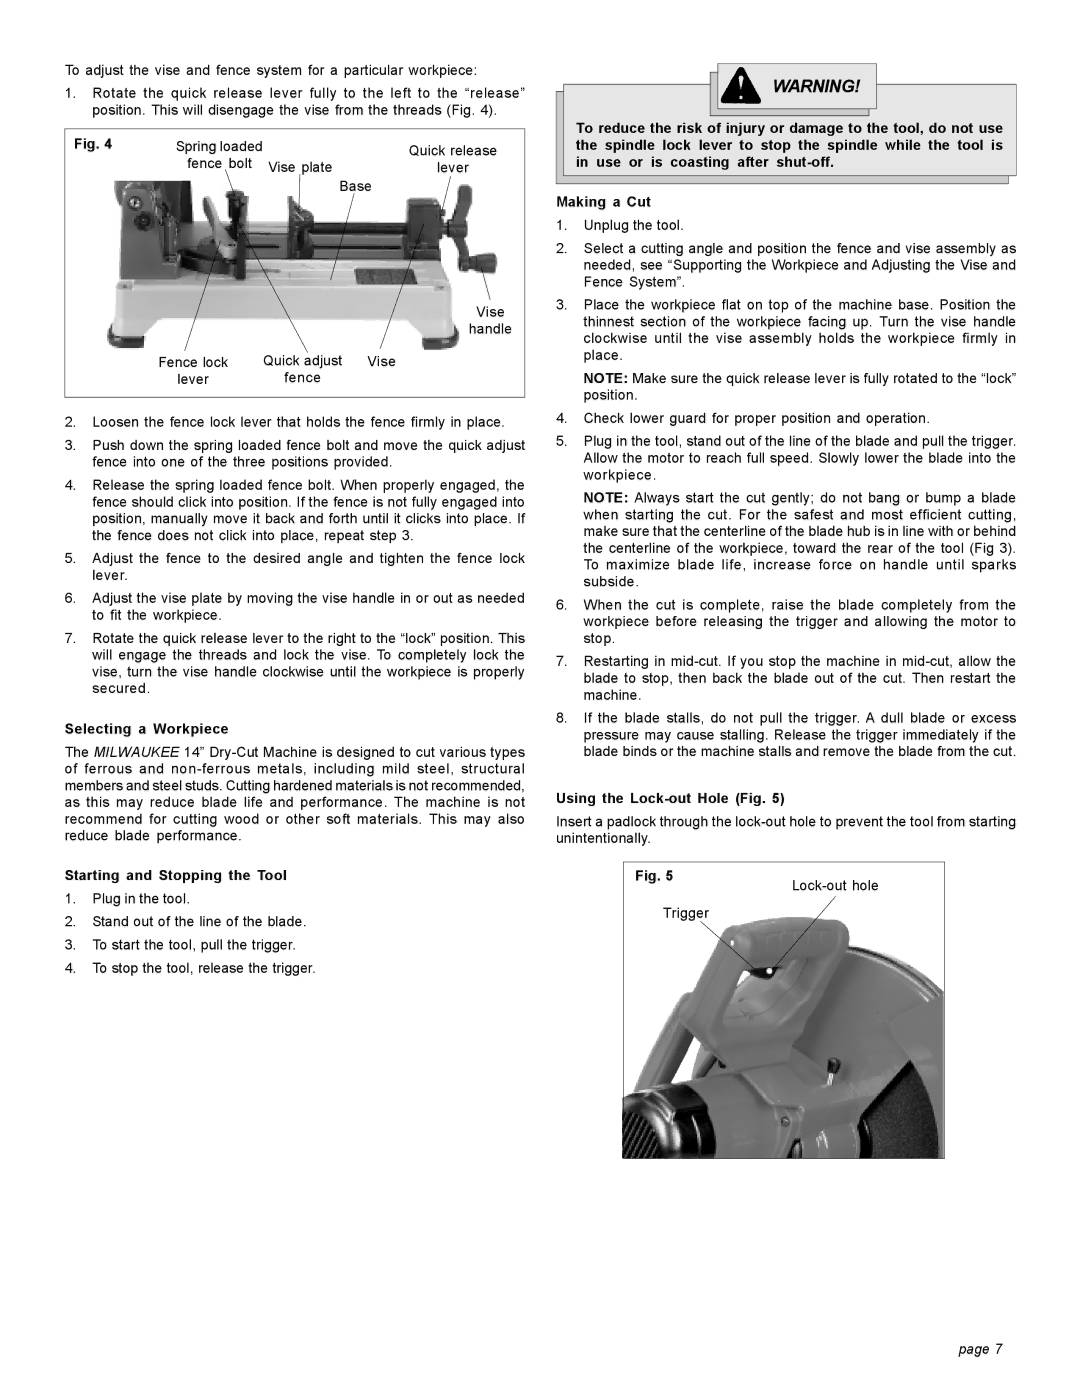
To adjust the vise and fence system for a particular workpiece:
1.Rotate the quick release lever fully to the left to the “release” position. This will disengage the vise from the threads (Fig. 4).
Fig. 4 | Spring loaded | Quick release |
| fence bolt Vise plate | lever |
|
| Base |
Vise
handle
Fence lock | Quick adjust | Vise |
lever | fence |
|
2.Loosen the fence lock lever that holds the fence firmly in place.
3.Push down the spring loaded fence bolt and move the quick adjust fence into one of the three positions provided.
4.Release the spring loaded fence bolt. When properly engaged, the fence should click into position. If the fence is not fully engaged into position, manually move it back and forth until it clicks into place. If the fence does not click into place, repeat step 3.
5.Adjust the fence to the desired angle and tighten the fence lock lever.
6.Adjust the vise plate by moving the vise handle in or out as needed to fit the workpiece.
7.Rotate the quick release lever to the right to the “lock” position. This will engage the threads and lock the vise. To completely lock the vise, turn the vise handle clockwise until the workpiece is properly secured.
Selecting a Workpiece
The MILWAUKEE 14”
Starting and Stopping the Tool
1.Plug in the tool.
2.Stand out of the line of the blade.
3.To start the tool, pull the trigger.
4.To stop the tool, release the trigger.
WARNING!
To reduce the risk of injury or damage to the tool, do not use the spindle lock lever to stop the spindle while the tool is in use or is coasting after
Making a Cut
1.Unplug the tool.
2.Select a cutting angle and position the fence and vise assembly as needed, see “Supporting the Workpiece and Adjusting the Vise and Fence System”.
3.Place the workpiece flat on top of the machine base. Position the thinnest section of the workpiece facing up. Turn the vise handle clockwise until the vise assembly holds the workpiece firmly in place.
NOTE: Make sure the quick release lever is fully rotated to the “lock” position.
4.Check lower guard for proper position and operation.
5.Plug in the tool, stand out of the line of the blade and pull the trigger. Allow the motor to reach full speed. Slowly lower the blade into the workpiece.
NOTE: Always start the cut gently; do not bang or bump a blade when starting the cut. For the safest and most efficient cutting, make sure that the centerline of the blade hub is in line with or behind the centerline of the workpiece, toward the rear of the tool (Fig 3). To maximize blade life, increase force on handle until sparks subside.
6.When the cut is complete, raise the blade completely from the workpiece before releasing the trigger and allowing the motor to stop.
7.Restarting in
8.If the blade stalls, do not pull the trigger. A dull blade or excess pressure may cause stalling. Release the trigger immediately if the blade binds or the machine stalls and remove the blade from the cut.
Using the Lock-out Hole (Fig. 5)
Insert a padlock through the
Fig. 5 | |
| |
Trigger |
|
page 7