2. To decrease the driving depth, simply

rotate the locator in the direction

labeled .

For Cat. No. 6780-20 (Fig. 10)

The 6780-20 Screwdriver has a torque setting adjustment collar that may be

APPLICATIONS

The detents “lock” the locator in place,

ensuring an accurate depth setting.

3. To remove the locator assembly, turn

the ramp-off sleeve while pulling it

away from the tool. Reattaching the

locator assembly will not change the

depth setting.

Adjusting Torque Setting

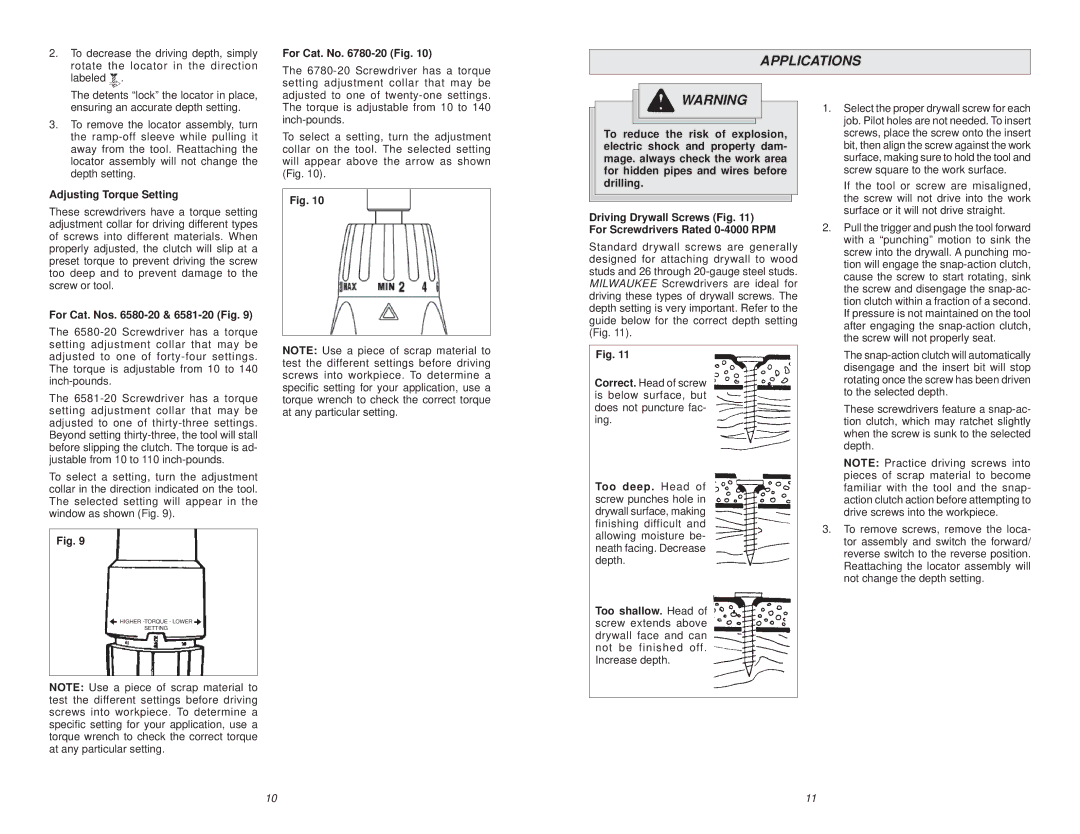
These screwdrivers have a torque setting adjustment collar for driving different types of screws into different materials. When properly adjusted, the clutch will slip at a preset torque to prevent driving the screw too deep and to prevent damage to the screw or tool.

For Cat. Nos. 6580-20 & 6581-20 (Fig. 9)

The 6580-20 Screwdriver has a torque setting adjustment collar that may be adjusted to one of forty-four settings. The torque is adjustable from 10 to 140 inch-pounds.

The 6581-20 Screwdriver has a torque setting adjustment collar that may be adjusted to one of thirty-three settings. Beyond setting thirty-three, the tool will stall before slipping the clutch. The torque is ad- justable from 10 to 110 inch-pounds.

To select a setting, turn the adjustment collar in the direction indicated on the tool. The selected setting will appear in the window as shown (Fig. 9).

Fig. 9

HIGHER -TORQUE - LOWER

SETTING

adjusted to one of twenty-one settings. The torque is adjustable from 10 to 140 inch-pounds.

To select a setting, turn the adjustment collar on the tool. The selected setting will appear above the arrow as shown (Fig. 10).

Fig. 10

NOTE: Use a piece of scrap material to test the different settings before driving screws into workpiece. To determine a specific setting for your application, use a torque wrench to check the correct torque at any particular setting.

WARNING

To reduce the risk of explosion, electric shock and property dam- mage. always check the work area for hidden pipes and wires before drilling.

Driving Drywall Screws (Fig. 11) For Screwdrivers Rated 0-4000 RPM

Standard drywall screws are generally designed for attaching drywall to wood studs and 26 through 20-gauge steel studs. MILWAUKEE Screwdrivers are ideal for driving these types of drywall screws. The depth setting is very important. Refer to the guide below for the correct depth setting (Fig. 11).

Fig. 11

Correct. Head of screw is below surface, but does not puncture fac- ing.

Too deep. Head of screw punches hole in drywall surface, making finishing difficult and allowing moisture be- neath facing. Decrease depth.

Too shallow. Head of screw extends above drywall face and can not be finished off. Increase depth.

1.Select the proper drywall screw for each job. Pilot holes are not needed. To insert screws, place the screw onto the insert bit, then align the screw against the work surface, making sure to hold the tool and screw square to the work surface.

If the tool or screw are misaligned, the screw will not drive into the work surface or it will not drive straight.

2.Pull the trigger and push the tool forward with a “punching” motion to sink the screw into the drywall. A punching mo- tion will engage the snap-action clutch, cause the screw to start rotating, sink the screw and disengage the snap-ac- tion clutch within a fraction of a second. If pressure is not maintained on the tool after engaging the snap-action clutch, the screw will not properly seat.

The snap-action clutch will automatically disengage and the insert bit will stop rotating once the screw has been driven to the selected depth.

These screwdrivers feature a snap-ac- tion clutch, which may ratchet slightly when the screw is sunk to the selected depth.

NOTE: Practice driving screws into pieces of scrap material to become familiar with the tool and the snap- action clutch action before attempting to drive screws into the workpiece.

3.To remove screws, remove the loca- tor assembly and switch the forward/ reverse switch to the reverse position. Reattaching the locator assembly will not change the depth setting.

NOTE: Use a piece of scrap material to test the different settings before driving screws into workpiece. To determine a specific setting for your application, use a torque wrench to check the correct torque at any particular setting.

10

11

Page 6
Image 6
Milwaukee 6580-20, 6740-20, 6792-20, 6791-21, 6790-20, 6707-20, 6708-21, 6791-20, 6742-20 Applications, Adjusting Torque Setting

6702-20, 6743-20, 6780-20, 6708-20, 6706-20 specifications

Milwaukee is a renowned brand in the power tools industry, recognized for its innovative designs and high-performance products. Among their extensive range, models such as the Milwaukee 6703-20, 6742-20, 6581-20, 6707-20, and 6792-20 stand out for their impressive features and cutting-edge technologies.

The Milwaukee 6703-20 is a heavy-duty, high-performance tool designed for drilling applications. With a powerful motor that delivers consistent torque, it is equipped with an all-metal gear case, ensuring durability and longevity. One of its standout features is the variable speed control, allowing users to adjust the speed for different materials and tasks. The ergonomic design and rubberized grip provide added comfort, making it suitable for extended use.

Next in line, the 6742-20 model showcases Milwaukee's commitment to innovation. This tool includes the REDLINK PLUS intelligence system, which offers advanced digital overload protection and enhances tool performance. Its compact design is perfect for tight spaces, while the high-output motor ensures efficient operation, regardless of the task complexity. The integrated LED light improves visibility in dark areas, enhancing user precision.

The Milwaukee 6581-20 is tailored for heavy-duty cutting applications. This model features a robust motor that can handle various materials, including wood and metal. It incorporates a quick-adjust feature that allows for quick and accurate depth adjustments. The tool’s design includes a built-in rafter hook for convenient storage, along with a durable construction that withstands rigorous job site conditions.

With the 6707-20 model, Milwaukee introduces a tool engineered for user efficiency and convenience. It comes with a powerful battery that supports extended run time, coupled with the REDLITHIUM technology, which enhances overall performance. The tool includes multiple speed settings and a keyless chuck for quick bit changes. This model is designed for versatility, making it an excellent choice for both professional contractors and DIY enthusiasts.

Finally, the Milwaukee 6792-20 is celebrated for its enhanced safety features and user-friendly operation. This tool integrates advanced safety technologies, including overload protection and electronic braking for improved user control. The lightweight design paired with an ergonomic handle ensures ease of use throughout prolonged tasks.

Incorporating a blend of high-performance capabilities, innovative technologies, and user-centric designs, Milwaukee’s 6703-20, 6742-20, 6581-20, 6707-20, and 6792-20 models exemplify the brand's dedication to providing exceptional products that meet the diverse needs of professionals in the power tools market. These tools represent the future of efficiency, reliability, and performance in the industry.