APPLICATIONS
This tool is intended for cutting unhardened ferrous metal and
•Do not cut stacked materials. Cut one piece at a time.
•Do not cut hardened steel.
•Cut materials with the wider edge of the shoe over the clamped side of the material.
•Do not touch the blade, workpiece, chips, or chip container with bare hands immediately after cutting; they may be hot and could burn skin.
Cutting Materials Thicker than 1/4" (3/4" Maximum Thickness)
![]()
![]()
![]() CAUTION!
CAUTION!
To reduce the risk of damage to the tool or blade, do not exceed the Feed Rate and Maximum Cut Time for materials thicker than 1/4", as charted below.
Between Maximum Cut Times, allow the tool to cool down for 6 minutes of running with no load or 60 minutes switched off.
Cutting too fast or too long in heavy material will damage the tool if the tool is not allowed to cool.
Cutting too slow will cause excessive wear on the blade.
When cutting materials over 1/4", certain guidelines must be followed to avoid serious damage to the tool and/or blade. The correct combination of the following factors will allow for a sucessful cut through thicker materials:
1.Material Thickness (do not cut materials thicker than 3/4")
NOTE: If the material thickness is not shown in the chart below, round up to the nearest thickness listed in the chart and follow those guide- lines.
2.Maximum Length of Cut (the length of material in inches through which the saw moves between cool down periods)
3.Feed Rate (the speed at which the saw moves through the material in seconds per inch)
4.Maximum Cutting Time (the total amount of time that the saw can be under load between cool down periods.
5.Cool Down Period (6 minutes running with no load or 60 min. switched off.)
Material | Maximum | Max |
|
|
Cutting Time | Length | Feed Rate | Cool Down | |
Thickness | (seconds) | of Cut | (sec./inch) | Period |
3/8" | 30 - 45 | 15" | 2 - 3 | 6 min. of running |
1/2" | 18 - 36 | 9" | 2 - 4 | with no load |
5/8" | 18 - 30 | 6" | 3 - 5 | or 60 min. |
3/4" | 20 - 25 | 5" | 4 - 5 | switched off |
|
Cutting Thin or Corrugated Materials
Cut thin and corrugated materials at least 1" from the edge of the workpiece to avoid injury or damage to the tool caused by thin strips of metal being pulled into the upper guard.
Cutting Large Sheets
Large sheets sag or bend if they are not correctly supported. If you attempt to cut without leveling and properly supporting the workpiece, the blade will tend to bind, causing KICKBACK.
Support large sheets. Be sure to set the depth of the cut so that you only cut through the workpiece, not through the supports.
When cutting widths greater than 4", clamp 1" lumber to workpiece and use the inside edge of the shoe as a guide.
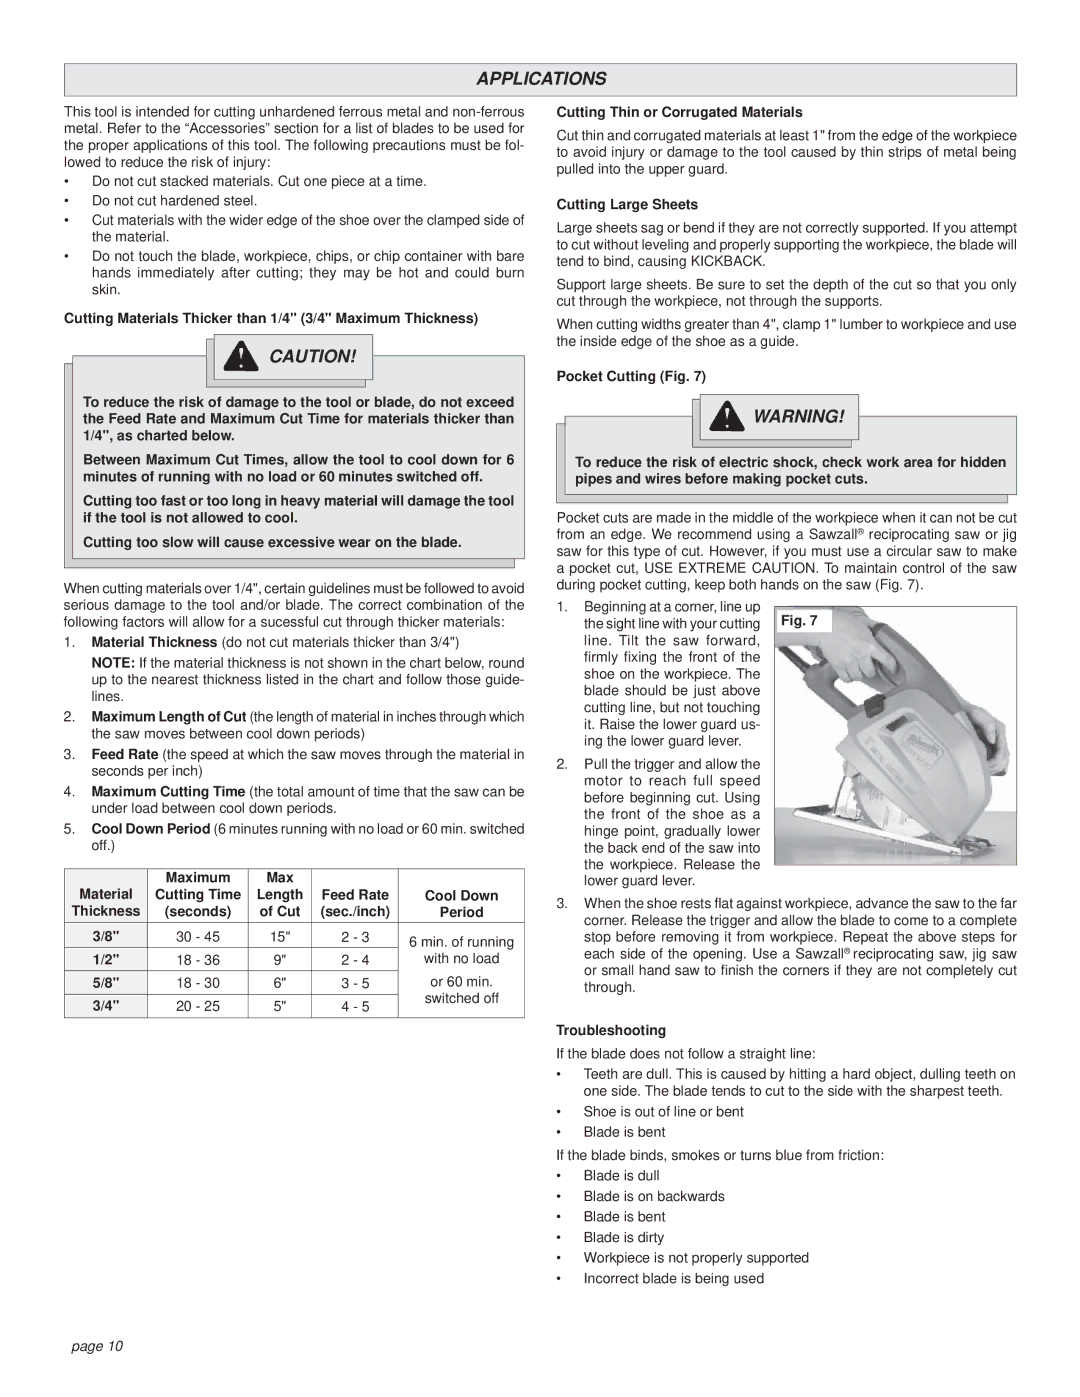
Pocket Cutting (Fig. 7)
![]() WARNING!
WARNING!
To reduce the risk of electric shock, check work area for hidden pipes and wires before making pocket cuts.
Pocket cuts are made in the middle of the workpiece when it can not be cut from an edge. We recommend using a Sawzall® reciprocating saw or jig saw for this type of cut. However, if you must use a circular saw to make a pocket cut, USE EXTREME CAUTION. To maintain control of the saw during pocket cutting, keep both hands on the saw (Fig. 7).
1.Beginning at a corner, line up
the sight line with your cutting Fig. 7 line. Tilt the saw forward,
firmly fixing the front of the shoe on the workpiece. The blade should be just above cutting line, but not touching it. Raise the lower guard us- ing the lower guard lever.
2.Pull the trigger and allow the motor to reach full speed before beginning cut. Using the front of the shoe as a hinge point, gradually lower the back end of the saw into the workpiece. Release the lower guard lever.
3.When the shoe rests flat against workpiece, advance the saw to the far corner. Release the trigger and allow the blade to come to a complete stop before removing it from workpiece. Repeat the above steps for each side of the opening. Use a Sawzall® reciprocating saw, jig saw or small hand saw to finish the corners if they are not completely cut through.
Troubleshooting
If the blade does not follow a straight line:
•Teeth are dull. This is caused by hitting a hard object, dulling teeth on one side. The blade tends to cut to the side with the sharpest teeth.
•Shoe is out of line or bent
•Blade is bent
If the blade binds, smokes or turns blue from friction:
•Blade is dull
•Blade is on backwards
•Blade is bent
•Blade is dirty
•Workpiece is not properly supported
•Incorrect blade is being used
page 10