MAXXUM9E 2/3/99 2:44 PM Page 18
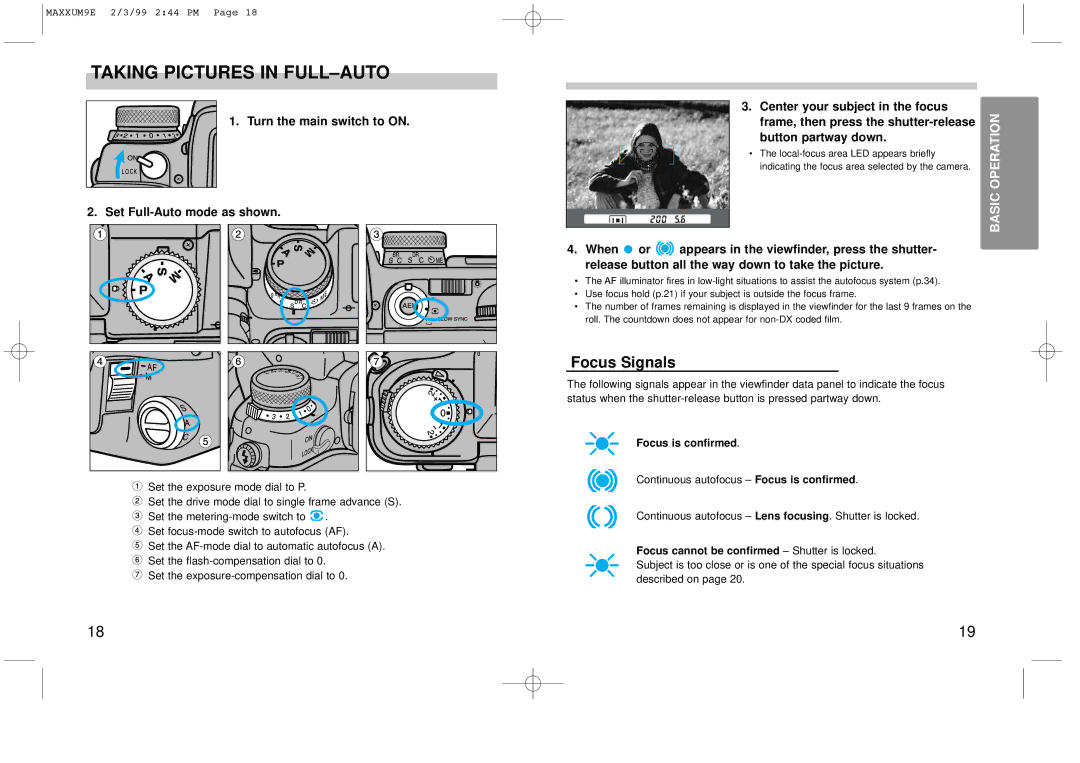
TAKING PICTURES IN FULL–AUTO
1. Turn the main switch to ON.
2. Set Full-Auto mode as shown.
Set the exposure mode dial to P.
Set the drive mode dial to single frame advance (S).
Set the ![]() .
.
Set
Set the
Set the
Set the
3. Center your subject in the focus
• The
frame, then press the
BASIC
4.When ![]() or
or ![]()
![]() appears in the viewfinder, press the shutter- release button all the way down to take the picture.
appears in the viewfinder, press the shutter- release button all the way down to take the picture.
•The AF illuminator fires in
•Use focus hold (p.21) if your subject is outside the focus frame.
•The number of frames remaining is displayed in the viewfinder for the last 9 frames on the roll. The countdown does not appear for
Focus Signals
The following signals appear in the viewfinder data panel to indicate the focus status when the
Focus is confirmed.
Continuous autofocus – Focus is confirmed.
Continuous autofocus – Lens focusing. Shutter is locked.
Focus cannot be confirmed – Shutter is locked.
Subject is too close or is one of the special focus situations described on page 20.
18 | 19 |
