CLEANING
THERMAL HEAD CLEANING
Cleaning as indicated below will help maintain stable printer operation and extend the printer’s life.
Preparations
Alcohol (isopropyl alcohol)
Tissue paper (Fold in half about 4 times, and use the folded side to clean.) Cotton buds
Cleaning kit (Option)*
Other : Cleaner pen (Option)*
*Please ask the dealer about options.
Make sure to turn off the power before cleaning.
A small amount of alcohol
Cleaning part
How to hold tissue paper
Cleaner pen (Option)
PRECAUTIONS |
FEATURES |
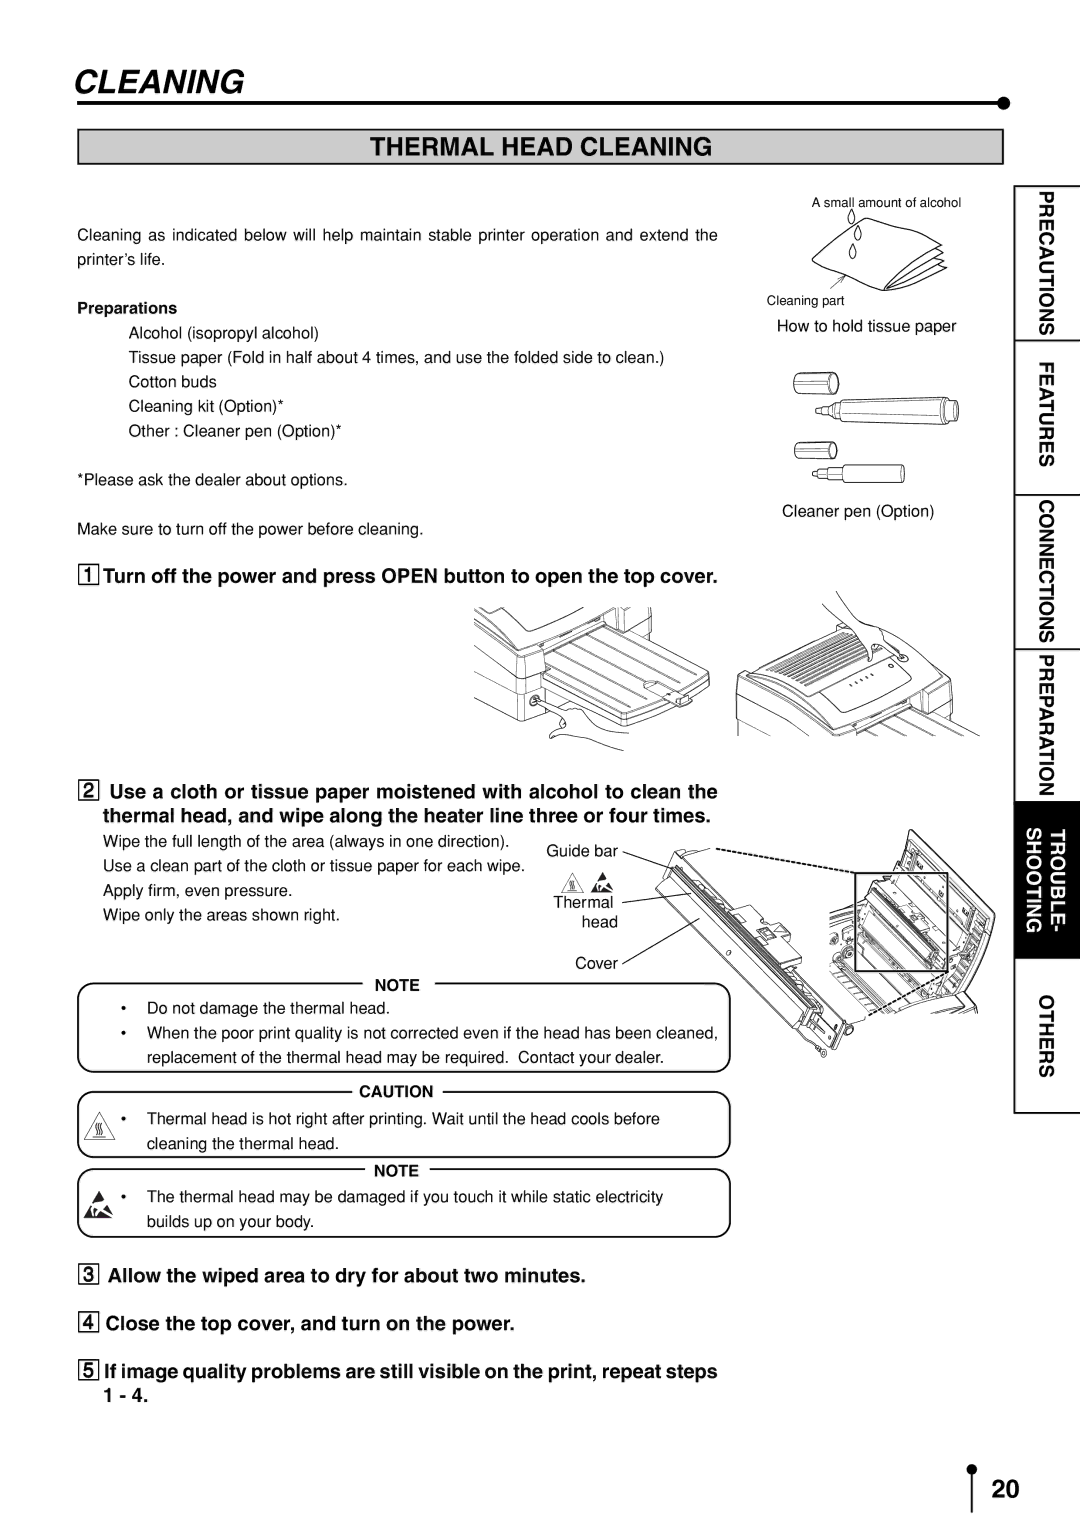
1Turn off the power and press OPEN button to open the top cover.
2Use a cloth or tissue paper moistened with alcohol to clean the thermal head, and wipe along the heater line three or four times.
Wipe the full length of the area (always in one direction). | Guide bar | |||||
Use a clean part of the cloth or tissue paper for each wipe. | ||||||
|
|
| ||||
Apply firm, even pressure. |
|
|
| |||
Thermal | ||||||
Wipe only the areas shown right. | ||||||
|
| head | ||||
|
|
|
|
| ||
|
|
|
| Cover | ||
| NOTE |
|
|
|
| |
|
|
|
|
|
| |
•Do not damage the thermal head.
•When the poor print quality is not corrected even if the head has been cleaned, replacement of the thermal head may be required. Contact your dealer.
CAUTION
•Thermal head is hot right after printing. Wait until the head cools before cleaning the thermal head.
NOTE
• The thermal head may be damaged if you touch it while static electricity builds up on your body.
3Allow the wiped area to dry for about two minutes.
4Close the top cover, and turn on the power.
5If image quality problems are still visible on the print, repeat steps 1 - 4.
CONNECTIONS | |
PREPARATION | |
SHOOTING | TROUBLE- |
| |
OTHERS | |
|
|
20
