Menu operation (continued)

2. INSTALLATION menu


ITEM

SETTING

FUNCTION

LAMP MODE

STANDARD

Select this option when you want to view images in a well-lit room.


LOW

Select to moderate the intensity of the lamp. The fan operating sound is reduced


and the lamp lifetime becomes longer.

LAMP TIME (LOW)

****H

This item shows a lamp operating time (hour) when LAMP MODE is LOW.


• When the LAMP MODE is STANDARD, this item shows a longer lamp operat-


ing time than the actual time. (See page 31 for the interval of lamp replace-


ment. )

AUTO POWER ON

ON / OFF

When ON is chosen, the lamp is automatically lit when the power cord is plugged


in the wall outlet. Choose ON when using the projector mounted on the ceiling.


• The projector is in the stand-by mode when the lamp is off. Use the remote


control to turn on the lamp.

AUTO POWER OFF

OFF / 5 - 60min

Use to set the time elapsed before the projector enters the stand-by mode when


there is no signal input from the source.

SPLASH SCREEN

ON / OFF

Choose ON to display the splash screen when the power is turned on.

BACK COLOR

BLUE / BLACK

Use to change the color of the screen that appears when no signal is supplied.

IMAGE REVERSE

OFF

Select when viewing images from the front with the projector installed on the


floor.


MIRROR

Select when viewing images projected from the behind of the screen with the


projector installed on the floor.


INVERT

Select when viewing images projected from the behind of the screen with the


projector installed on the ceiling.


MIRROR INVERT

Select when viewing images from the front with the projector installed on the


ceiling.

TRIGGER OUT

ON / OFF

Choose ON to output the trigger output signal (12 V) from the TRIGGER terminal


when the lamp illuminates.

TEST PATTERN CROSS HATCH


Select to show the test cross hatch pattern.


When LAMP MODE has been set to LOW, the lamp mode changes from STANDARD to LOW about one minute after turn-on.

When the lamp mode is switched, the projected image may flicker. This is not a product malfunction.

Do not change the setting of LAMP MODE frequently.

To cancel the test pattern, press any button.

3. FEATURE menu


ITEM

SETTING

FUNCTION


ASPECT

AUTO

Select to change the aspect ratio automatically depending on the input signal.


4:3


Select to project images with an aspect ratio of 4:3.


16:9


Select to project images with an aspect ratio of 16:9. (Linearly stretched.)


ZOOM1

Select to enlarge and project images of CinemaScope size.


ZOOM2

Select to enlarge and project images of Vista size.


STRETCH

Select to enlarge to 16:9 and project of the images with an aspect ratio of 4:3.


(Non-linearly stretched.)


REAL

Select to project images in their original size as input. Not available when the


keystone adjustment is applied.


PASSWORD FUNCTION


Use to enable or cancel the password lock. See page 30 for details.


MENU POSITION

2 options

Use to change the position of the menu.


CINEMA MODE

AUTO

The film mode will be automatically activated when a film source signal is input.


OFF

The film mode will not be activated.


VIDEO SIGNAL

8 options

When AUTO is selected, the appropriate video format is automatically selected


depending on the input signal. If the image isn’t displayed correctly, select the


desired video format manually.


SET UP

AUTO

Select AUTO for normal use. When LANGUAGE is not set to

and 480i,


480p or TV60 signal is input, the SET UP changes to 7.5% automatically.


OFF

Select to make black lighter.


3.75% / 7.5%

Select to make black intense.


• When 7.5% is chosen, the brightness is decreased by the set-up cancel


function for the U.S. Choose OFF when the image is dark.


SCART INPUT

ON / OFF

Choose ON when connecting the projector with a device equipped with the


SCART terminal that can output RGB signal. SCART terminal is used mainly


in Europe. Choose OFF normally. (Available only for the input signal from the


COMPUTER IN/COMPONENT VIDEO IN terminal.)


LANGUAGE

10 languages

Use to select the language used in the menus.


RESET ALL

OK


Use to reset the settings of the menu (excluding PASSWORD FUNCTION and


LANGUAGE) to the factory setting values.


When SCART INPUT is set to ON, normal computer signals aren’t projected.

Use a SCART-BNC (or SCART-Mini D-SUB 15P) cable (option) when connecting this projector with an AV device equipped with the SCART terminal.

Some AV devices equipped with the SCART terminal aren’t compatible with this projector.

It may take a little while to carry out RESET ALL in the FEATURE menu.

ENGLISH

EN-25

Page 25
Image 25
Mitsubishi Electronics HC1600 user manual Installation menu, Feature menu

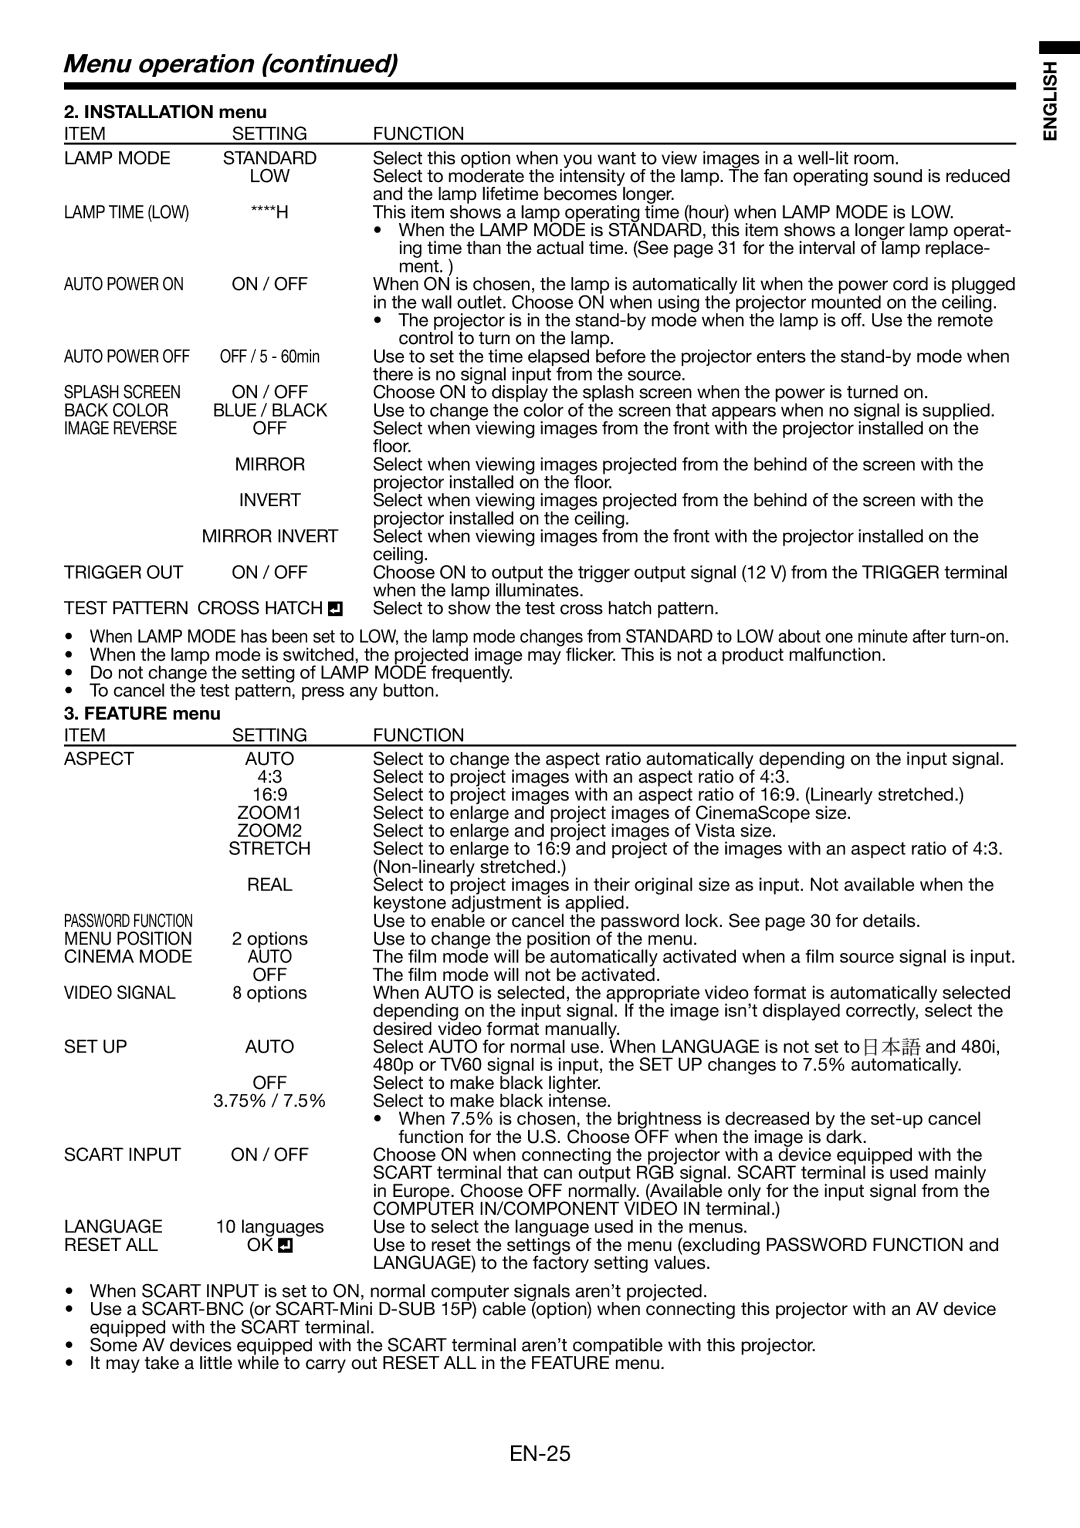
HC1600 specifications

Mitsubishi Electronics HC1600 is a powerful projector that combines cutting-edge technology with user-friendly features, making it a popular choice for both home entertainment and professional presentations. This model is designed to deliver impressive image quality, versatility, and reliable performance.

One of the standout features of the HC1600 is its high brightness level, which reaches up to 3,000 lumens. This substantial brightness allows the projector to perform well even in well-lit environments, ensuring that images remain clear and vibrant. Coupled with a high contrast ratio, the HC1600 produces sharp images with excellent color reproduction, enhancing the viewing experience for movies, games, and presentations.

The HC1600 employs advanced DLP (Digital Light Processing) technology, which contributes to its reliability and longevity. DLP projectors are known for their ability to produce smooth, detailed images, minimizing the occurrence of motion blur. This makes the HC1600 an excellent choice for fast-paced content, such as sports or action films.

In terms of resolution, the HC1600 offers a native resolution of 1920 x 1080 pixels, providing full HD clarity. This level of detail allows users to appreciate every intricate aspect of their content, whether it's the subtle textures in a film or the fine print in a presentation. For added convenience, the projector also supports a variety of input formats and resolutions, making it flexible for different multimedia needs.

Connectivity options are abundant in the HC1600. It features multiple HDMI ports, USB connections, and composite video inputs, enabling seamless integration with a range of devices including laptops, gaming consoles, and media players. The inclusion of these connectivity choices enhances its versatility as a multimedia projector.

Additionally, the HC1600 includes a built-in speaker, which, while may not replace a dedicated sound system, offers decent audio quality for less complex presentations or casual movie viewing. For those who desire an immersive audio experience, external audio devices can easily be connected, elevating the overall viewing experience.

The design of the HC1600 is also worth noting. It is lightweight and compact, making it suitable for both stationary setups and portable use. Users can easily transport it to different locations, whether for business meetings, classrooms, or home movie nights.

In summary, the Mitsubishi Electronics HC1600 is a well-rounded projector that brings together brightness, resolution, and connectivity into one package. Its DLP technology ensures high quality images while its diverse input options guarantee compatibility with many devices. Whether for casual viewing or professional presentations, the HC1600 stands out as a reliable option for all multimedia needs.