
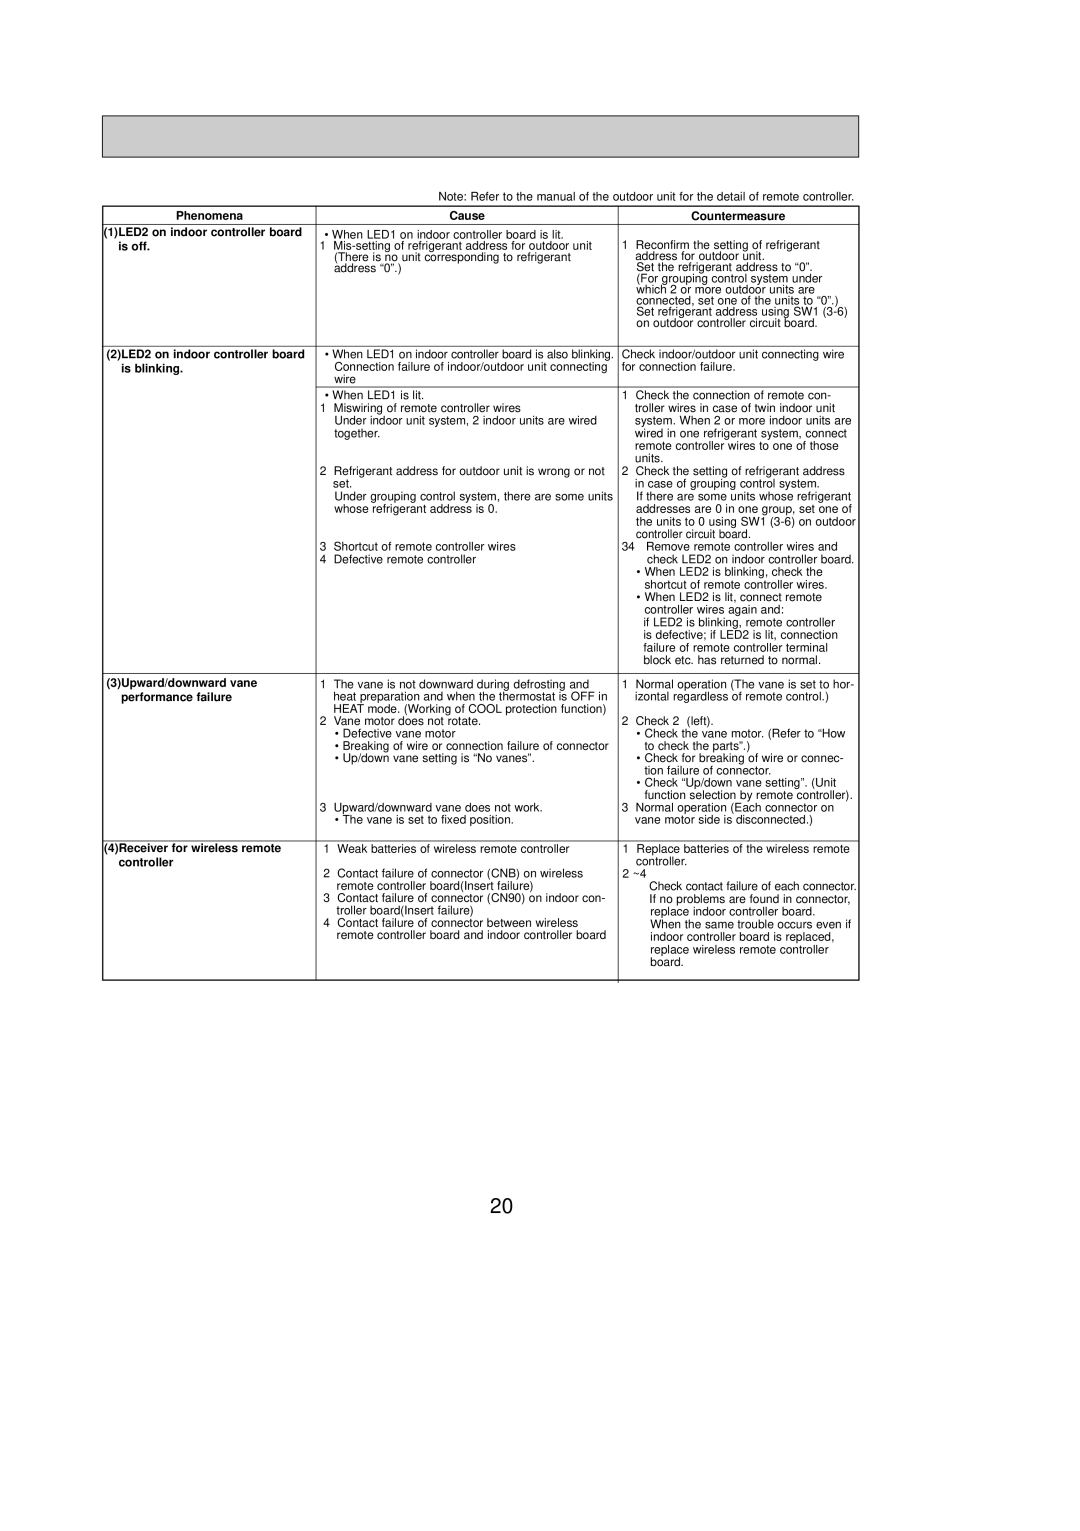
PCA-A24GA specifications
Mitsubishi Electronics has long been a pioneer in the field of industrial automation, and the PCA-A24GA is a notable addition to its line of high-performance programmable controllers. This compact yet powerful device is designed to optimize processes and increase efficiency across various applications, making it a preferred choice for industries ranging from manufacturing to building automation.One of the standout features of the PCA-A24GA is its versatility. The controller offers a wide range of input/output (I/O) options, enabling seamless integration with various sensors and actuators. With 24 digital input channels and 16 relay output channels, the PCA-A24GA can handle complex control tasks while maintaining a compact footprint. This flexibility is further enhanced by its support for analog inputs and outputs, allowing for greater precision in monitoring and controlling processes.
The PCA-A24GA is built with cutting-edge technologies that ensure robust performance. It employs Mitsubishi's advanced processing algorithms, which enhance real-time data processing capabilities. This ensures responsive control, reducing lag and improving overall system performance. Additionally, the controller features an intuitive programming environment, making it accessible to both seasoned engineers and those new to automation programming.
Communications are another strong suit of the PCA-A24GA. It offers multiple communication protocols, including Ethernet and RS-232, which allow for easy connectivity to various devices and systems. This ensures that the PCA-A24GA can be integrated into existing networks without significant modifications, facilitating smoother transitions and upgrades.
In terms of reliability and durability, the PCA-A24GA excels. Designed to operate in demanding environments, it is built to withstand temperature fluctuations, vibrations, and dust, which is essential for industrial settings. The controller's long operational life reduces maintenance costs and downtime, contributing to improved productivity.
Energy efficiency is also a key characteristic of the PCA-A24GA. Mitsubishi Electronics has designed this controller with eco-friendly technologies, making it suitable for organizations looking to reduce their carbon footprint while maintaining high levels of productivity.
In summary, the Mitsubishi Electronics PCA-A24GA stands out with its versatile I/O options, advanced processing capabilities, comprehensive communication protocols, and robust build. These features make it an excellent choice for industries seeking reliable and efficient automation solutions, securing Mitsubishi's reputation as a leader in the field.