Menu operation (continued)
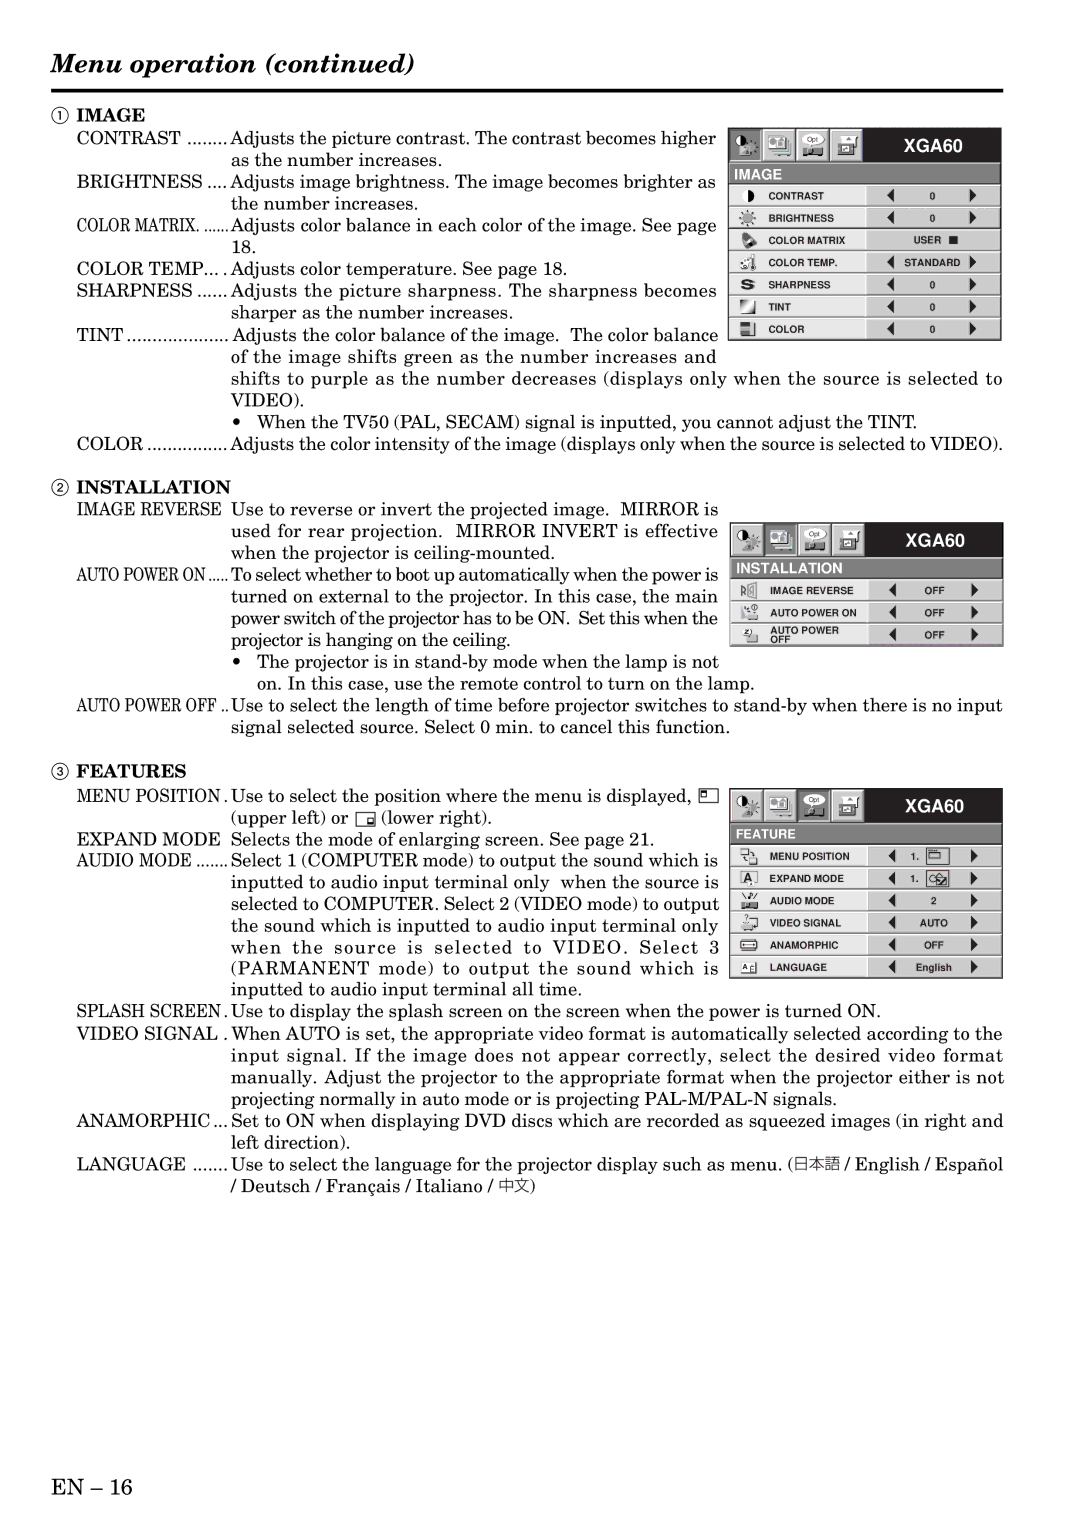
1IMAGE
CONTRAST ........ Adjusts the picture contrast. The contrast becomes higher |
|
|
|
| Opt |
|
|
| XGA60 | ||
as the number increases. |
|
|
|
|
|
|
|
|
|
|
|
|
|
|
|
|
|
|
|
|
|
| |
IMAGE |
|
|
| ||||||||
BRIGHTNESS .... Adjusts image brightness. The image becomes brighter as |
|
|
| ||||||||
|
| CONTRAST | 0 |
|
| ||||||
the number increases. |
|
|
|
| |||||||
|
| BRIGHTNESS | 0 |
|
| ||||||
COLOR MATRIX. ...... Adjusts color balance in each color of the image. See page |
|
|
|
| |||||||
|
| COLOR MATRIX | USER |
|
| ||||||
18. |
|
|
|
| |||||||
|
|
|
|
|
|
|
|
|
|
| |
COLOR TEMP... . Adjusts color temperature. See page 18. |
|
| COLOR TEMP. | STANDARD | |||||||
SHARPNESS ...... Adjusts the picture sharpness. The sharpness becomes |
|
| SHARPNESS | 0 |
|
| |||||
sharper as the number increases. |
|
| TINT | 0 |
|
| |||||
|
|
|
| ||||||||
TINT .................... Adjusts the color balance of the image. The color balance |
|
| COLOR | 0 |
|
| |||||
|
|
|
| ||||||||
|
|
|
|
|
|
|
|
|
|
| |
of the image shifts green as the number increases and |
|
|
|
|
|
|
|
|
|
|
|
shifts to purple as the number decreases (displays only when the source is selected to | |||||||||||
VIDEO). |
|
|
|
|
|
|
|
|
|
|
|
• When the TV50 (PAL, SECAM) signal is inputted, you cannot adjust the TINT. | |||||||||||
COLOR ................ Adjusts the color intensity of the image (displays only when the source is selected to VIDEO).
2INSTALLATION
IMAGE REVERSE Use to reverse or invert the projected image. MIRROR is
used for rear projection. MIRROR INVERT is effective |
|
|
|
| Opt |
|
|
| XGA60 |
|
|
|
|
|
|
| |||
when the projector is |
|
|
|
|
|
|
|
|
|
|
|
|
|
|
|
|
|
| |
INSTALLATION |
| ||||||||
AUTO POWER ON ..... To select whether to boot up automatically when the power is |
| ||||||||
turned on external to the projector. In this case, the main |
|
| IMAGE REVERSE | OFF | |||||
power switch of the projector has to be ON. Set this when the |
|
| AUTO POWER ON | OFF | |||||
projector is hanging on the ceiling. |
|
| AUTO POWER | OFF | |||||
|
| OFF | |||||||
|
|
|
|
|
|
|
|
|
|
•The projector is in
on. In this case, use the remote control to turn on the lamp.
AUTO POWER OFF ..Use to select the length of time before projector switches to
3FEATURES
MENU POSITION . Use to select the position where the menu is displayed, |
|
|
|
| Opt |
|
|
|
|
| XGA60 |
(upper left) or (lower right). |
|
|
|
|
|
|
|
|
|
|
|
EXPAND MODE Selects the mode of enlarging screen. See page 21. | FEATURE |
| |||||||||
AUDIO MODE ....... Select 1 (COMPUTER mode) to output the sound which is |
|
| MENU POSITION | 1. | |||||||
inputted to audio input terminal only when the source is |
|
|
|
| |||||||
| A | EXPAND MODE | 1. | ||||||||
| A | ||||||||||
selected to COMPUTER. Select 2 (VIDEO mode) to output |
|
| AUDIO MODE | 2 | |||||||
|
|
|
|
|
|
|
|
|
|
|
|
the sound which is inputted to audio input terminal only | ? | VIDEO SIGNAL | AUTO | ||||||||
when the source is selected to VIDEO . Select 3 |
|
|
|
|
|
|
|
|
|
|
|
|
| ANAMORPHIC | OFF | ||||||||
(PARMANENT mode) to output the sound which is |
|
| LANGUAGE | English | |||||||
| A Ë | ||||||||||
inputted to audio input terminal all time. |
|
|
|
|
|
|
|
|
|
|
|
SPLASH SCREEN . Use to display the splash screen on the screen when the power is turned ON.
VIDEO SIGNAL . When AUTO is set, the appropriate video format is automatically selected according to the input signal. If the image does not appear correctly, select the desired video format manually. Adjust the projector to the appropriate format when the projector either is not projecting normally in auto mode or is projecting
ANAMORPHIC ... Set to ON when displaying DVD discs which are recorded as squeezed images (in right and
left direction). |
|
|
LANGUAGE ....... Use to select the language for the projector display such as menu. ( | / English / Español | |
/ Deutsch / Français / Italiano / | ) |
|
EN – 16