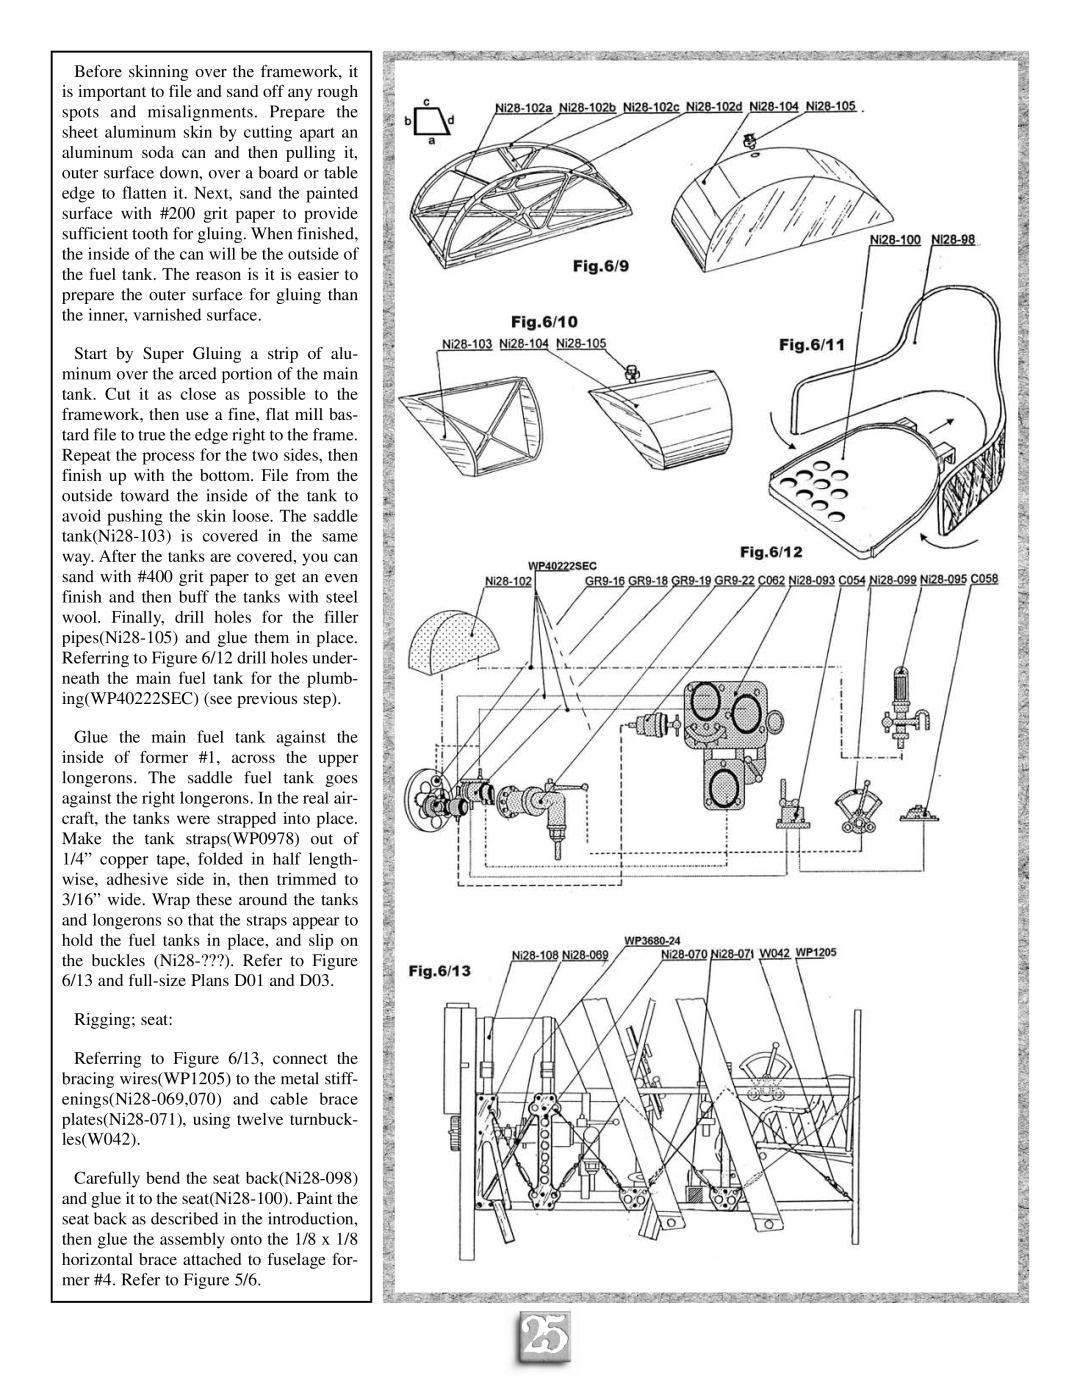
Before skinning over the framework, it is important to file and sand off any rough spots and misalignments. Prepare the sheet aluminum skin by cutting apart an aluminum soda can and then pulling it, outer surface down, over a board or table edge to flatten it. Next, sand the painted surface with #200 grit paper to provide sufficient tooth for gluing. When finished, the inside of the can will be the outside of the fuel tank. The reason is it is easier to prepare the outer surface for gluing than the inner, varnished surface.
Start by Super Gluing a strip of alu- minum over the arced portion of the main tank. Cut it as close as possible to the framework, then use a fine, flat mill bas- tard file to true the edge right to the frame. Repeat the process for the two sides, then finish up with the bottom. File from the outside toward the inside of the tank to avoid pushing the skin loose. The saddle
Glue the main fuel tank against the inside of former #1, across the upper longerons. The saddle fuel tank goes against the right longerons. In the real air- craft, the tanks were strapped into place. Make the tank straps(WP0978) out of 1/4” copper tape, folded in half length- wise, adhesive side in, then trimmed to 3/16” wide. Wrap these around the tanks and longerons so that the straps appear to hold the fuel tanks in place, and slip on the buckles
Rigging; seat:
Referring to Figure 6/13, connect the bracing wires(WP1205) to the metal stiff-
Carefully bend the seat
25