Manuals
/
Moen
/
Household Appliance
/
Plumbing Product
Moen
84781
manual
Installation Instructions
Models:
84781
1
4
8
8
Download
8 pages
197 b
1
2
3
4
5
6
7
8
Install
Parts Diagram
Warranty
Page 4
Image 4
Page 3
Page 5
Page 4
Image 4
Page 3
Page 5
Contents
HELPFUL TOOLS
HERRAMIENTAS UTILES
OUTILS UTILES
ESPAÑOL
PARTS DIAGRAM
DI´ÁGRAMA DE PIEZAS
TABLEAU DES PIÈCES
ENGLISH
GARANTIE À VIE LIMITÉE DE MOEN
INFORMATION POUR LE CONSOMMATEUR
DÉMONTAGE
Pour remonter, suivre les étapes ci-dessus à l’inverse
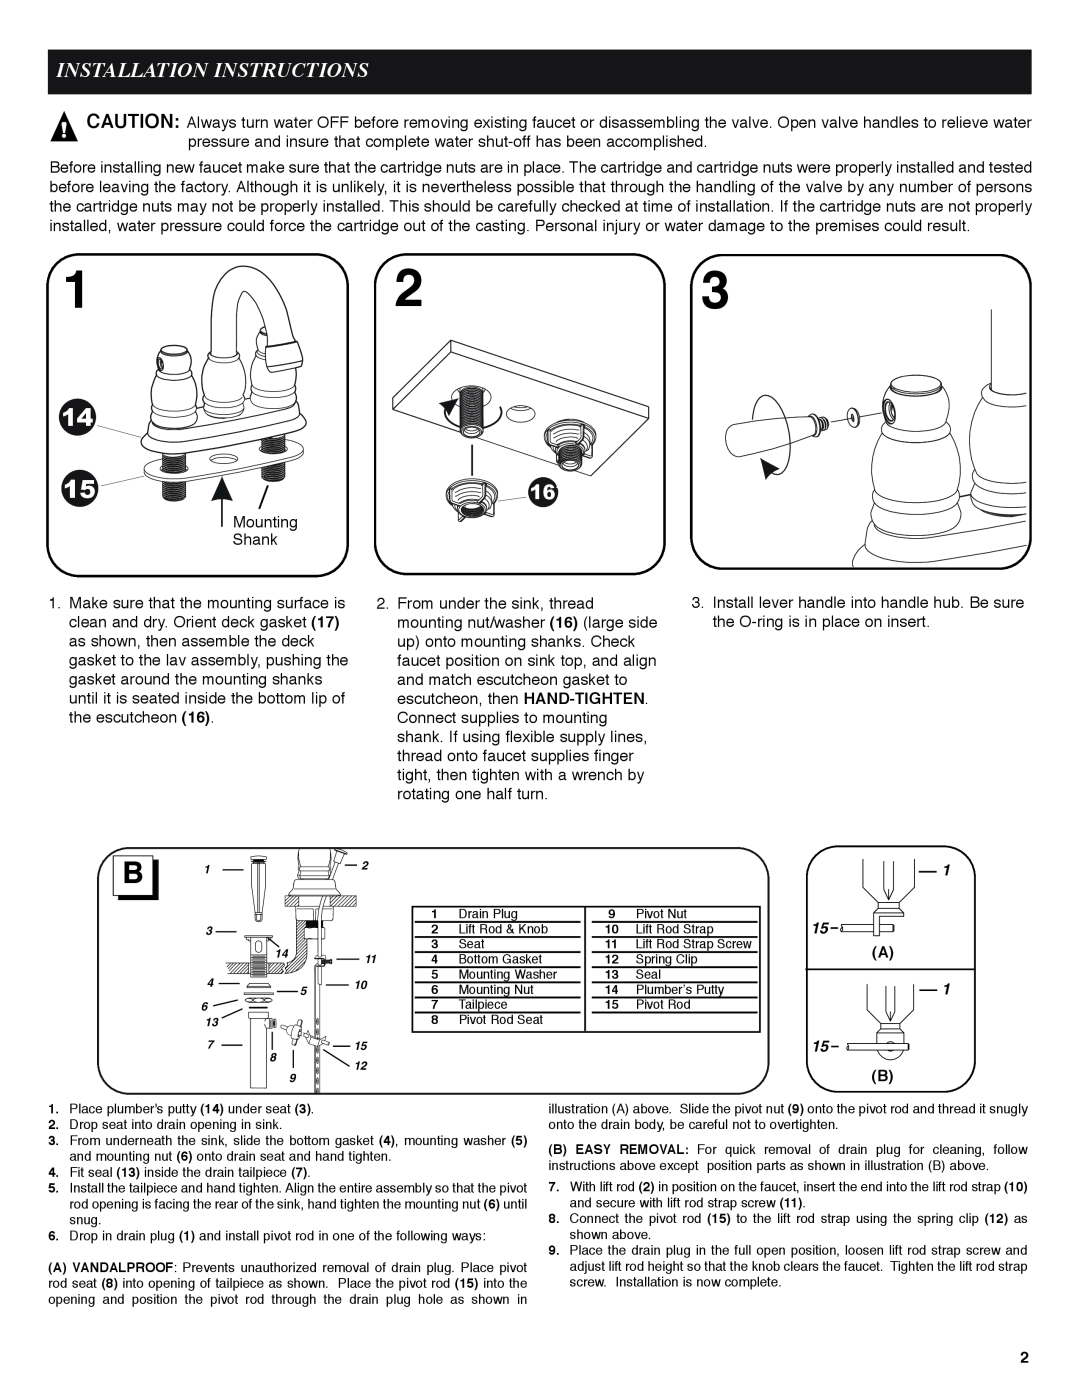
INSTALLATION INSTRUCTIONS
DISASSEMBLY
MOEN LIFETIME LIMITED WARRANTY
FLUSHING INSTRUCTIONS
CONSUMER INFORMATION
INSTRUCCIONES PARA LA INSTALACIÓN
INSTRUCCIONES DE LIMPIEZA
DESENSAMBLAJE
MOEN GARANTIA LIMITADA DE VIDA
INFORMACION AL CONSUMIDOR
DIRECTIVES D’INSTALLATION
Top
Page
Image
Contents