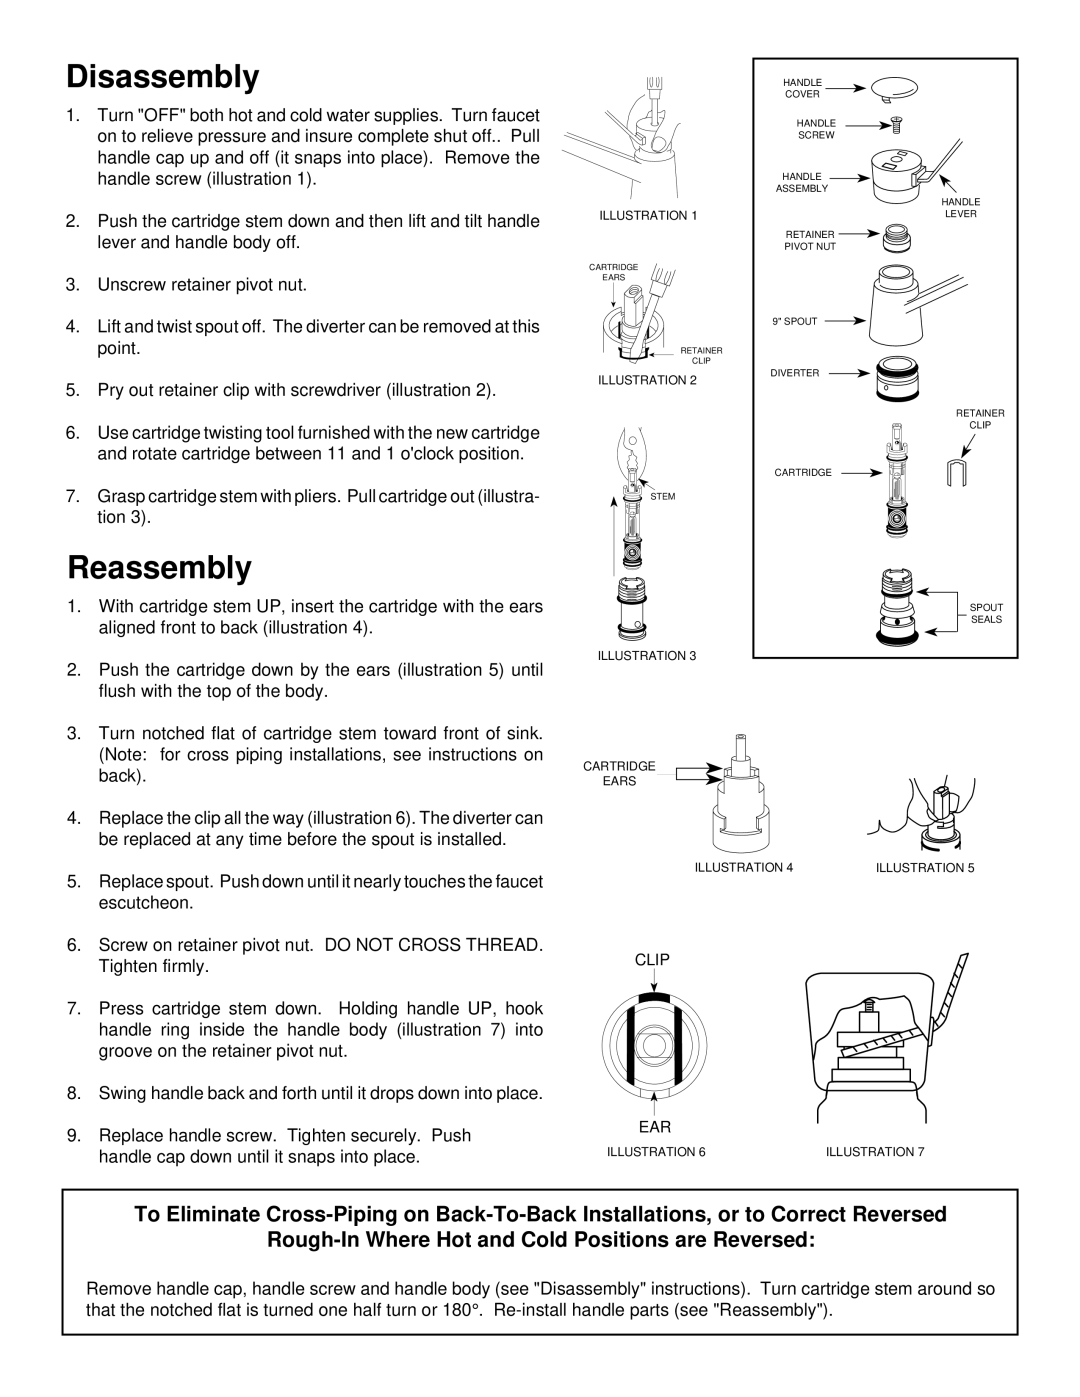
7300, 8700 specifications
The Moen 7300 and 7310 series are prominent kitchen faucets that stand out in both design and functionality, making them popular choices for homeowners and interior designers alike. These faucets are designed to add both elegance and practicality to modern kitchens, featuring stylish curves and smooth finishes that can seamlessly integrate into any decor.One of the standout features of the Moen 7300 and 7310 models is their advanced spray technology. These faucets are equipped with a powerful spray head that offers two distinct functions: a steady stream and a powerful spray. This versatility allows users to tackle various tasks with ease, from rinsing dishes to washing vegetables, ensuring that kitchen chores are completed efficiently.
Another notable characteristic of the Moen 7300 and 7310 faucets is their intuitive single-handle design. This ergonomic feature enables users to control both water flow and temperature with just one hand, promoting ease of use during food preparation or cleaning. Additionally, the high-arc spout design provides more clearance for large pots and pans, enhancing the overall user experience.
For those mindful of water conservation, the Moen 7300 and 7310 are equipped with the latest water-saving technologies. These faucets are compliant with EPA WaterSense criteria, helping reduce water usage without compromising on performance. This eco-friendly aspect not only contributes to sustainability but also results in lower water bills.
In terms of installation, both models come with a hassle-free, quick-connect system that simplifies the process, making it accessible for homeowners and plumbers alike. The durable construction ensures longevity, featuring a robust metal body and high-quality components that make these faucets resilient against daily wear and tear.
Furthermore, the finish options available for the Moen 7300 and 7310 line cater to various aesthetic preferences, including chrome, spot-resistant stainless steel, and oil-rubbed bronze. These finishes are designed to resist fingerprints and water spots, making maintenance easy and keeping the faucet looking pristine.
In summary, the Moen 7300 and 7310 series embodies a perfect mix of style, functionality, and sustainability. With their advanced spray technology, ergonomic design, water-saving features, and various finish options, these faucets are ideal for anyone looking to enhance their kitchen space with a reliable and chic solution.

