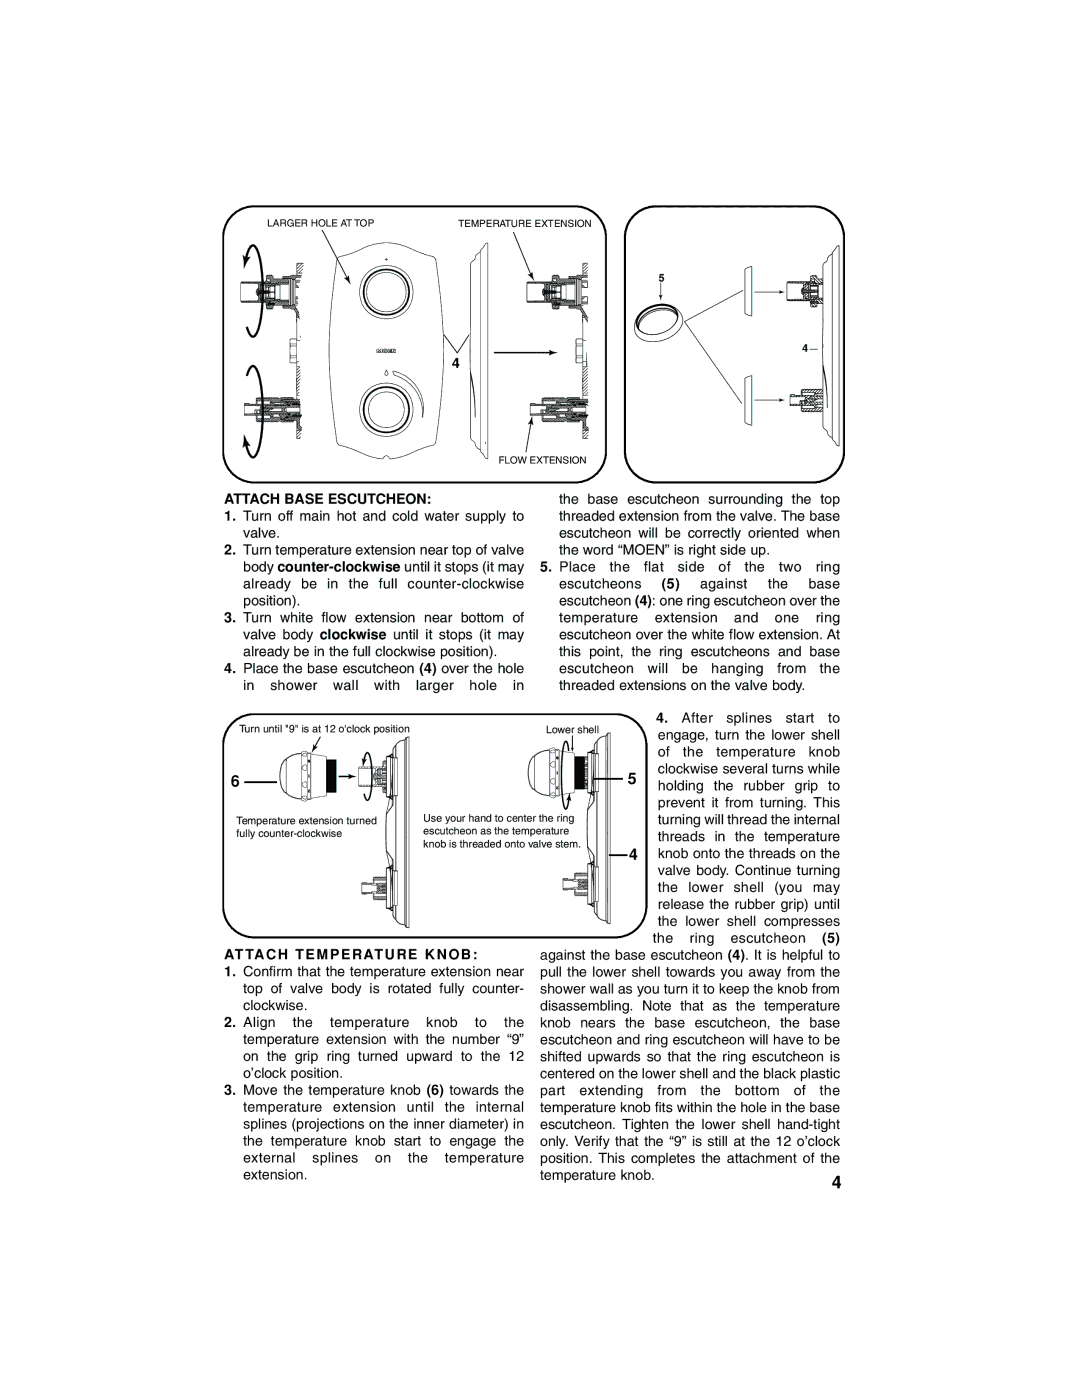
LARGER HOLE AT TOP | TEMPERATURE EXTENSION |
5
4
4
FLOW EXTENSION
ATTACH BASE ESCUTCHEON:
1.Turn off main hot and cold water supply to valve.
2.Turn temperature extension near top of valve body
3.Turn white flow extension near bottom of valve body clockwise until it stops (it may already be in the full clockwise position).
4.Place the base escutcheon (4) over the hole
in shower wall with larger hole in
Turn until "9" is at 12 o'clock position
6
Temperature extension turned fully
ATTACH TEMPERATURE KNOB:
1.Confirm that the temperature extension near top of valve body is rotated fully counter- clockwise.
2.Align the temperature knob to the temperature extension with the number “9” on the grip ring turned upward to the 12 o’clock position.
3.Move the temperature knob (6) towards the temperature extension until the internal splines (projections on the inner diameter) in the temperature knob start to engage the external splines on the temperature extension.
the base escutcheon surrounding the top threaded extension from the valve. The base escutcheon will be correctly oriented when the word “MOEN” is right side up.
5.Place the flat side of the two ring escutcheons (5) against the base escutcheon (4): one ring escutcheon over the temperature extension and one ring escutcheon over the white flow extension. At this point, the ring escutcheons and base escutcheon will be hanging from the threaded extensions on the valve body.
4.After splines start to
engage, turn the lower shell of the temperature knob clockwise several turns while
5 holding the rubber grip to prevent it from turning. This turning will thread the internal threads in the temperature
4knob onto the threads on the
valve body. Continue turning the lower shell (you may release the rubber grip) until
the lower shell compresses the ring escutcheon (5)
against the base escutcheon (4). It is helpful to pull the lower shell towards you away from the shower wall as you turn it to keep the knob from disassembling. Note that as the temperature knob nears the base escutcheon, the base escutcheon and ring escutcheon will have to be shifted upwards so that the ring escutcheon is centered on the lower shell and the black plastic part extending from the bottom of the temperature knob fits within the hole in the base escutcheon. Tighten the lower shell
temperature knob. | 4 |
|