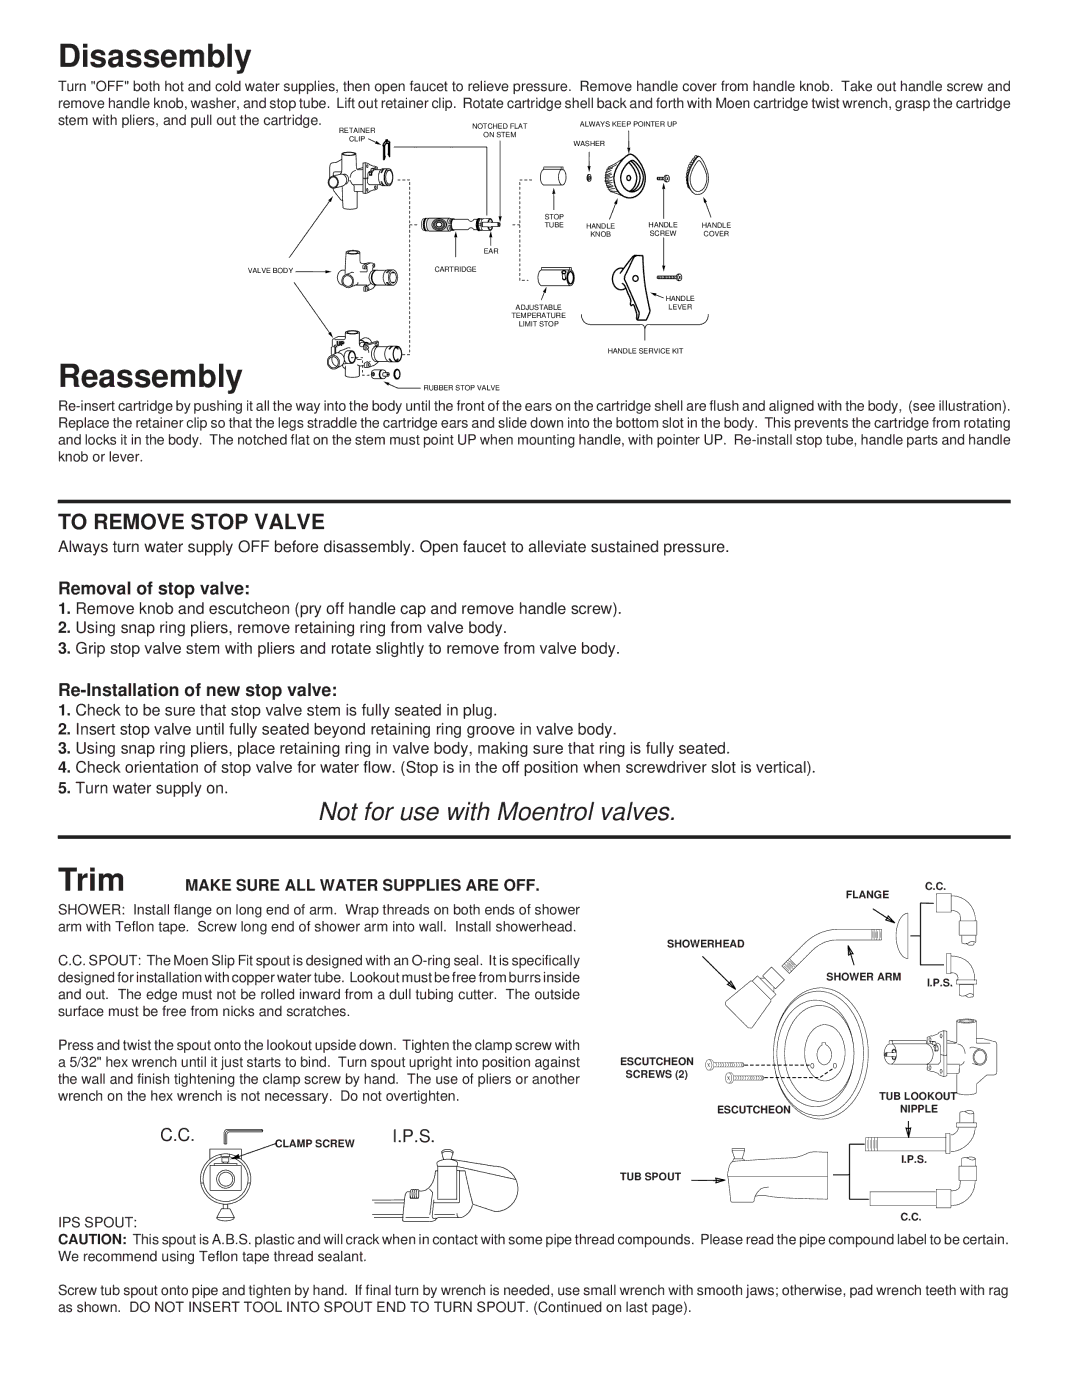
72615, T555, T471, 2290, 72700 specifications
Moen is renowned for its innovative and high-quality plumbing products, and their faucet models—Moen 2291, 5401, 2290, T473, and 2700—are prime examples of this commitment to excellence. Each model features unique characteristics and cutting-edge technologies that enhance functionality and aesthetics in contemporary kitchens and bathrooms.The Moen 2291 is a stylish and practical kitchen faucet characterized by its sleek, high-arc design. It features Moen's Duralast cartridge, which ensures smooth operation and longevity, minimizing the need for repairs. The faucet includes a pull-down sprayer with a powerful spray mode and a pause function, allowing for easy rinsing and cleaning. This model also comes with Spot Resist stainless finish, reducing water spots and fingerprints, ensuring that it remains attractive with minimal maintenance.
The Moen 5401 is a premier choice for those who value both style and performance in a kitchen faucet. Its unique design includes a side spray that complements the primary faucet, providing versatility in washing dishes and cleaning the sink. The 5401 is equipped with Moen's Reflex System, allowing for easy pull-down and retract functions, enhancing the user experience. The chrome finish of this model adds a touch of elegance, making it a perfect addition to any kitchen décor.
For those seeking a minimalist design, the Moen 2290 is an excellent option. This two-handle faucet combines vintage charm with modern functionality. Its high-quality construction and durable materials ensure resilience over time. The 2290 incorporates the innovative Posi-Temp pressure-balancing control, which maintains water temperature, preventing sudden changes that can be uncomfortable during use.
The Moen T473 showcases the brand's commitment to style and ease of use with its sleek design and advanced features. This model includes Moen's powerful Power Clean technology, providing 50% more spray power than most pull-down and pull-out faucets. This means quicker and more effective cleaning, all while maintaining a steady water flow.
Lastly, the Moen 2700 is designed specifically for bathrooms, offering a traditional and elegant touch. Its single-handle operation allows for easy temperature and flow control. The Eco-Performance feature of the 2700 reduces water consumption without sacrificing performance, making it an eco-friendly choice for water-conscious consumers.
Collectively, these Moen models offer a range of designs suited for various preferences while incorporating groundbreaking technologies and thoughtful features that elevate the overall user experience in any setting.

