
RS W12 specifications
The Monitor Audio RS W12 is a subwoofer that embodies the pinnacle of performance in modern audio design. Known for its exceptional bass reproduction and versatility, it has become a favorite among audiophiles and home theater enthusiasts alike.At the heart of the RS W12 is a powerful 12-inch driver, specifically designed to deliver deep and accurate low-frequency sound. The driver utilizes Monitor Audio's renowned RST (Rigid Surface Technology) which enhances stiffness while reducing distortion. This technology allows the RS W12 to produce tight, controlled bass that can shake the walls and fill large spaces without sounding boomy or overwhelming.
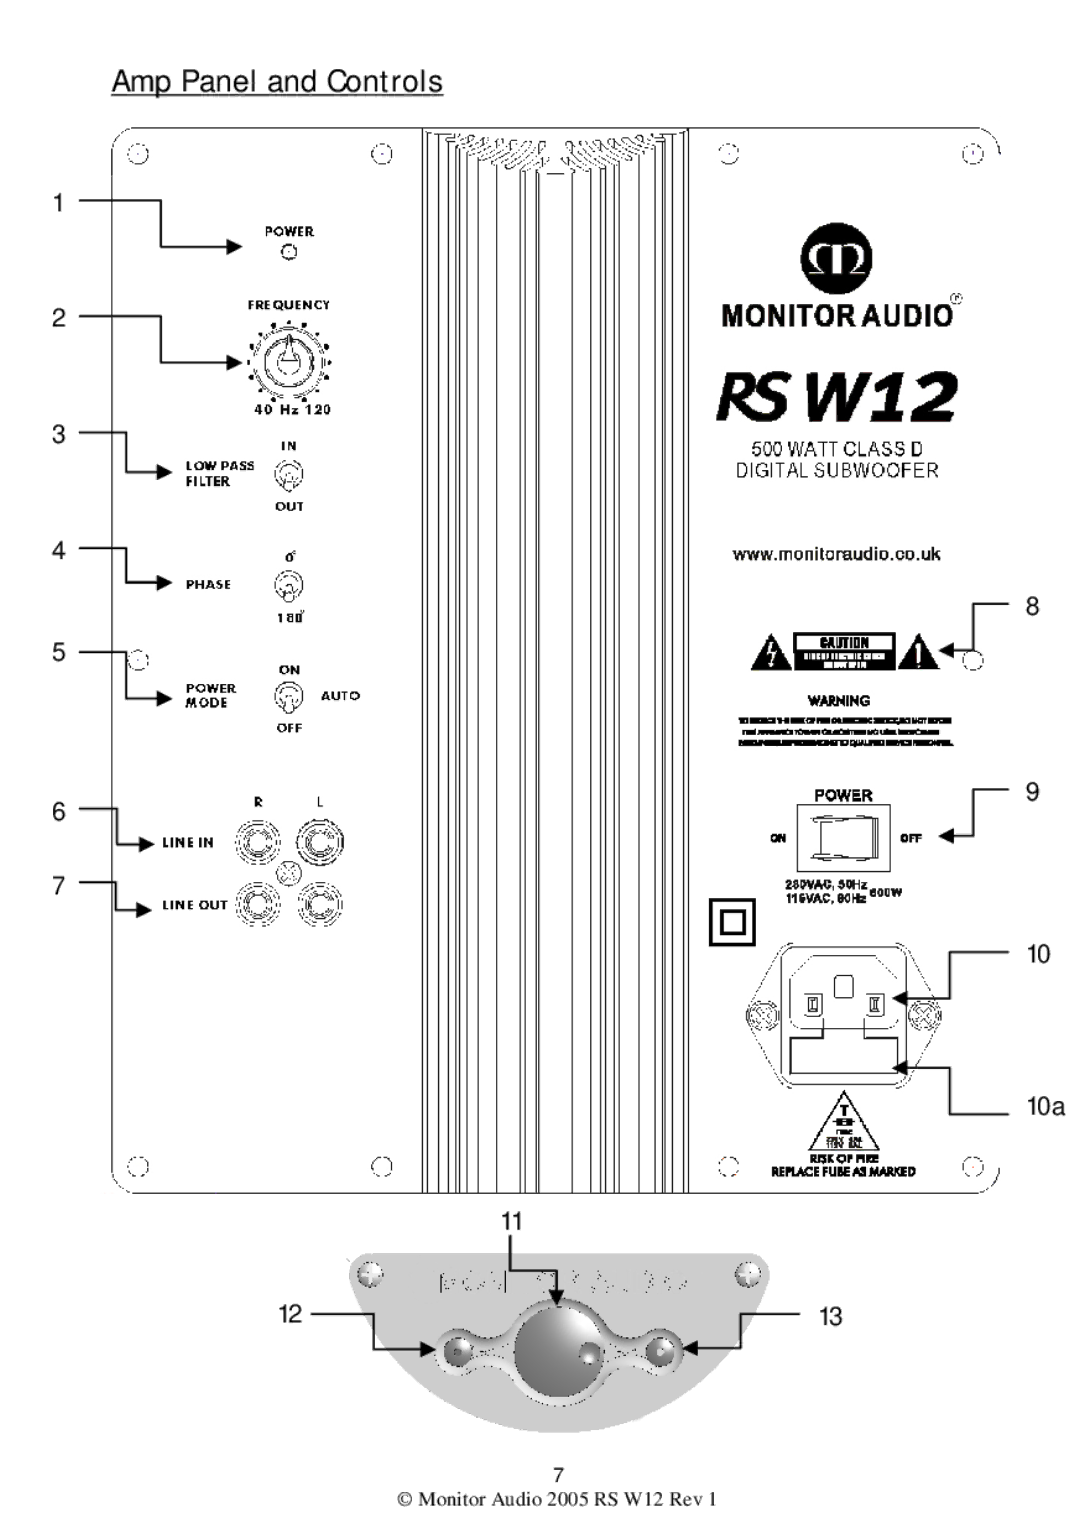
One of the key features of the RS W12 is its built-in 500W Class D amplifier. This amplifier not only ensures that the subwoofer runs efficiently but also provides ample power to deliver dynamic bass response. The amplifier is finely tuned to match the characteristics of the driver, leading to a harmonious blend that elevates both music and cinematic experiences.
The RS W12 is also equipped with advanced DSP (Digital Signal Processing) capabilities. This allows for precise tuning and customization of the subwoofer's performance based on the listening environment. Users can easily adjust parameters such as phase, crossover frequency, and level from the intuitive control panel, ensuring optimal integration with other speakers in the setup.
Built with high-quality materials, the RS W12 features a robust cabinet that minimizes unwanted resonance. The stylish design, characterized by a sleek, modern finish, makes it an attractive addition to any audio setup. Available in different finishes, it can seamlessly blend into various home aesthetics.
Connectivity options are versatile, with both line-level and speaker-level inputs, allowing the RS W12 to integrate with a wide range of audio systems. Whether used in a dedicated home theater or as a part of a stereo setup, its adaptability is one of its standout attributes.
In conclusion, the Monitor Audio RS W12 subwoofer stands out in the crowded market of audio equipment. With its innovative technologies, powerful amplification, and precise tuning capabilities, it delivers an unparalleled audio experience that appeals to both casual listeners and dedicated enthusiasts. Its combination of form and function makes it a compelling choice for anyone looking to enhance their sound system with potent and precise low-end performance.