7

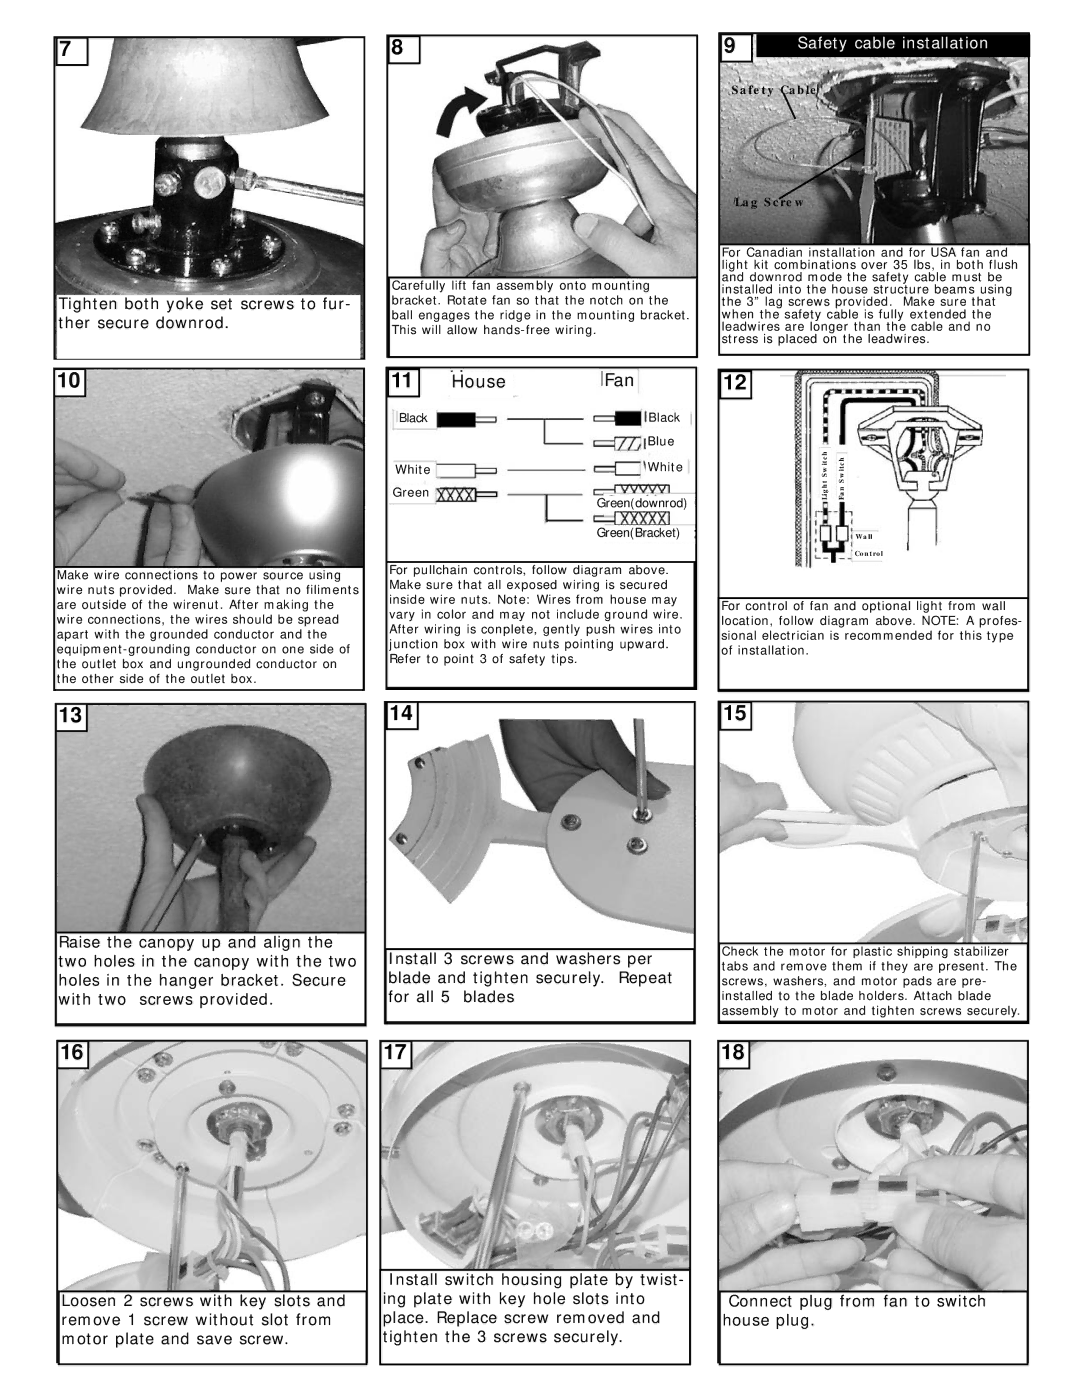
Tighten both yoke set screws to fur- ther secure downrod.

10

Make wire connections to power source using wire nuts provided. Make sure that no filiments are outside of the wirenut. After making the wire connections, the wires should be spread apart with the grounded conductor and the equipment-grounding conductor on one side of the outlet box and ungrounded conductor on the other side of the outlet box.

8

Carefully lift fan assembly onto mounting bracket. Rotate fan so that the notch on the ball engages the ridge in the mounting bracket. This will allow hands-free wiring.


House


Fan


11


Black


Black


Blue


White


White


Green


Green(downrod)


Green(Bracket)


For pullchain controls, follow diagram above. Make sure that all exposed wiring is secured inside wire nuts. Note: Wires from house may vary in color and may not include ground wire. After wiring is conplete, gently push wires into junction box with wire nuts pointing upward. Refer to point 3 of safety tips.

9Safety cable installation

Safety Cable

Lag Screw

For Canadian installation and for USA fan and light kit combinations over 35 lbs, in both flush and downrod mode the safety cable must be installed into the house structure beams using the 3” lag screws provided. Make sure that when the safety cable is fully extended the leadwires are longer than the cable and no stress is placed on the leadwires.

12

Fan Switch

Light Switch

Wall

Control

For control of fan and optional light from wall location, follow diagram above. NOTE: A profes- sional electrician is recommended for this type of installation.

13

Raise the canopy up and align the two holes in the canopy with the two holes in the hanger bracket. Secure with two screws provided.

14

Install 3 screws and washers per blade and tighten securely. Repeat for all 5 blades

15

Check the motor for plastic shipping stabilizer tabs and remove them if they are present. The screws, washers, and motor pads are pre- installed to the blade holders. Attach blade assembly to motor and tighten screws securely.

16

Loosen 2 screws with key slots and remove 1 screw without slot from motor plate and save screw.

17

Install switch housing plate by twist- ing plate with key hole slots into place. Replace screw removed and tighten the 3 screws securely.

18

Connect plug from fan to switch house plug.

Page 3
Image 3
Monte Carlo Fan Company 5DAXX Tighten both yoke set screws to fur- ther secure downrod, Black Blue White Green

5DAXX specifications

The Monte Carlo Fan Company is renowned for its commitment to quality and innovation in ceiling fan design, and the 5DAXX model exemplifies these ideals perfectly. This fan is crafted to provide a perfect blend of style, performance, and quiet operation, making it a popular choice for homeowners seeking to enhance their living spaces.

One of the standout features of the Monte Carlo 5DAXX fan is its striking design. The fan boasts a modern and sleek aesthetic with its five distinct blades, which are available in a variety of finishes to complement any decor. Whether you prefer a classic wood grain or a contemporary glossy finish, the 5DAXX offers an option that can seamlessly integrate into your home’s interior.

In terms of performance, the 5DAXX doesn't disappoint. It is powered by a powerful motor that ensures ample airflow while maintaining whisper-quiet operation. This is especially beneficial for bedrooms or living areas where a peaceful environment is essential. With its versatile speed settings, users can customize airflow according to their preferences, making it suitable for both hot summer days and cool winter nights.

The Monte Carlo 5DAXX is also equipped with advanced technology features. Many models come with integrated smart capabilities, allowing homeowners to control the fan's function via smartphone apps or voice assistants. This modern feature streamlines convenience and enables users to adjust the ceiling fan from anywhere in their home, providing enhanced comfort without the need for a remote.

Another significant characteristic of the 5DAXX is its durability. Constructed from high-quality materials, the fan is designed to withstand the test of time. The blades are engineered for optimal efficiency and longevity, making the 5DAXX a sound investment for any household.

Additionally, the fan supports a range of mounting options including standard, angled, and flush mounting, which increases its versatility for different ceiling heights and room configurations. This flexibility ensures that the Monte Carlo 5DAXX can be adapted to various spaces, making it a favored choice for both renovations and new builds.

Overall, the Monte Carlo Fan Company 5DAXX stands out in the ceiling fan market thanks to its stylish design, efficient performance, modern technology, and robust durability. It embodies everything that a contemporary ceiling fan should be, making it an excellent addition to any home looking for a blend of aesthetics and functionality.