19
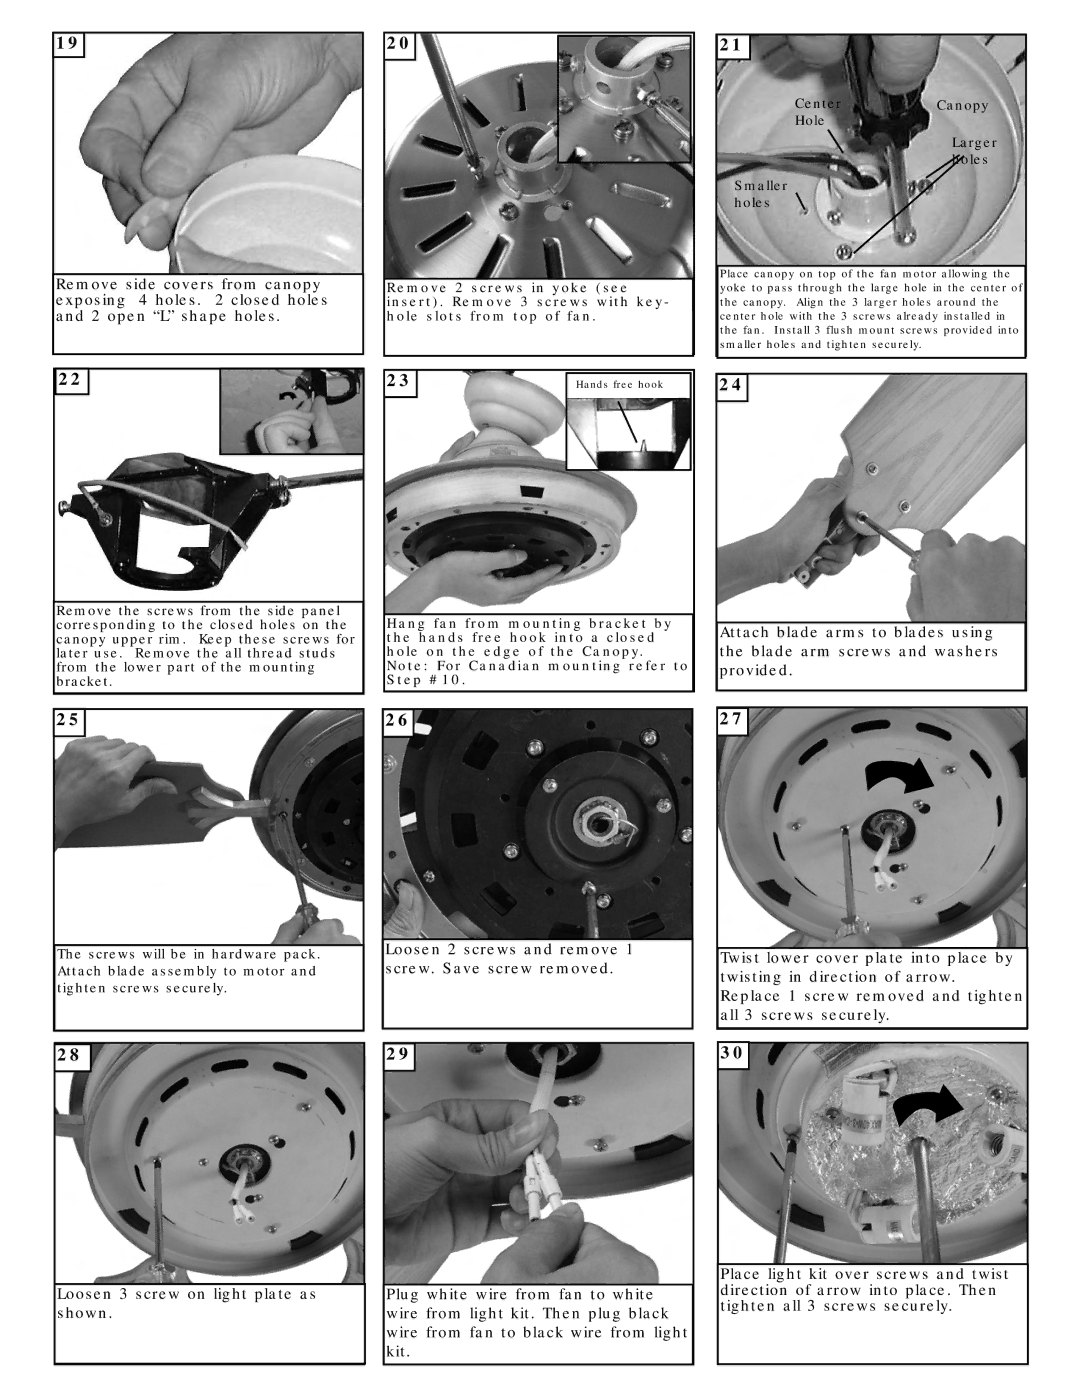
Remove side covers from canopy exposing 4 holes. 2 closed holes and 2 open “L” shape holes.
22
Remove the screws from the side panel corresponding to the closed holes on the canopy upper rim. Keep these screws for later use. Remove the all thread studs from the lower part of the mounting bracket.
25
The screws will be in hardware pack. Attach blade assembly to motor and tighten screws securely.
28
Loosen 3 screw on light plate as shown.
20
Remove 2 screws in yoke (see insert). Remove 3 screws with key- hole slots from top of fan.
23 | Hands free hook |
Hang fan from mounting bracket by the hands free hook into a closed hole on the edge of the Canopy. Note: For Canadian mounting refer to Step #10.
26
Loosen 2 screws and remove 1 screw. Save screw removed.
29
Plug white wire from fan to white wire from light kit. Then plug black wire from fan to black wire from light kit.
21
Center | Canopy |
Hole | Larger |
| |
Smaller | holes |
| |
holes |
|
Place canopy on top of the fan motor allowing the yoke to pass through the large hole in the center of the canopy. Align the 3 larger holes around the center hole with the 3 screws already installed in the fan. Install 3 flush mount screws provided into smaller holes and tighten securely.
![]() 24
24
Attach blade arms to blades using the blade arm screws and washers provided.
27
Twist lower cover plate into place by twisting in direction of arrow. Replace 1 screw removed and tighten all 3 screws securely.
30
Place light kit over screws and twist direction of arrow into place. Then tighten all 3 screws securely.