
5GL66 Series specifications
The Monte Carlo Fan Company 5GL66 Series is a remarkable line of ceiling fans that combines sophisticated design with advanced technology, making it a standout choice for any modern living space. Known for its impressive performance and aesthetic appeal, the 5GL66 Series is engineered to enhance comfort and style in both residential and commercial environments.One of the standout features of the 5GL66 Series is its powerful and efficient motor. This motor is designed to provide optimal airflow while consuming minimal energy, aligning with contemporary energy-efficiency standards. With a whisper-quiet operation, the fan ensures that it does not disrupt daily activities or peaceful moments, making it ideal for bedrooms, living rooms, and office spaces.
The fan's design is characterized by its sleek lines and modern silhouette, available in a variety of finishes to complement any décor. From polished metal to subtle wood tones, the Monte Carlo 5GL66 Series offers customization options that allow homeowners to personalize their spaces. The fan blades are meticulously crafted to provide a blend of aesthetics and aerodynamics, helping to maximize airflow and create a comfortable environment.
An important technological aspect of the 5GL66 Series is its compatibility with smart home systems. The fan can be integrated with various smart devices, enabling users to control speed settings, lighting, and other features remotely through mobile apps or voice commands. This connectivity elevates user convenience, allowing for effortless adjustments according to different needs and preferences.
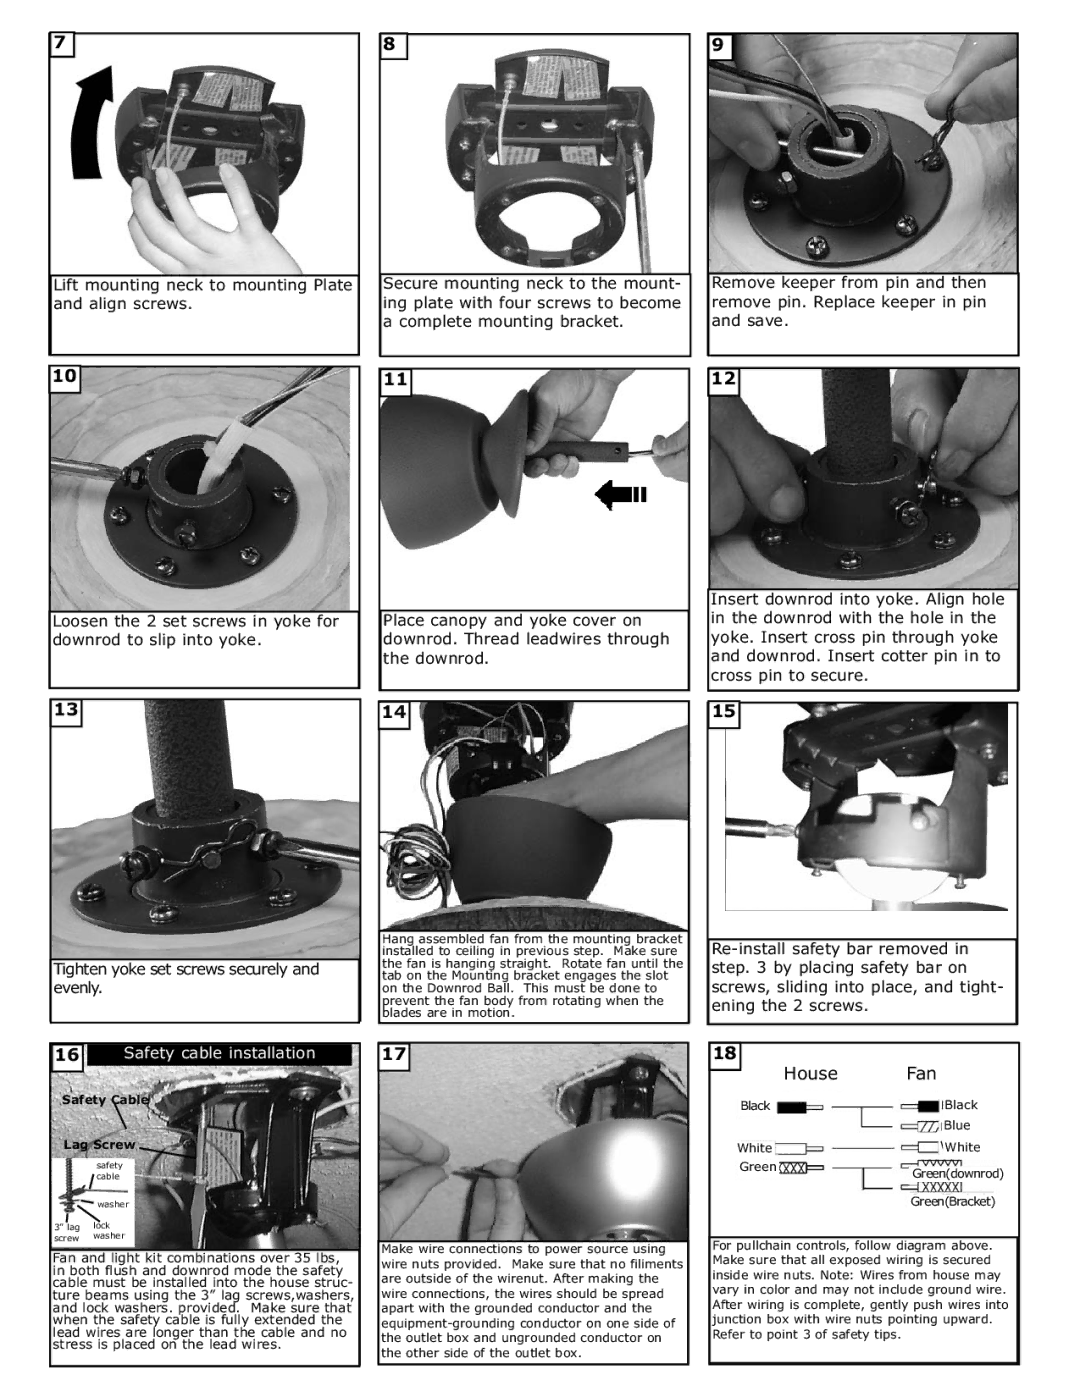
Another significant characteristic of this series is its versatile mounting options. The 5GL66 Series can be installed in various configurations, including standard, angled, and close-to-ceiling mounts, making it suitable for rooms with high or low ceilings. This flexibility ensures that all users can enjoy the benefits of ceiling fan technology, regardless of their space's architectural constraints.
In addition, the Monte Carlo Fan Company prioritizes safety and reliability in its products. The 5GL66 Series comes with a robust warranty, assuring customers of the fan's durability and performance longevity. With its combination of innovative features, stylish design, and reliable operation, the Monte Carlo Fan Company 5GL66 Series is an exemplary choice for those seeking both functionality and elegance in their ceiling fans. Whether for home or workspace, this series promises to deliver an unparalleled experience in comfort and visual appeal.