Enjoying music or videos with the HT-R420
Before connecting
•Make sure that all the connections from pages 10 to 16 are complete.
•Turning on the AV Receiver may cause a momentary power surge, which might interfere with other electrical equipment such as computers. If this happens, use a wall outlet on a different circuit.
|
| Before operating |
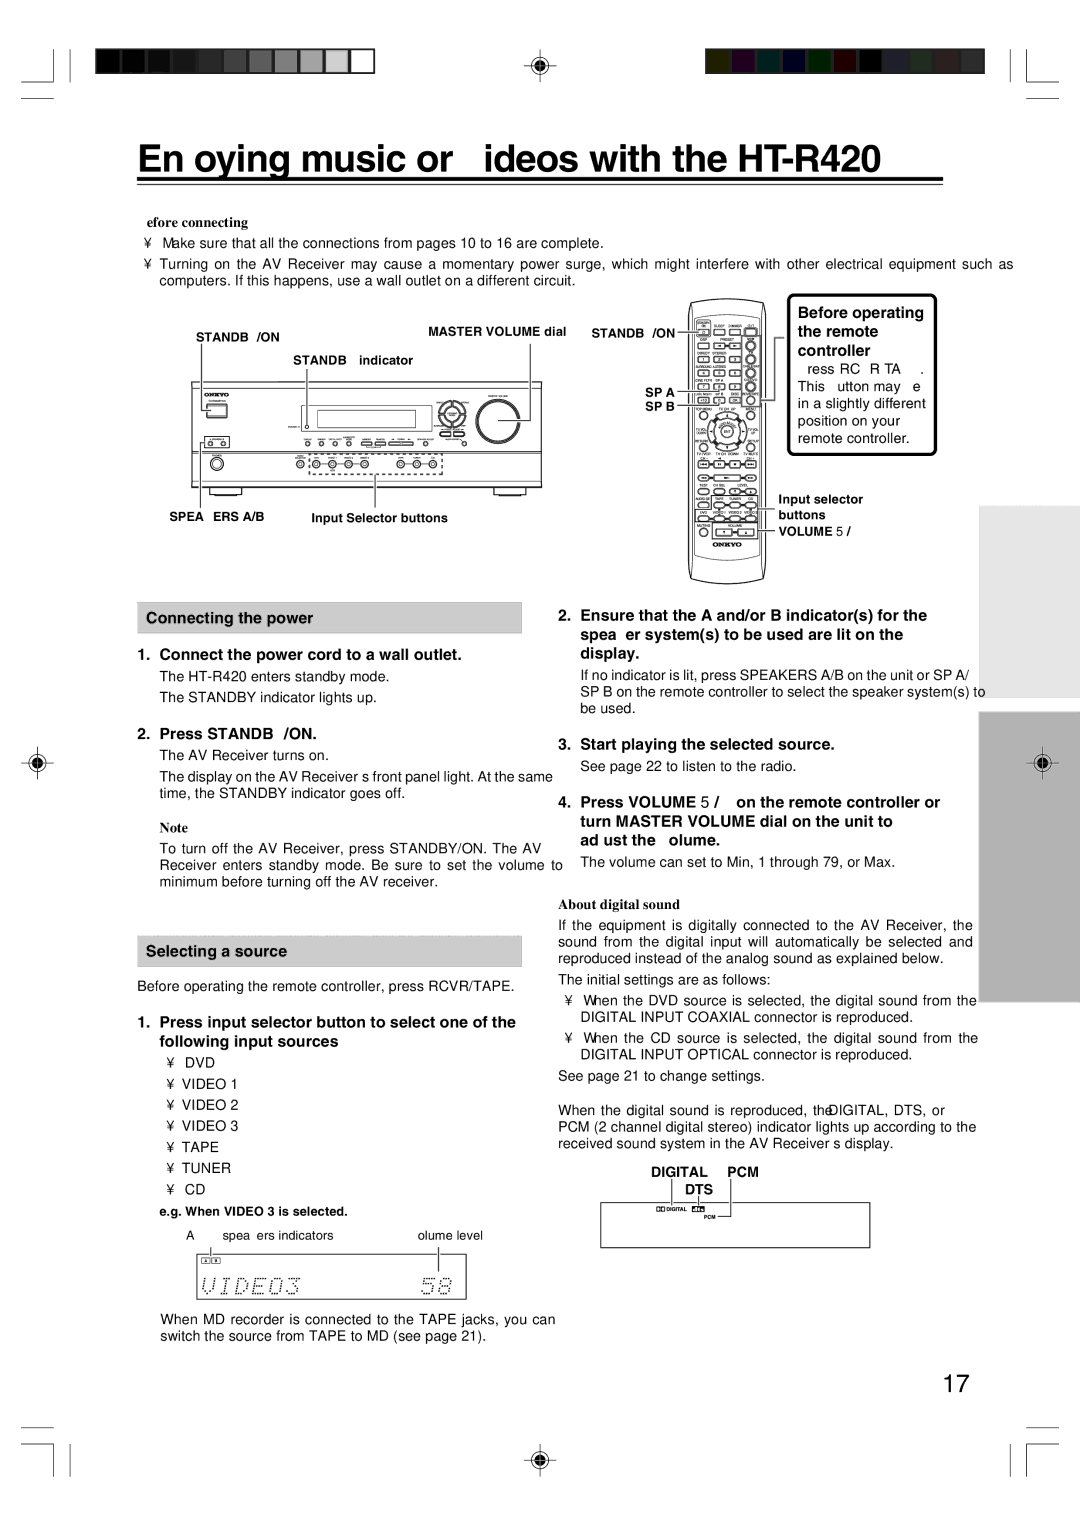
STANDBY/ON | MASTER VOLUME dial STANDBY/ON | the remote |
| controller | |
| STANDBY indicator | |
| Press RCVR/TAPE. | |
|
| |
| SP A | This button may be |
| in a slightly different | |
| SP B | |
|
| position on your |
|
| remote controller. |
|
| Input selector |
SPEAKERS A/B | Input Selector buttons | buttons |
|
| VOLUME 5/∞ |
Connecting the power
1.Connect the power cord to a wall outlet.
The
2.Ensure that the A and/or B indicator(s) for the speaker system(s) to be used are lit on the display.
If no indicator is lit, press SPEAKERS A/B on the unit or SP A/ SP B on the remote controller to select the speaker system(s) to be used.
2.Press STANDBY/ON.
The AV Receiver turns on.
The display on the AV Receiver’s front panel light. At the same time, the STANDBY indicator goes off.
Note
To turn off the AV Receiver, press STANDBY/ON. The AV Receiver enters standby mode. Be sure to set the volume to minimum before turning off the AV receiver.
Selecting a source
Before operating the remote controller, press RCVR/TAPE.
1.Press input selector button to select one of the following input sources:
•DVD
•VIDEO 1
•VIDEO 2
•VIDEO 3
•TAPE
•TUNER
•CD
e.g. When VIDEO 3 is selected.
A & B speakers indicators | Volume level | ||||
|
|
|
|
|
|
|
|
|
|
|
|
|
|
|
|
|
|
|
|
|
|
|
|
3.Start playing the selected source.
See page 22 to listen to the radio.
4.Press VOLUME 5/∞ on the remote controller or turn MASTER VOLUME dial on the unit to adjust the volume.
The volume can set to Min, 1 through 79, or Max.
About digital sound
If the equipment is digitally connected to the AV Receiver, the sound from the digital input will automatically be selected and reproduced instead of the analog sound as explained below.
The initial settings are as follows:
•When the DVD source is selected, the digital sound from the DIGITAL INPUT COAXIAL connector is reproduced.
•When the CD source is selected, the digital sound from the DIGITAL INPUT OPTICAL connector is reproduced.
See page 21 to change settings.
When the digital sound is reproduced, the ŸDIGITAL, DTS, or PCM (2 channel digital stereo) indicator lights up according to the received sound system in the AV Receiver’s display.
ŸDIGITAL PCM
DTS
When MD recorder is connected to the TAPE jacks, you can switch the source from TAPE to MD (see page 21).
17