
Upright Bagless Vacuum Cleaner specifications
The Morphy Richards Upright Bagless Vacuum Cleaner is designed to provide efficient cleaning solutions while ensuring user convenience. This innovative vacuum combines modern technology with user-friendly features to make household chores easier and more effective.One of the standout characteristics of the Morphy Richards Upright Vacuum Cleaner is its powerful suction capability. Equipped with a strong motor, this vacuum delivers excellent performance on various floor types, including carpets, hardwood, and tiles. The adjustable suction settings allow users to customize the power according to the specific cleaning needs, whether it’s removing fine dust from hard surfaces or tackling deep-set dirt in carpets.
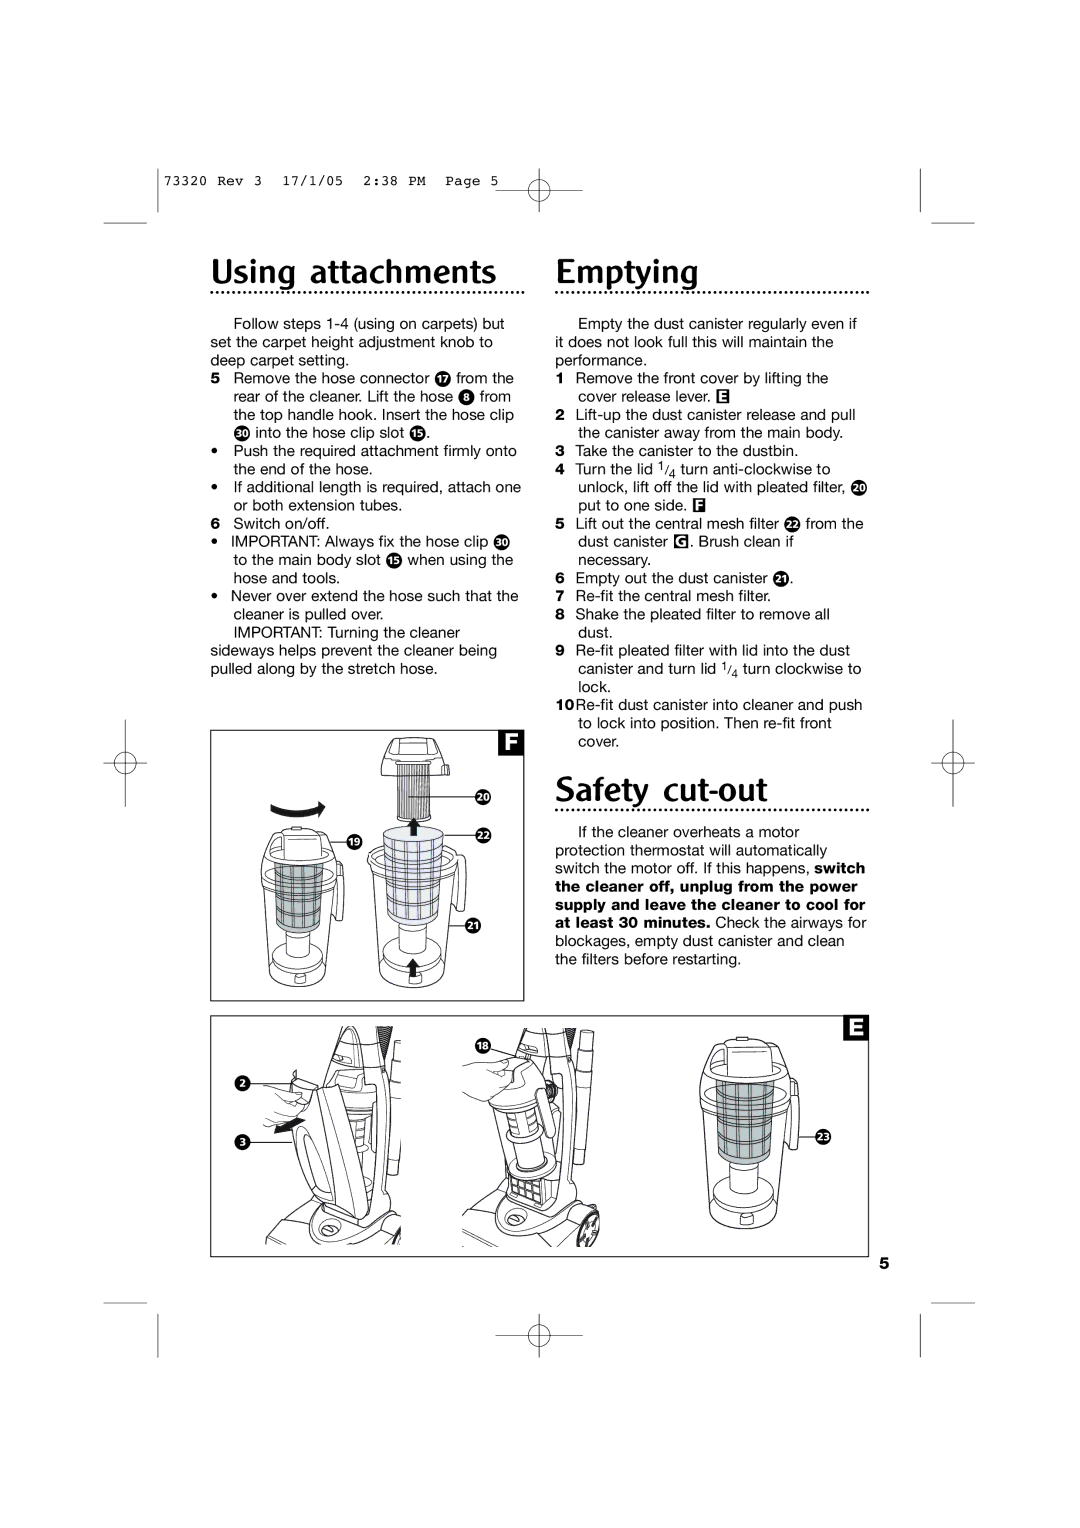
The bagless design is a significant feature that sets this vacuum apart. It eliminates the need for disposable bags, saving time and money while also being environmentally friendly. The transparent dust container allows users to see when it needs to be emptied, ensuring optimal performance at all times. With a simple release mechanism, emptying the dustbin is hassle-free, promoting better hygiene and cleanliness.
An important technological feature of the Morphy Richards Upright Vacuum is its advanced filtration system. The HEPA filter captures allergens and microscopic particles, making it an excellent choice for allergy sufferers. This filtration technology ensures that the air expelled from the vacuum is cleaner than the air in the room, contributing to a healthier living environment.
The design of the vacuum is also worth noting. It boasts a lightweight structure, which makes it easy to maneuver around the home without straining. The ergonomic handle enhances comfort during use, allowing for extended cleaning sessions without discomfort. Additionally, the vacuum features a variety of accessories, including a crevice tool and upholstery brush, tailoring the cleaning experience for various surfaces and hard-to-reach areas.
Another notable aspect of the Morphy Richards Upright Bagless Vacuum Cleaner is its low noise operation. This feature is particularly appreciated in household environments, where loud appliances can be disruptive. Users can clean their homes without disturbing family members or pets.
In summary, the Morphy Richards Upright Bagless Vacuum Cleaner combines powerful performance with user-friendly features, making it an excellent choice for anyone looking to maintain a clean and healthy home. With its bagless design, advanced filtration system, lightweight build, and versatile attachments, it stands out as a reliable option for everyday cleaning needs.