
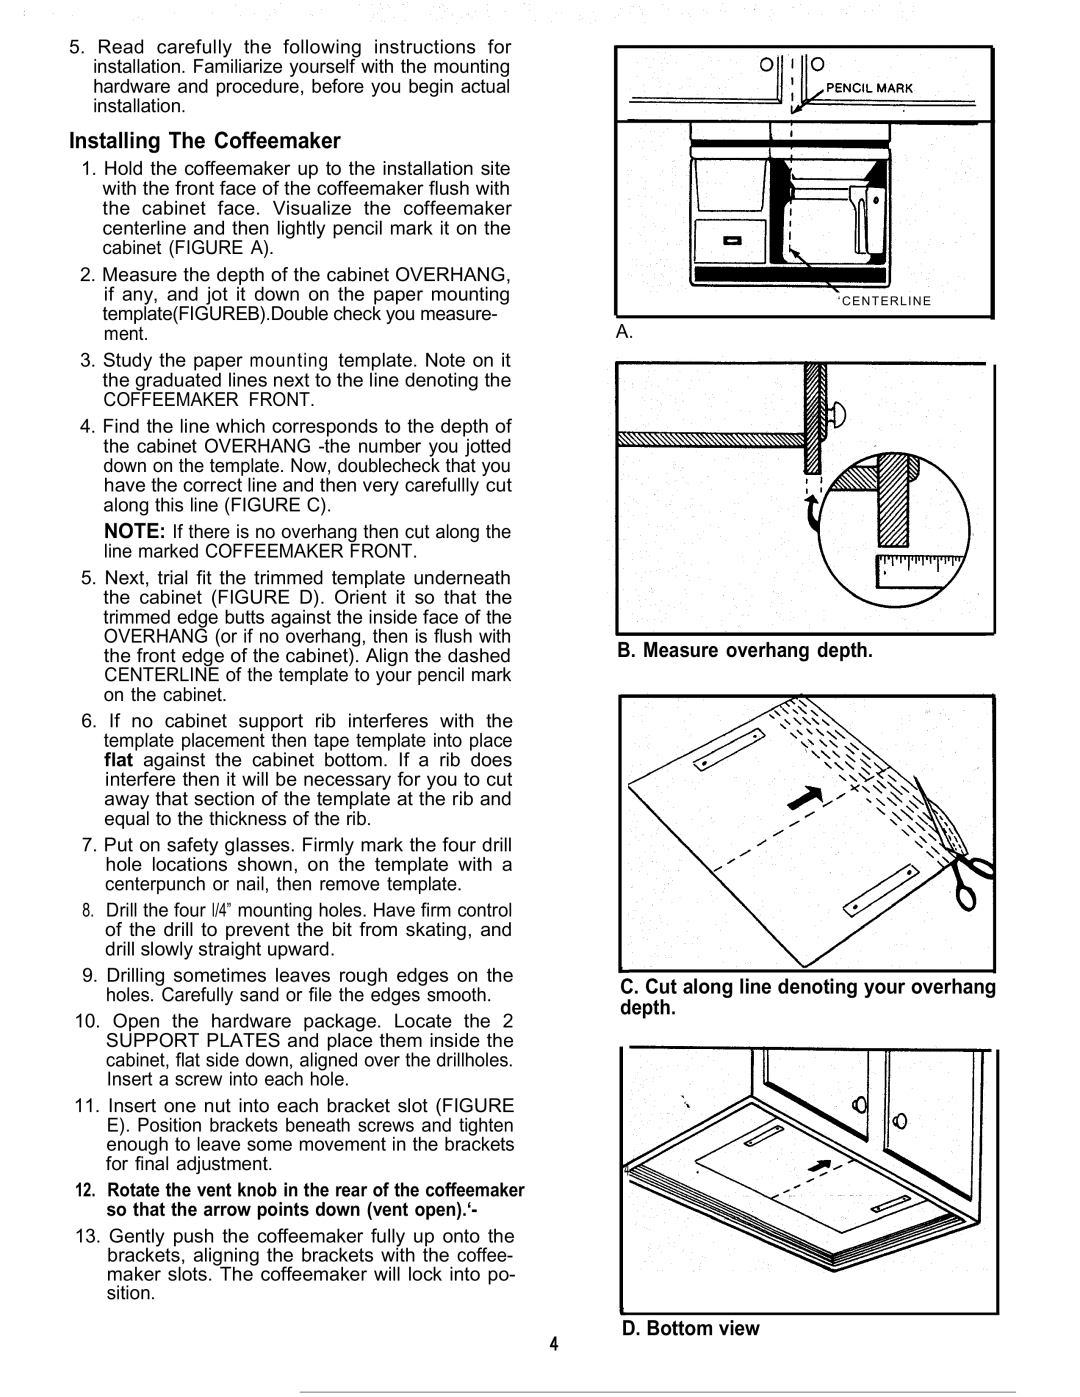
403 Series specifications
The Mr. Coffee 403 Series is a standout coffee maker that exemplifies convenience and reliability for coffee enthusiasts. Designed with the user in mind, this model combines functionality with advanced brewing technologies to deliver a consistently satisfying cup of coffee.One of the primary features of the Mr. Coffee 403 Series is its ability to brew up to 12 cups of coffee at a time. This volume makes it an ideal choice for families, office settings, or gatherings where multiple guests are present. The spacious glass carafe not only allows for ample coffee storage but also showcases the brewing process, adding aesthetic appeal to any kitchen counter.
The brewing technology integrated into the Mr. Coffee 403 Series includes an effective brewing system that ensures the perfect temperature and time for optimal flavor extraction. This model utilizes a unique brewing cycle that evenly saturates coffee grounds, maximizing their flavor potential. Additionally, the programmable timer feature allows users to set their coffee to brew at any desired time, ensuring that fresh coffee is ready right when they need it.
Another notable characteristic of the Mr. Coffee 403 Series is its user-friendly interface. The machine features an easy-to-read control panel that makes programming a breeze. With simple buttons and clear indicators, users can navigate through the settings without any hassle. Furthermore, the water reservoir includes measurement markings, allowing for precise filling and ensuring the right coffee-to-water ratio every time.
Cleaning and maintenance are also simplified with this model. The removable filter basket allows for easy disposal of used coffee grounds, and the carafe is dishwasher-safe, making cleanup straightforward.
In addition to these essential features, the Mr. Coffee 403 Series is built with durability in mind. The materials used in construction are designed to withstand daily usage, ensuring that this coffee maker will serve users faithfully for years to come.
With its combination of practicality, innovative brewing technology, and user-centered design, the Mr. Coffee 403 Series stands out in a crowded market. It caters to both the casual coffee drinker and the aficionado, making it a versatile addition to any coffee lover's kitchen arsenal. Whether for quiet mornings alone or lively gatherings with friends, the Mr. Coffee 403 Series reliably delivers the rich, flavorful coffee experience users crave.