3� In the Disk field, press <Enter> key and use <Space> key to select the disks you want to create for the RAID volume, then click <Enter> key to finish selection. This field will become available according to the selected RAID level.
4� Then select the | strip | size | for | the RAID array by using the “upper arrow” |
or “down arrow” | keys | to | scroll | through the available values, and pressing |
the <Enter> key to select and advance to the next field. The available val- ues range from 4KB to 128 KB in power of 2 increments. The strip size should be chosen based on the planned drive usage. Here are some typical values: RAID0
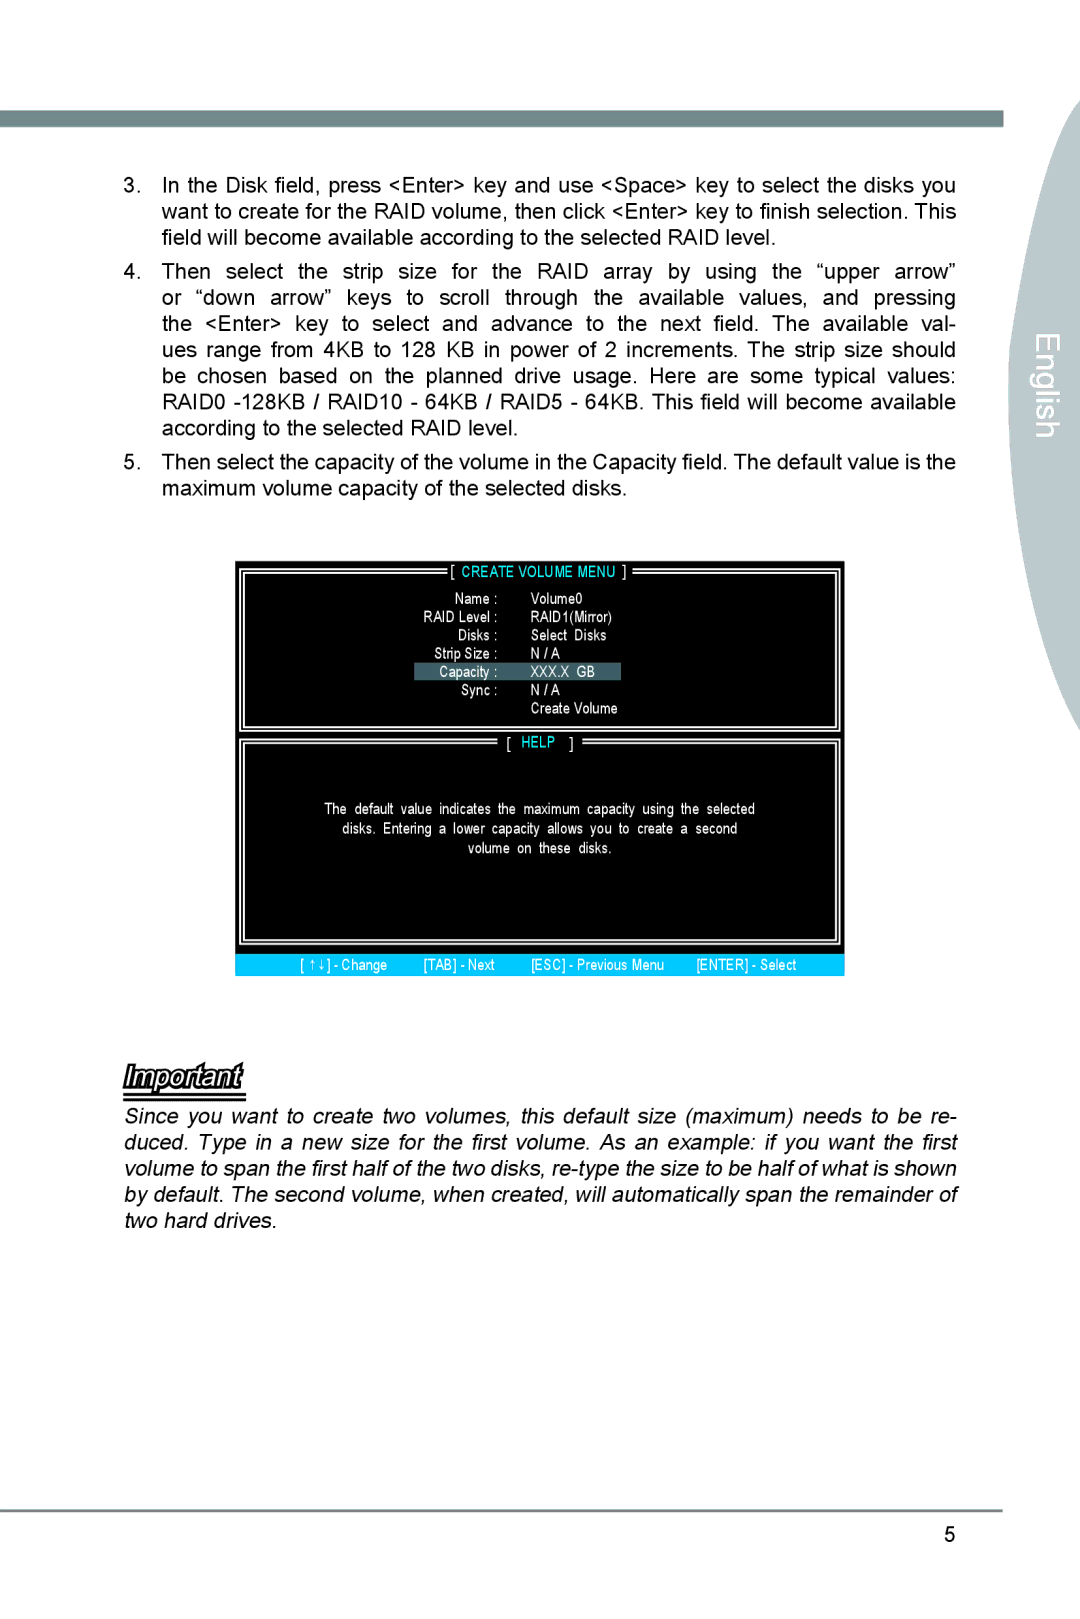
5� Then select the capacity of the volume in the Capacity field. The default value is the maximum volume capacity of the selected disks.
[ CREATE VOLUME MENU ]
Name : | Volume0 | |
RAID Level : | RAID1(Mirror) | |
Disks : | Select | Disks |
Strip Size : | N / A |
|
Capacity : | XXX.X GB | |
Sync : | N / A |
|
| Create Volume | |
[ | HELP | ] |
The default value indicates the maximum capacity using the selected
disks. Entering a lower capacity allows you to create a second
volume on these disks.
[ ↑↓] - Change | [TAB] - Next | [ESC] - Previous Menu | [ENTER] - Select |
Important
Since you want to create two volumes, this default size (maximum) needs to be re- duced. Type in a new size for the first volume. As an example: if you want the first volume to span the first half of the two disks,