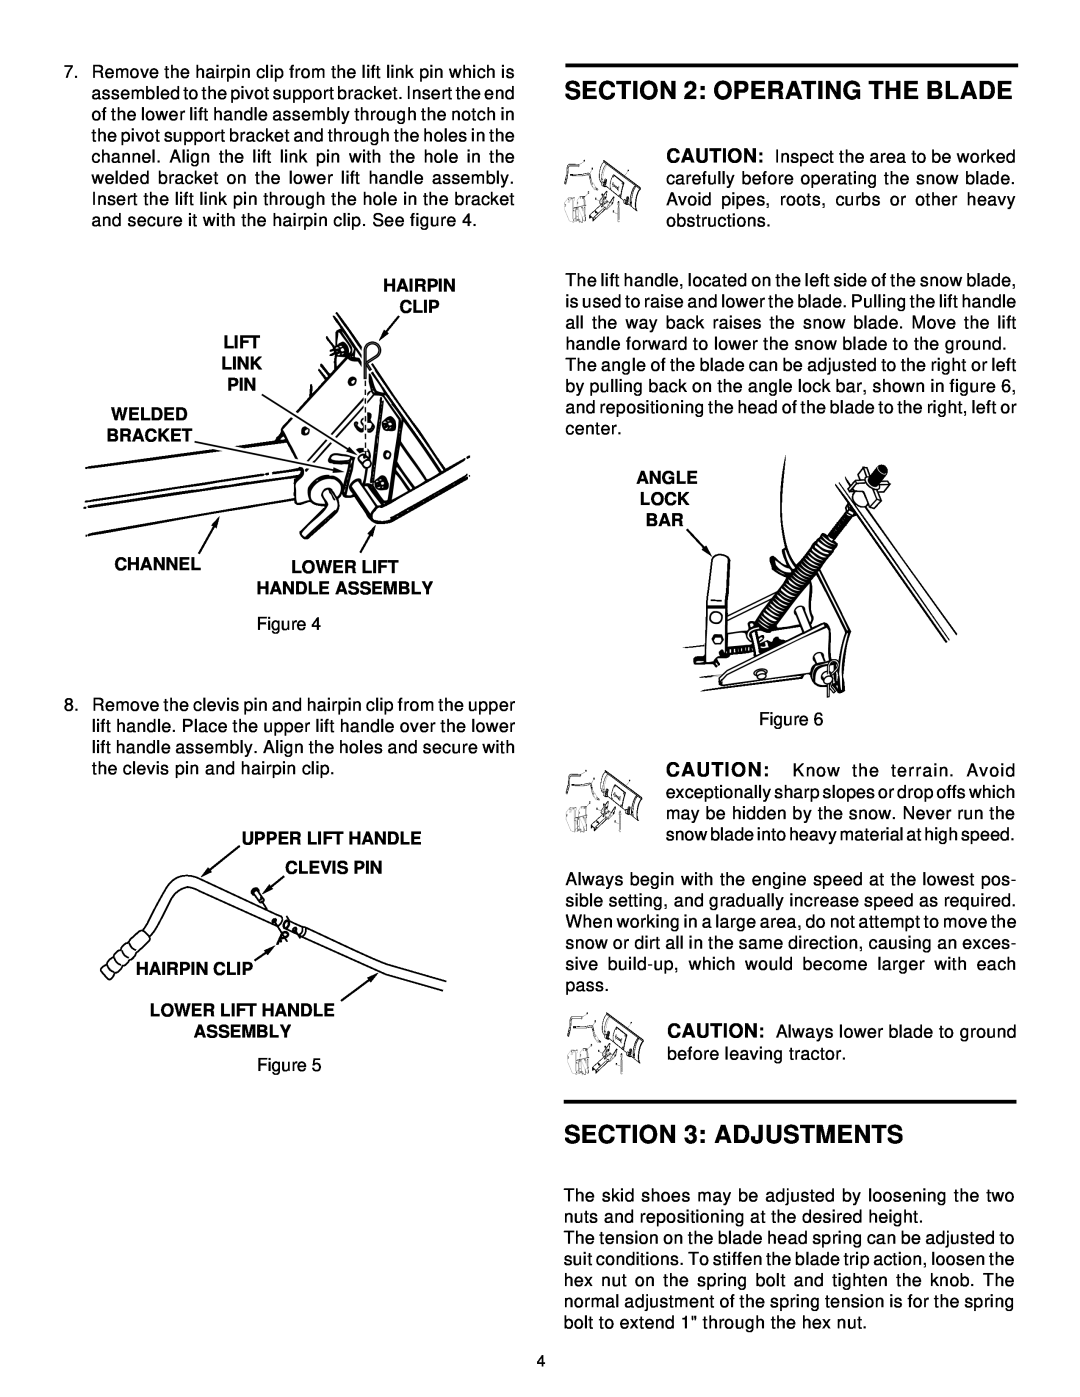
7.Remove the hairpin clip from the lift link pin which is assembled to the pivot support bracket. Insert the end of the lower lift handle assembly through the notch in the pivot support bracket and through the holes in the channel. Align the lift link pin with the hole in the welded bracket on the lower lift handle assembly. Insert the lift link pin through the hole in the bracket and secure it with the hairpin clip. See figure 4.
HAIRPIN
CLIP
LIFT
LINK
PIN
WELDED
BRACKET
CHANNEL | LOWER LIFT |
| HANDLE ASSEMBLY |
| Figure 4 |
SECTION 2: OPERATING THE BLADE
ACAUTION: Inspect the area to be worked
| B | F | carefully before operating the snow blade. |
|
|
| |
C |
|
| Avoid pipes, roots, curbs or other heavy |
| D |
| |
|
| E | obstructions. |
|
|
|
The lift handle, located on the left side of the snow blade, is used to raise and lower the blade. Pulling the lift handle all the way back raises the snow blade. Move the lift handle forward to lower the snow blade to the ground.
The angle of the blade can be adjusted to the right or left by pulling back on the angle lock bar, shown in figure 6, and repositioning the head of the blade to the right, left or center.
ANGLE
LOCK
BAR
8.Remove the clevis pin and hairpin clip from the upper lift handle. Place the upper lift handle over the lower lift handle assembly. Align the holes and secure with the clevis pin and hairpin clip.
UPPER LIFT HANDLE
CLEVIS PIN
HAIRPIN CLIP
LOWER LIFT HANDLE
ASSEMBLY
Figure 5
|
| Figure 6 |
B | F | CAUTION: Know the terrain. Avoid |
A |
|
|
C |
| exceptionally sharp slopes or drop offs which |
| may be hidden by the snow. Never run the | |
| E | |
| D |
|
|
| snow blade into heavy material at high speed. |
Always begin with the engine speed at the lowest pos- sible setting, and gradually increase speed as required. When working in a large area, do not attempt to move the snow or dirt all in the same direction, causing an exces- sive
A
B | F | CAUTION: Always lower blade to ground |
|
| |
C |
| before leaving tractor. |
D |
| |
| E |
|
SECTION 3: ADJUSTMENTS
The skid shoes may be adjusted by loosening the two nuts and repositioning at the desired height.
The tension on the blade head spring can be adjusted to suit conditions. To stiffen the blade trip action, loosen the hex nut on the spring bolt and tighten the knob. The normal adjustment of the spring tension is for the spring bolt to extend 1" through the hex nut.
4