Carriage Bolt
Wing Nut
Weld Pin![]()
![]()
![]()
![]()
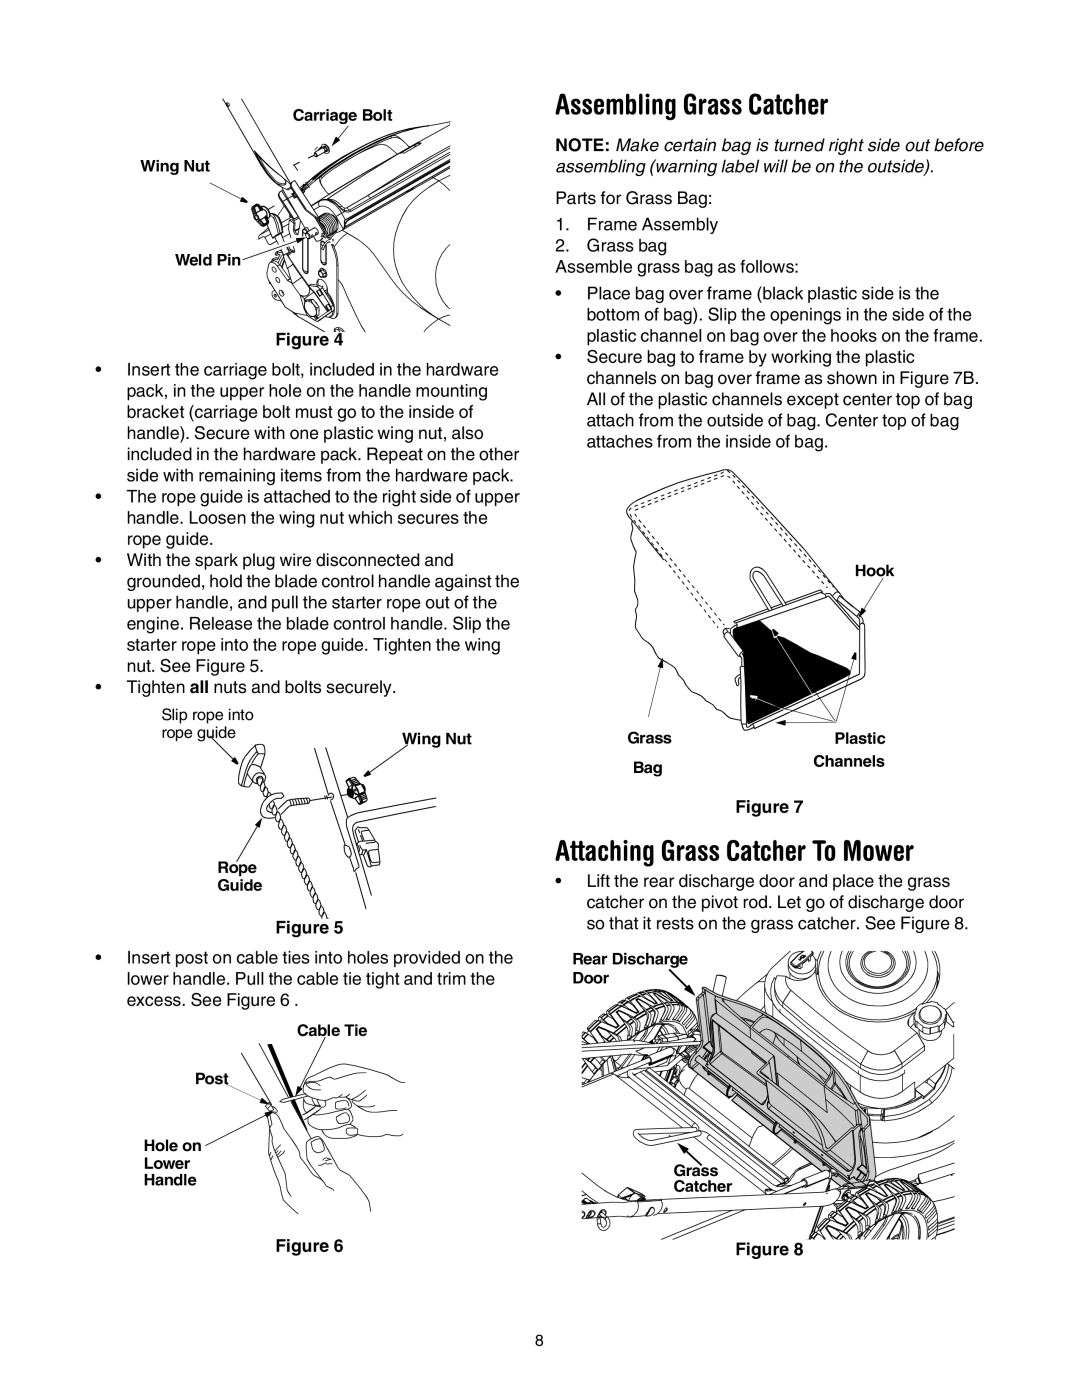
Figure 4
•Insert the carriage bolt, included in the hardware pack, in the upper hole on the handle mounting bracket (carriage bolt must go to the inside of handle). Secure with one plastic wing nut, also included in the hardware pack. Repeat on the other side with remaining items from the hardware pack.
•The rope guide is attached to the right side of upper handle. Loosen the wing nut which secures the rope guide.
•With the spark plug wire disconnected and grounded, hold the blade control handle against the upper handle, and pull the starter rope out of the engine. Release the blade control handle. Slip the starter rope into the rope guide. Tighten the wing nut. See Figure 5.
•Tighten all nuts and bolts securely.
Slip rope into |
|
rope guide | Wing Nut |
|
Rope
Guide
Figure 5
•Insert post on cable ties into holes provided on the lower handle. Pull the cable tie tight and trim the excess. See Figure 6 .
Cable Tie
Post
Hole on ![]()
Lower
Handle
Figure 6
Assembling Grass Catcher
NOTE: Make certain bag is turned right side out before assembling (warning label will be on the outside).
Parts for Grass Bag:
1.Frame Assembly
2.Grass bag
Assemble grass bag as follows:
•Place bag over frame (black plastic side is the bottom of bag). Slip the openings in the side of the plastic channel on bag over the hooks on the frame.
•Secure bag to frame by working the plastic channels on bag over frame as shown in Figure 7B. All of the plastic channels except center top of bag attach from the outside of bag. Center top of bag attaches from the inside of bag.
Hook
GrassPlastic
BagChannels
Figure 7
Attaching Grass Catcher To Mower
•Lift the rear discharge door and place the grass catcher on the pivot rod. Let go of discharge door so that it rests on the grass catcher. See Figure 8.
Rear Discharge
Door
Grass
Catcher
Figure 8
8
