
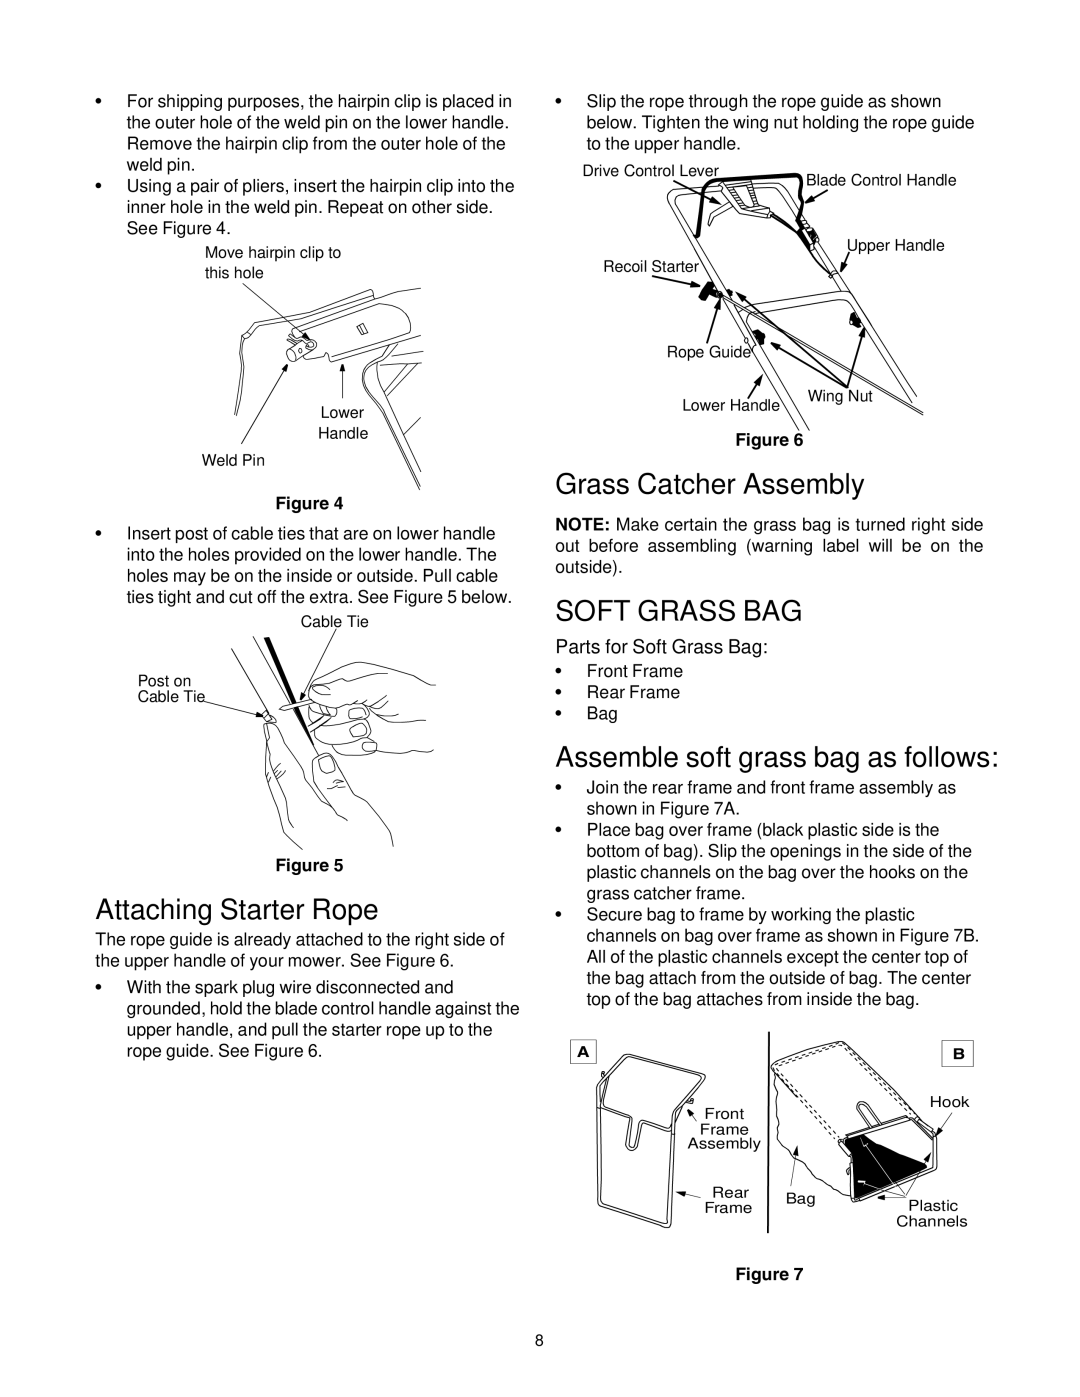
440 Thru E459 specifications
The MTD 440 through E459 series represents a significant advancement in the realm of mid-range tractors, tailored for both agricultural and industrial applications. This series encapsulates a blend of power, efficiency, and advanced technology, making it a preferred choice for farmers and professionals alike.One of the standout features of the MTD 440 to E459 series is its robust engine performance. The series is equipped with a high-efficiency, four-stroke diesel engine that boasts increased torque and horsepower while maintaining excellent fuel economy. This powertrain is designed to handle demanding tasks, whether it's plowing, tilling, or moving heavy loads. The engines are also compliant with global emission standards, ensuring that they contribute to a cleaner environment.
In addition to its powerful engines, the series showcases advanced transmission options. The MTD tractors come with a choice of manual and hydraulic gear systems, providing operators with flexibility and control. The intuitive design of the gear shifting mechanism enhances ease of use, allowing for smooth transitions between gears, which is particularly beneficial during complex agricultural tasks.
The MTD 440 through E459 series also incorporates cutting-edge technologies that enhance user experience. One notable feature is the integrated smart display dashboard, which offers real-time monitoring of crucial parameters such as fuel levels, engine temperature, and diagnostic alerts. This allows operators to maintain optimal performance and address any issues before they escalate.
Comfort and ergonomics are also priorities in the design of this series. The spacious cabin provides excellent visibility and is equipped with adjustable seating, climate control, and noise-reducing features to ensure a pleasant working environment, even during long hours of operation. Additionally, the tractors come with user-friendly controls that are easily accessible, enabling operators to focus on their tasks without distraction.
The durability of the MTD 440 to E459 series cannot be overstated. Constructed with high-quality materials, these tractors are built to withstand harsh working conditions. Features such as reinforced chassis, improved suspension systems, and weather-resistant components contribute to their longevity and reliability in the field.
Safety is another critical aspect of the MTD series. These tractors come equipped with essential safety features such as roll-over protective structures (ROPS), multiple braking systems, and well-designed lighting for improved visibility during nighttime operations.
In summary, the MTD 440 through E459 series combines power, efficiency, and advanced technology to deliver an exceptional mid-range tractor solution. With its robust engine performance, versatile transmission options, user-friendly technology, comfort features, and solid safety measures, it stands out as a reliable choice for those in need of a dependable agricultural or industrial machine.