SP1E16A specifications
The Multiquip SP1E16A is engineered to meet the demands of professionals seeking reliable and efficient equipment for concrete and masonry projects. This innovative concrete saw combines powerful performance with advanced features that enhance productivity and precision in cutting tasks.One of the standout features of the SP1E16A is its robust engine. Powered by a high-performance 16 horsepower engine, this saw ensures consistent power delivery, allowing users to handle various cutting applications effortlessly. Its impressive engine is complemented by a heavy-duty belt drive system, which contributes to increased reliability and reduced maintenance needs, extending the life of the saw under demanding conditions.
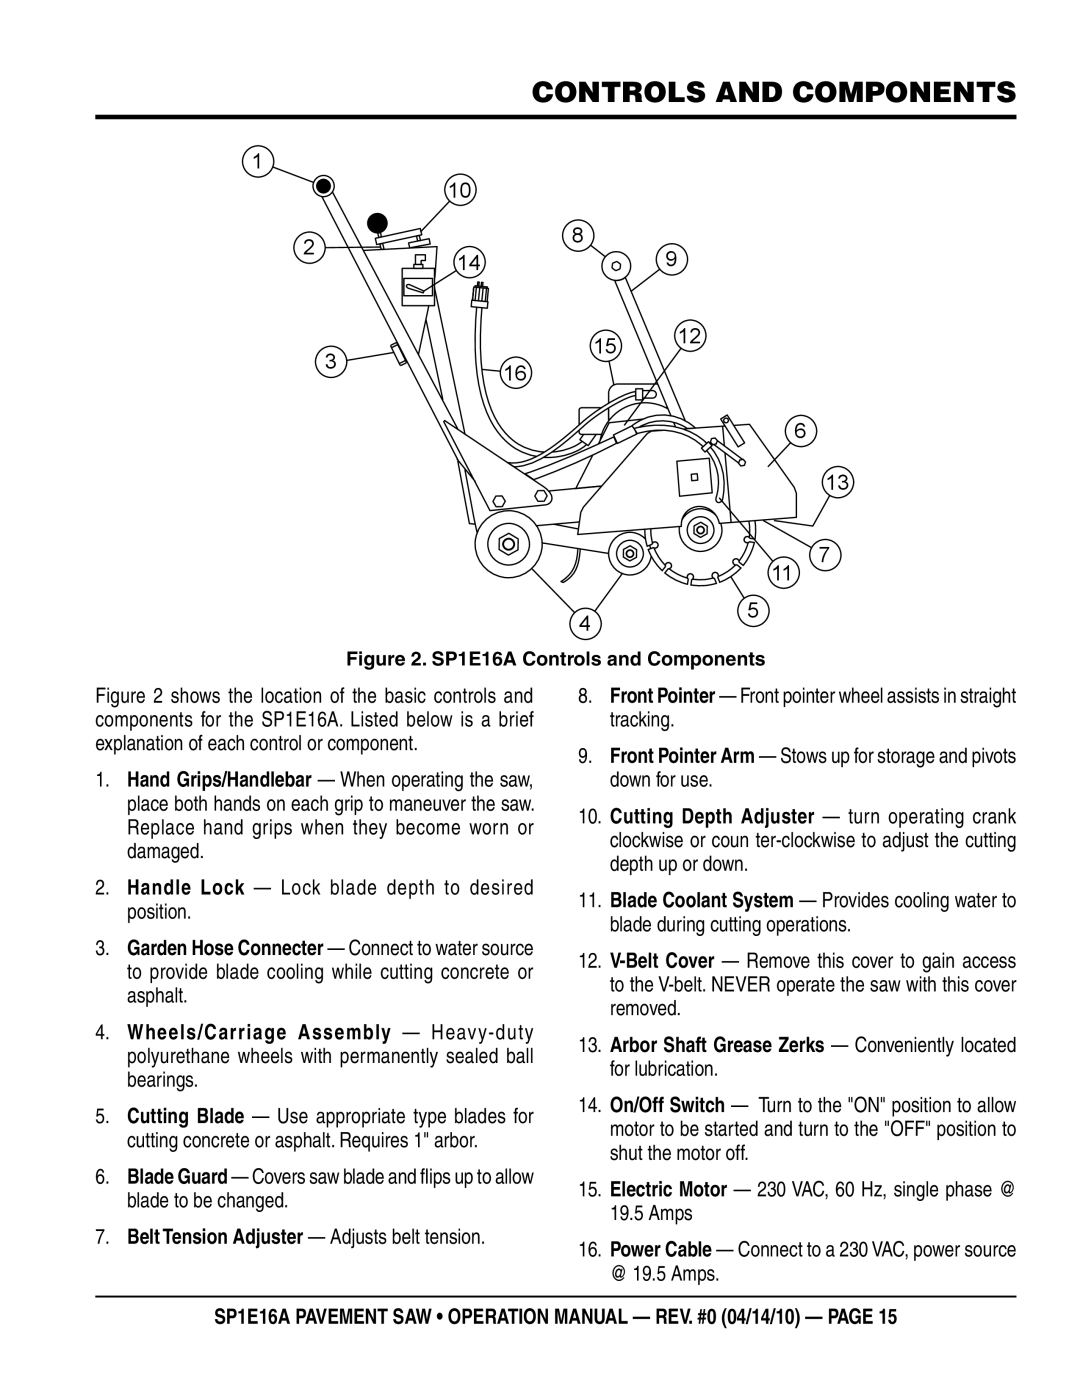
The SP1E16A is designed with user comfort and ease of operation in mind. It features an ergonomic handle with rubber grips that reduce vibration and provide excellent control during operation. The saw also includes an adjustable cutting depth feature, allowing for precise cuts at different depths, making it adaptable for various materials, including asphalt and concrete. The ability to adjust cutting depth not only enhances versatility but also improves the efficiency of operations.
Durability is a key characteristic of the Multiquip SP1E16A. It boasts a solid steel frame construction that withstands the rigors of job site environments. This sturdy design ensures that the saw can handle heavy use without compromising performance. Additionally, the saw is equipped with a water delivery system that minimizes dust and debris during cutting, promoting safer working conditions and improved visibility.
Another technological advancement integrated into the SP1E16A is its easy blade change system. This feature simplifies switching blades, significantly reducing downtime between cuts. Operators can swiftly adapt to different job requirements, enhancing overall productivity.
Furthermore, the SP1E16A incorporates safety mechanisms, such as blade guards and emergency stop switches, ensuring that operators can work with confidence. It also complies with industry safety standards, providing peace of mind while on the job.
In summary, the Multiquip SP1E16A is a powerful and versatile concrete saw designed for professionals seeking efficiency, durability, and user-friendly features. With its robust engine, adjustable cutting depth, ergonomic design, and enhanced safety features, the SP1E16A stands out as a reliable tool for any concrete cutting application, making it an essential addition to the toolkit of contractors and builders alike.

