blades

BLADE PLACEMENT

1.Blade Guard — Pivot the blade guard front cover all the way back. The guard tension spring will keep the front cover in position.

2.Blade Hex Nut — Unscrew the blade shaft nut (right side loosens clockwise and tightens counter-clockwise while the left side loosens counter-clockwise and tightens clockwise. DO NOT overtighten the nut (approximately 45-50 ft. lb/61-68 N/m) when finalizing the assembly.

3.Outside Blade Flange (Collar) — Ensure that the outside blade flange is placed flush against the diamond blade.The inside surface of the flange must be free of debris and permit a tight closure on the surface of the blade core.

4.Diamond Blade — Ensure that the proper diamond blade has been selected for the job. Pay close attention to the directional arrows on the blade. The blade's operating directional arrows must point in a "down- cutting" direction to perform correctly. When placing the blade onto the blade shaft, ensure the arbor hole of the blade matches the diameter of the shaft.

5.Inner Flange (Collar) — This flange is fixed upon the blade shaft. The inside surface of the flange must be free of debris and permit a tight closure on the surface of the blade.

Blade Speed

A diamond blade’s performance is directly connected to specific peripheral (rim) speeds.

The following shaft rotational speeds have been factory set to ensure optimum blade performance.

SP1E16A 16-inch (406.4 mm) Capacity – 2,718 RPM

NOTICE

The following steps should be accomplished before using the saw on any cutting surface.

WARNING

Dropping or forcing the blade onto the cutting surface can severely damage the diamond blade and may cause serious damage to the saw and bodily harm.

Blade Removal and Replacement

CAUTION

ALWAYS ensure that unit is unplugged (disconnected) when installing blade.

1.Set the motor ON/OFF switches to the OFF position to prevent accidental starting.

2.Place the saw on a stable level working surface.

3.Ensure the blade is raised and the raise/lower crank is locked into position.

NOTICE

When removing or installing a diamond blade, please note that the blade retaining nuts are left and right-hand threaded.

4.Lift up the blade guard cover to gain access to the blade.

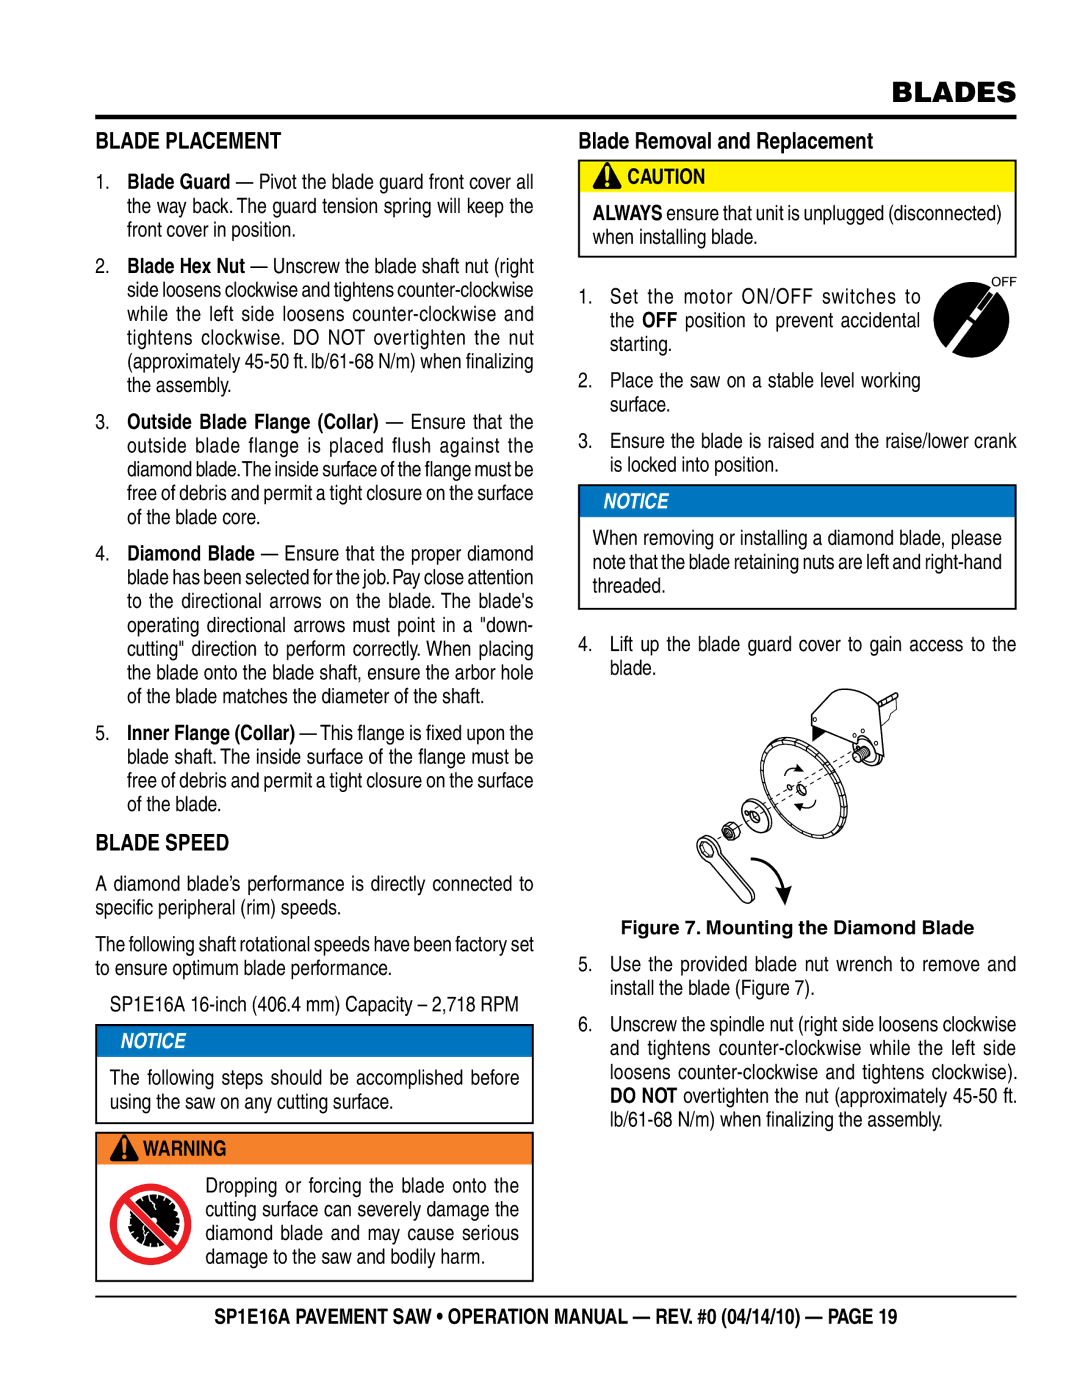
Figure 7. Mounting the Diamond Blade

5.Use the provided blade nut wrench to remove and install the blade (Figure 7).

6.Unscrew the spindle nut (right side loosens clockwise and tightens counter-clockwise while the left side loosens counter-clockwise and tightens clockwise). DO NOT overtighten the nut (approximately 45-50 ft. lb/61-68 N/m) when finalizing the assembly.

SP1E16A PAVEMENT SAW • operation manual — rev. #0 (04/14/10) — page 19

Page 19
Image 19
Multiquip SP1E16A operation manual Blade Speed, Blade Removal and Replacement

SP1E16A specifications

The Multiquip SP1E16A is engineered to meet the demands of professionals seeking reliable and efficient equipment for concrete and masonry projects. This innovative concrete saw combines powerful performance with advanced features that enhance productivity and precision in cutting tasks.

One of the standout features of the SP1E16A is its robust engine. Powered by a high-performance 16 horsepower engine, this saw ensures consistent power delivery, allowing users to handle various cutting applications effortlessly. Its impressive engine is complemented by a heavy-duty belt drive system, which contributes to increased reliability and reduced maintenance needs, extending the life of the saw under demanding conditions.

The SP1E16A is designed with user comfort and ease of operation in mind. It features an ergonomic handle with rubber grips that reduce vibration and provide excellent control during operation. The saw also includes an adjustable cutting depth feature, allowing for precise cuts at different depths, making it adaptable for various materials, including asphalt and concrete. The ability to adjust cutting depth not only enhances versatility but also improves the efficiency of operations.

Durability is a key characteristic of the Multiquip SP1E16A. It boasts a solid steel frame construction that withstands the rigors of job site environments. This sturdy design ensures that the saw can handle heavy use without compromising performance. Additionally, the saw is equipped with a water delivery system that minimizes dust and debris during cutting, promoting safer working conditions and improved visibility.

Another technological advancement integrated into the SP1E16A is its easy blade change system. This feature simplifies switching blades, significantly reducing downtime between cuts. Operators can swiftly adapt to different job requirements, enhancing overall productivity.

Furthermore, the SP1E16A incorporates safety mechanisms, such as blade guards and emergency stop switches, ensuring that operators can work with confidence. It also complies with industry safety standards, providing peace of mind while on the job.

In summary, the Multiquip SP1E16A is a powerful and versatile concrete saw designed for professionals seeking efficiency, durability, and user-friendly features. With its robust engine, adjustable cutting depth, ergonomic design, and enhanced safety features, the SP1E16A stands out as a reliable tool for any concrete cutting application, making it an essential addition to the toolkit of contractors and builders alike.