MAINTENANCE
Lubrication
Your Snowthrower does not require any lubrication for the life of the Snowthrower.
Replacing Impeller Blades
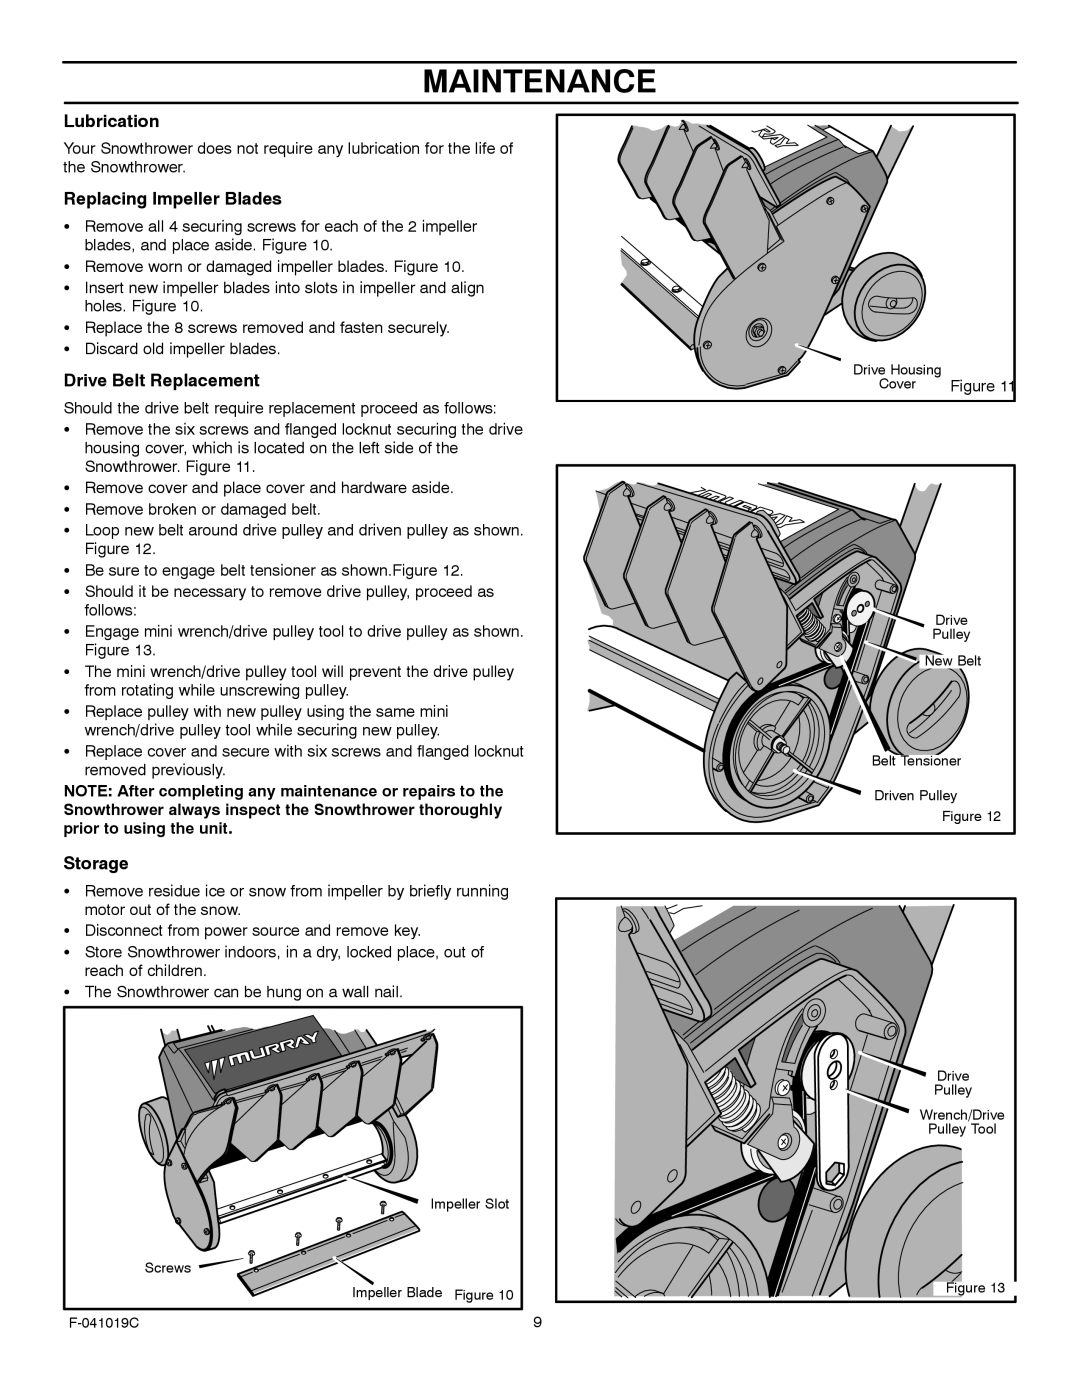
SRemove all 4 securing screws for each of the 2 impeller blades, and place aside. Figure 10.
SRemove worn or damaged impeller blades. Figure 10.
SInsert new impeller blades into slots in impeller and align holes. Figure 10.
SReplace the 8 screws removed and fasten securely.
SDiscard old impeller blades.
Drive Belt Replacement
Should the drive belt require replacement proceed as follows:
SRemove the six screws and flanged locknut securing the drive housing cover, which is located on the left side of the Snowthrower. Figure 11.
SRemove cover and place cover and hardware aside.
SRemove broken or damaged belt.
SLoop new belt around drive pulley and driven pulley as shown. Figure 12.
SBe sure to engage belt tensioner as shown.Figure 12.
SShould it be necessary to remove drive pulley, proceed as follows:
SEngage mini wrench/drive pulley tool to drive pulley as shown. Figure 13.
SThe mini wrench/drive pulley tool will prevent the drive pulley from rotating while unscrewing pulley.
SReplace pulley with new pulley using the same mini wrench/drive pulley tool while securing new pulley.
SReplace cover and secure with six screws and flanged locknut removed previously.
NOTE: After completing any maintenance or repairs to the Snowthrower always inspect the Snowthrower thoroughly prior to using the unit.
Drive Housing | |
Cover | Figure 11 |
| Drive |
| Pulley |
| New Belt |
Belt Tensioner | |
Driven Pulley | |
| Figure 12 |
Storage
SRemove residue ice or snow from impeller by briefly running motor out of the snow.
SDisconnect from power source and remove key.
SStore Snowthrower indoors, in a dry, locked place, out of reach of children.
SThe Snowthrower can be hung on a wall nail.
Impeller Slot
Screws |
|
Impeller Blade | Figure 10 |
9 |
Drive
Pulley
Wrench/Drive
Pulley Tool
Figure 13
