OPERATION |
|
|
| ||
HOW TO START THE ENGINE | NOTE: If engine fails to start after three | ||||
NOTE: DO NOT BE ALARMED, your engine | pulls, push the primer button two times and | ||||
again pull the recoil starter handle. |
| ||||
will smoke the first time it is started. It is |
| ||||
|
|
|
| ||
burning off the protective coating that is on | WARNING: Never run the en- | ||||
the internal engine parts. | gine indoors or in a poorly venti- | ||||
WARNING: Never leave the trim- | lated area. Engine exhaust con- | ||||
tains | carbon | monoxide, | an | ||
mer unattended while the engine | |||||
odorless and deadly gas. Keep | |||||
is running. Wait for the trimmer | |||||
hands, | feet, | hair and loose | |||
lines to stop rotation. | |||||
clothing away from the trimmer | |||||
| |||||
1. Before each use, remove debris from the | and any moving parts on the en- | ||||
gine. Avoid the muffler and sur- | |||||
debris screen shown in NO TAG. Debris | rounding areas. Temperatures | ||||
can cause the engine to overheat. Wipe |
|
| ° |
| |
the debris screen with a cloth or paper | may exceed 150 F. |
| |||
|
|
|
| ||
towel. |
|
|
|
| |
2. Move the throttle control lever forward to |
|
|
|
| |
the START or FAST position. |
|
|
|
| |
3. To start a cold engine, push the primer but- |
|
|
|
| |
ton five times. Wait two seconds between |
|
|
|
| |
each push of the primer button. |
|
|
|
| |
NOTE: Do not use the primer to start a |
|
|
|
| |
warm engine. |
|
|
|
| |
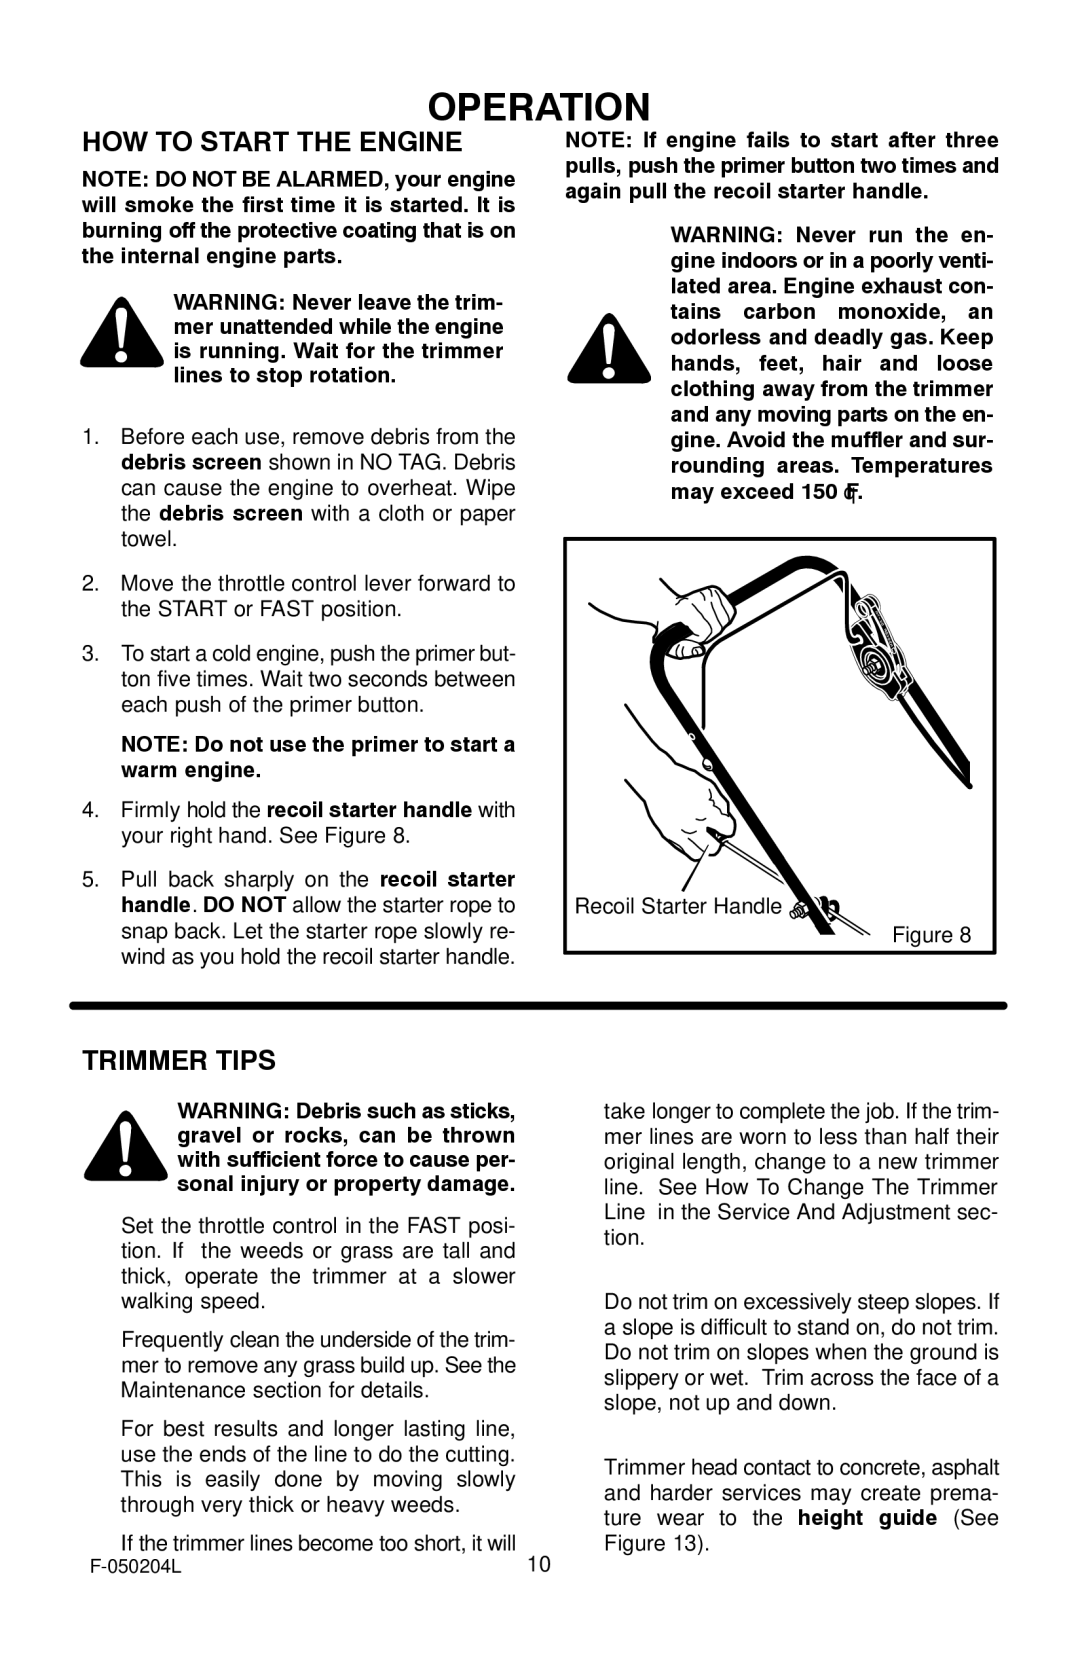
4. Firmly hold the recoil starter handle with |
|
|
|
| |
your right hand. See Figure 8. |
|
|
|
| |
5. Pull back sharply on the recoil starter |
|
|
|
| |
handle. DO NOT allow the starter rope to | Recoil Starter Handle |
|
| ||
snap back. Let the starter rope slowly re- |
|
| Figure 8 | ||
wind as you hold the recoil starter handle. |
|
|
|
| |
TRIMMER TIPS
WARNING: Debris such as sticks, | take longer to complete the job. If the trim- | |
gravel or rocks, can be thrown | mer lines are worn to less than half their | |
with sufficient force to cause per- | original length, change to a new trimmer | |
sonal injury or property damage. | line. “See How To Change The Trimmer | |
S Set the throttle control in the FAST posi- | Line” in the Service And Adjustment sec- | |
tion. | ||
tion. If the weeds or grass are tall and | ||
| ||
thick, operate the trimmer at a slower |
| |
walking speed. | S Do not trim on excessively steep slopes. If | |
S Frequently clean the underside of the trim- | a slope is difficult to stand on, do not trim. | |
Do not trim on slopes when the ground is | ||
mer to remove any grass build up. See the | ||
slippery or wet. Trim across the face of a | ||
Maintenance section for details. | ||
slope, not up and down. | ||
|
SFor best results and longer lasting line,
use the ends of the line to do the cutting. | S Trimmer head contact to concrete, asphalt | |
This is easily done by moving slowly | ||
and harder services may create prema- | ||
through very thick or heavy weeds. | ||
ture wear to the height guide (See | ||
| ||
S If the trimmer lines become too short, it will | Figure 13). | |
10 |
