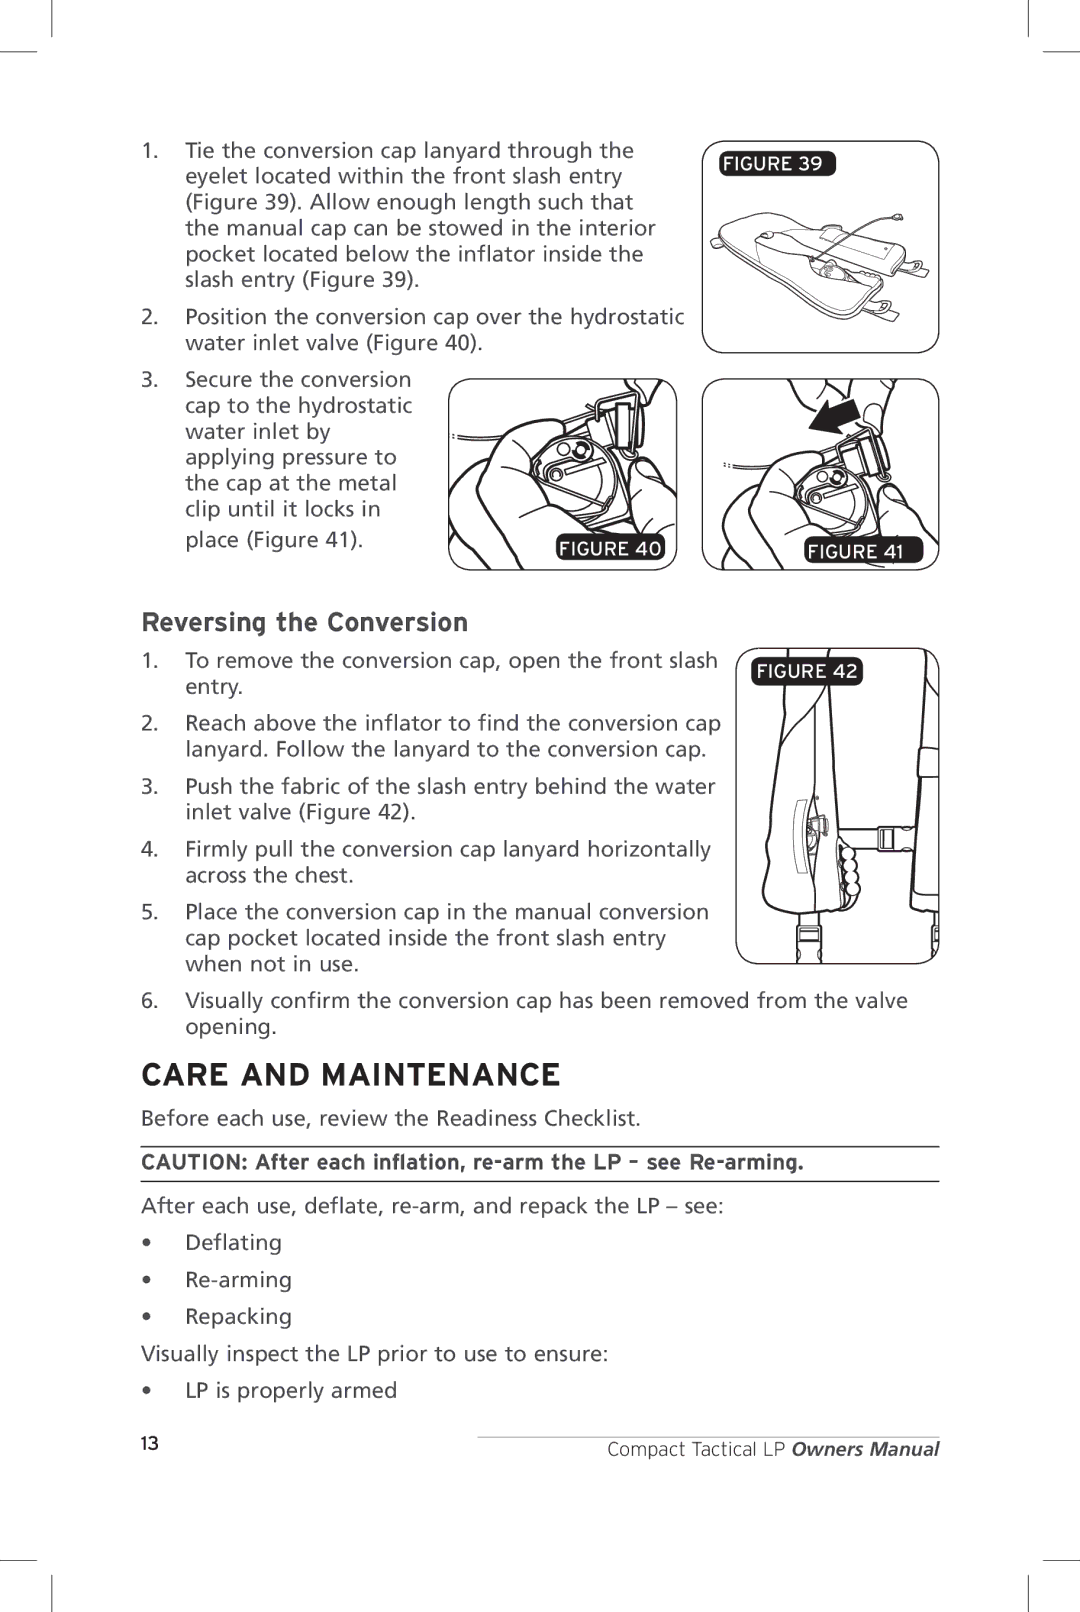
1.Tie the conversion cap lanyard through the eyelet located within the front slash entry (Figure 39). Allow enough length such that the manual cap can be stowed in the interior pocket located below the inflator inside the slash entry (Figure 39).
2.Position the conversion cap over the hydrostatic water inlet valve (Figure 40).
3. Secure the conversion cap to the hydrostatic water inlet by applying pressure to the cap at the metal clip until it locks in
place (Figure 41). | FIGURE 40 |
|
FIGURE 39
FIGURE 41
Reversing the Conversion |
| |
1. To remove the conversion cap, open the front slash | FIGURE 42 | |
entry. | ||
|
2.Reach above the inflator to find the conversion cap lanyard. Follow the lanyard to the conversion cap.
3.Push the fabric of the slash entry behind the water inlet valve (Figure 42).
4. Firmly pull the conversion cap lanyard horizontally across the chest.
5. Place the conversion cap in the manual conversion
cap pocket located inside the front slash entry when not in use.
6.Visually confirm the conversion cap has been removed from the valve opening.
CARE AND MAINTENANCE
Before each use, review the Readiness Checklist.
CAUTION: After each inflation,
After each use, deflate,
•Deflating
•
•Repacking
Visually inspect the LP prior to use to ensure:
•LP is properly armed
13 |
|
Compact Tactical LP Owners Manual |
