30
9.
12 X (M5 X 8)
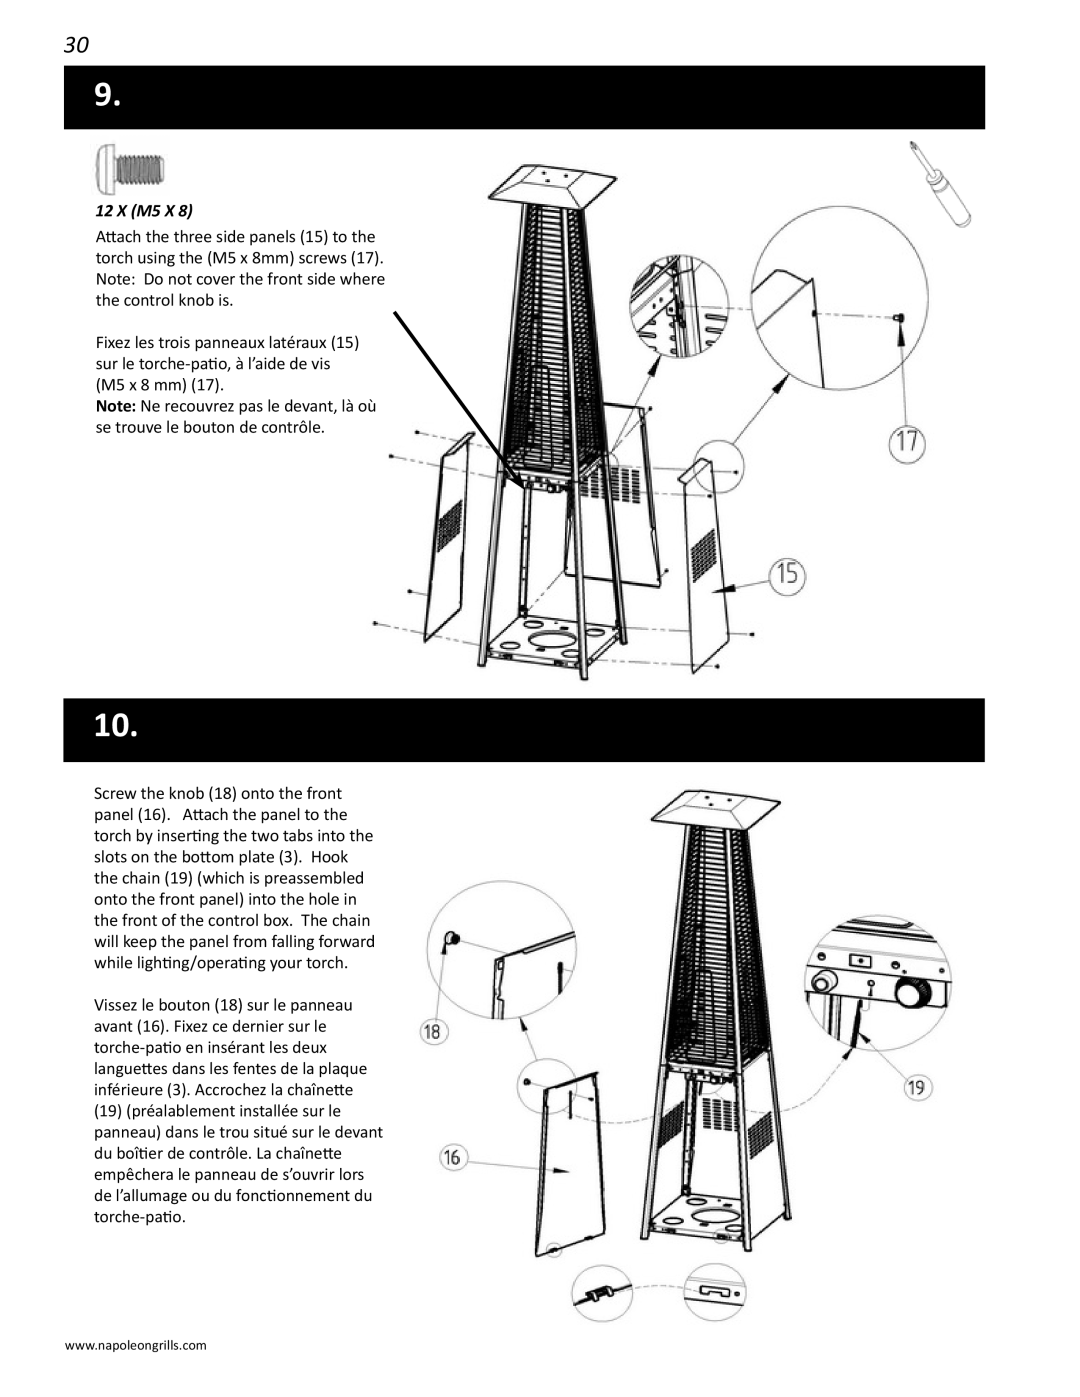
Attach the three side panels (15) to the torch using the (M5 x 8mm) screws (17). Note: Do not cover the front side where the control knob is.
Fixez les trois panneaux latéraux (15) sur le
Note: Ne recouvrez pas le devant, là où se trouve le bouton de contrôle.
10.
Screw the knob (18) onto the front panel (16). Attach the panel to the torch by inserting the two tabs into the slots on the bottom plate (3). Hook the chain (19) (which is preassembled onto the front panel) into the hole in the front of the control box. The chain will keep the panel from falling forward while lighting/operating your torch.
Vissez le bouton (18) sur le panneau avant (16). Fixez ce dernier sur le
(19)(préalablement installée sur le panneau) dans le trou situé sur le devant du boîtier de contrôle. La chaînette empêchera le panneau de s’ouvrir lors de l’allumage ou du fonctionnement du
www.napoleongrills.com
