5
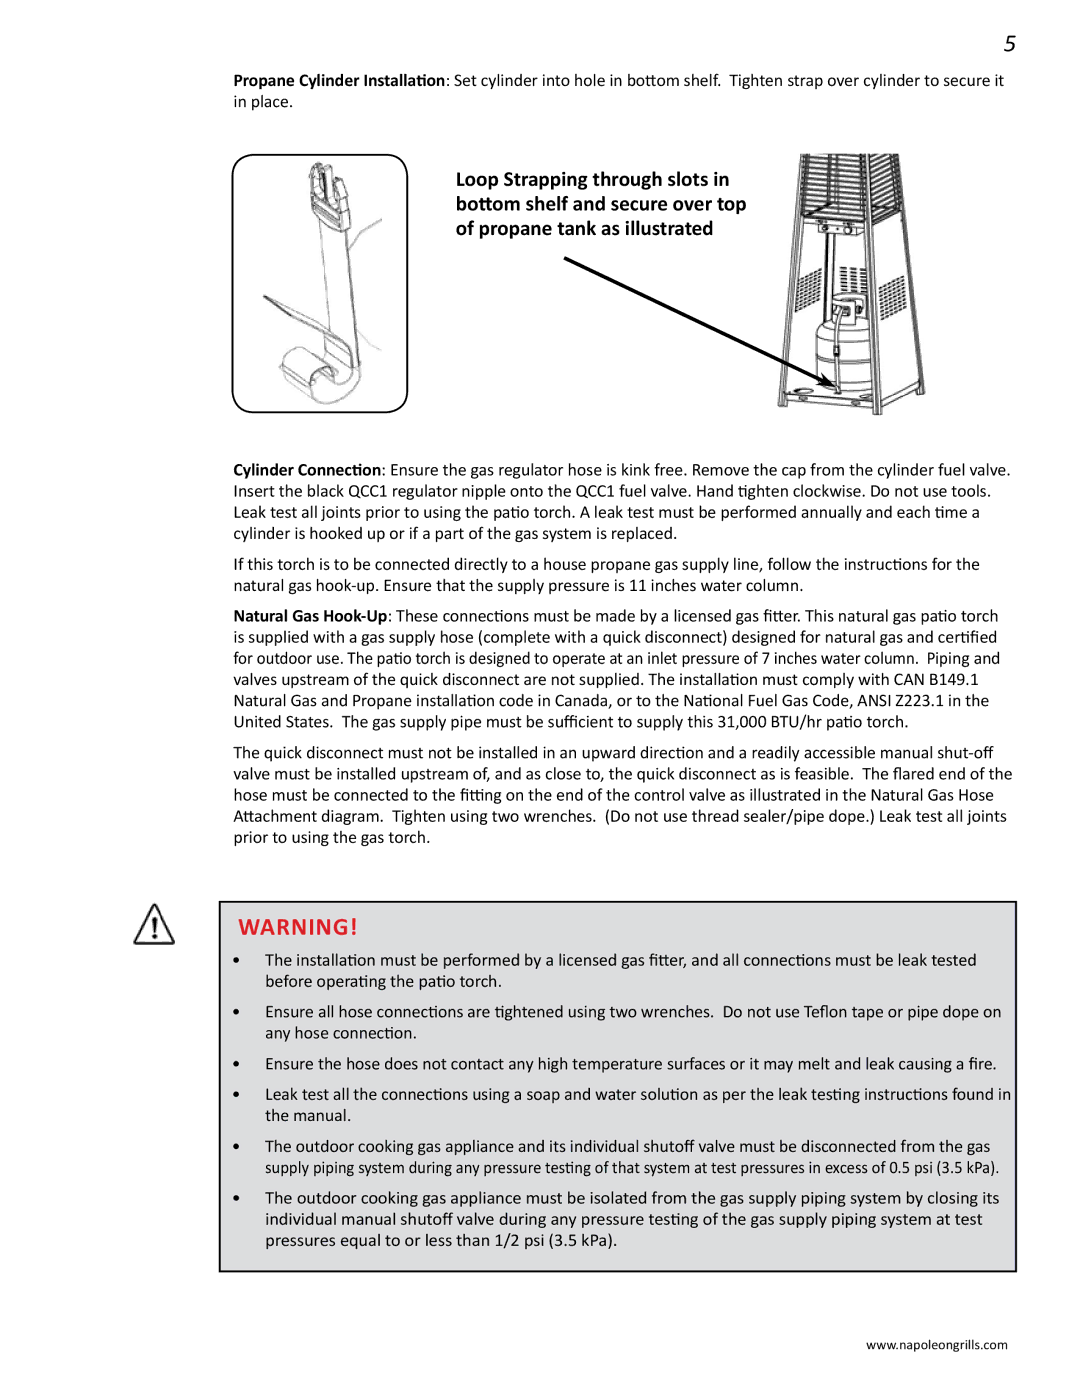
Propane Cylinder Installation: Set cylinder into hole in bottom shelf. Tighten strap over cylinder to secure it in place.
Loop Strapping through slots in bottom shelf and secure over top of propane tank as illustrated
Cylinder Connection: Ensure the gas regulator hose is kink free. Remove the cap from the cylinder fuel valve. Insert the black QCC1 regulator nipple onto the QCC1 fuel valve. Hand tighten clockwise. Do not use tools. Leak test all joints prior to using the patio torch. A leak test must be performed annually and each time a cylinder is hooked up or if a part of the gas system is replaced.
If this torch is to be connected directly to a house propane gas supply line, follow the instructions for the natural gas
Natural Gas
The quick disconnect must not be installed in an upward direction and a readily accessible manual
WARNING!
•The installation must be performed by a licensed gas fitter, and all connections must be leak tested before operating the patio torch.
•Ensure all hose connections are tightened using two wrenches. Do not use Teflon tape or pipe dope on any hose connection.
•Ensure the hose does not contact any high temperature surfaces or it may melt and leak causing a fire.
•Leak test all the connections using a soap and water solution as per the leak testing instructions found in the manual.
•The outdoor cooking gas appliance and its individual shutoff valve must be disconnected from the gas supply piping system during any pressure testing of that system at test pressures in excess of 0.5 psi (3.5 kPa).
•The outdoor cooking gas appliance must be isolated from the gas supply piping system by closing its individual manual shutoff valve during any pressure testing of the gas supply piping system at test pressures equal to or less than 1/2 psi (3.5 kPa).
www.napoleongrills.com
