Contents
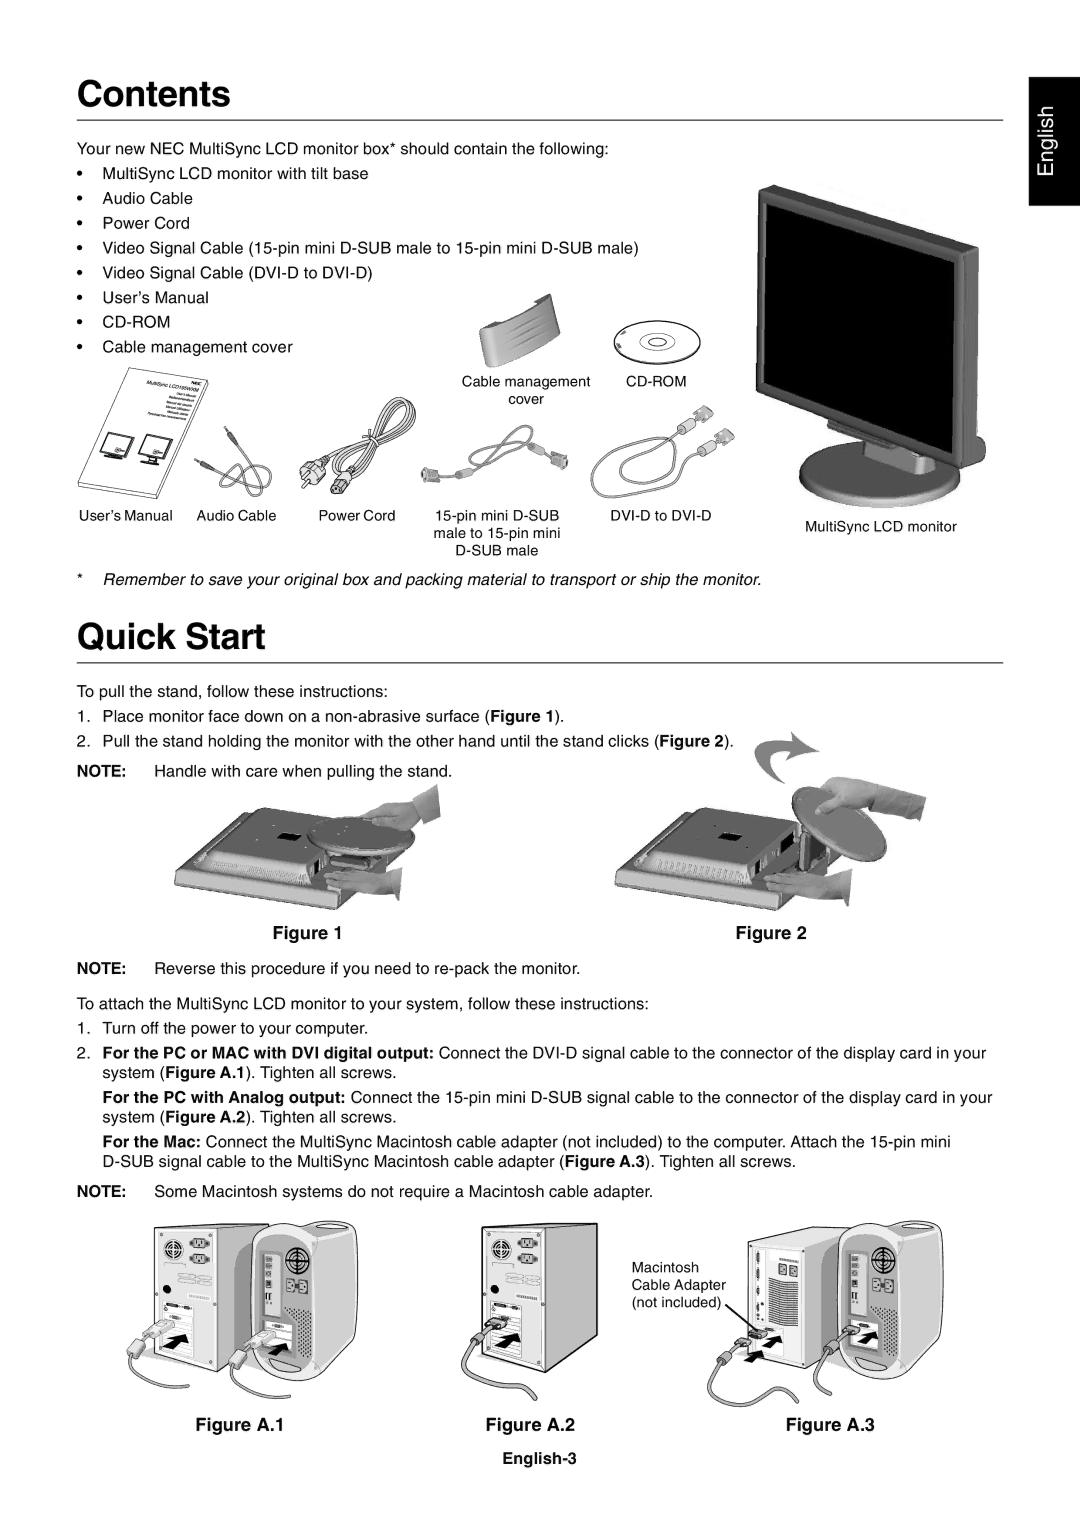
Your new NEC MultiSync LCD monitor box* should contain the following:
¥MultiSync LCD monitor with tilt base
¥Audio Cable
¥Power Cord
¥Video Signal Cable
¥Video Signal Cable
¥UserÕs Manual
¥
¥ Cable management cover
Cable management | |
cover |
|
UserÕs Manual Audio Cable | Power Cord | ||
|
| male to | MultiSync LCD monitor |
|
|
| |
|
|
|
*Remember to save your original box and packing material to transport or ship the monitor.
Quick Start
To pull the stand, follow these instructions:
1.Place monitor face down on a
2.Pull the stand holding the monitor with the other hand until the stand clicks (Figure 2).
NOTE: Handle with care when pulling the stand.
English
Figure 1 | Figure 2 |
NOTE: Reverse this procedure if you need to
To attach the MultiSync LCD monitor to your system, follow these instructions:
1.Turn off the power to your computer.
2.For the PC or MAC with DVI digital output: Connect the
For the PC with Analog output: Connect the
For the Mac: Connect the MultiSync Macintosh cable adapter (not included) to the computer. Attach the
NOTE: Some Macintosh systems do not require a Macintosh cable adapter.
Macintosh Cable Adapter (not included)
Figure A.1 | Figure A.2 | Figure A.3 |