
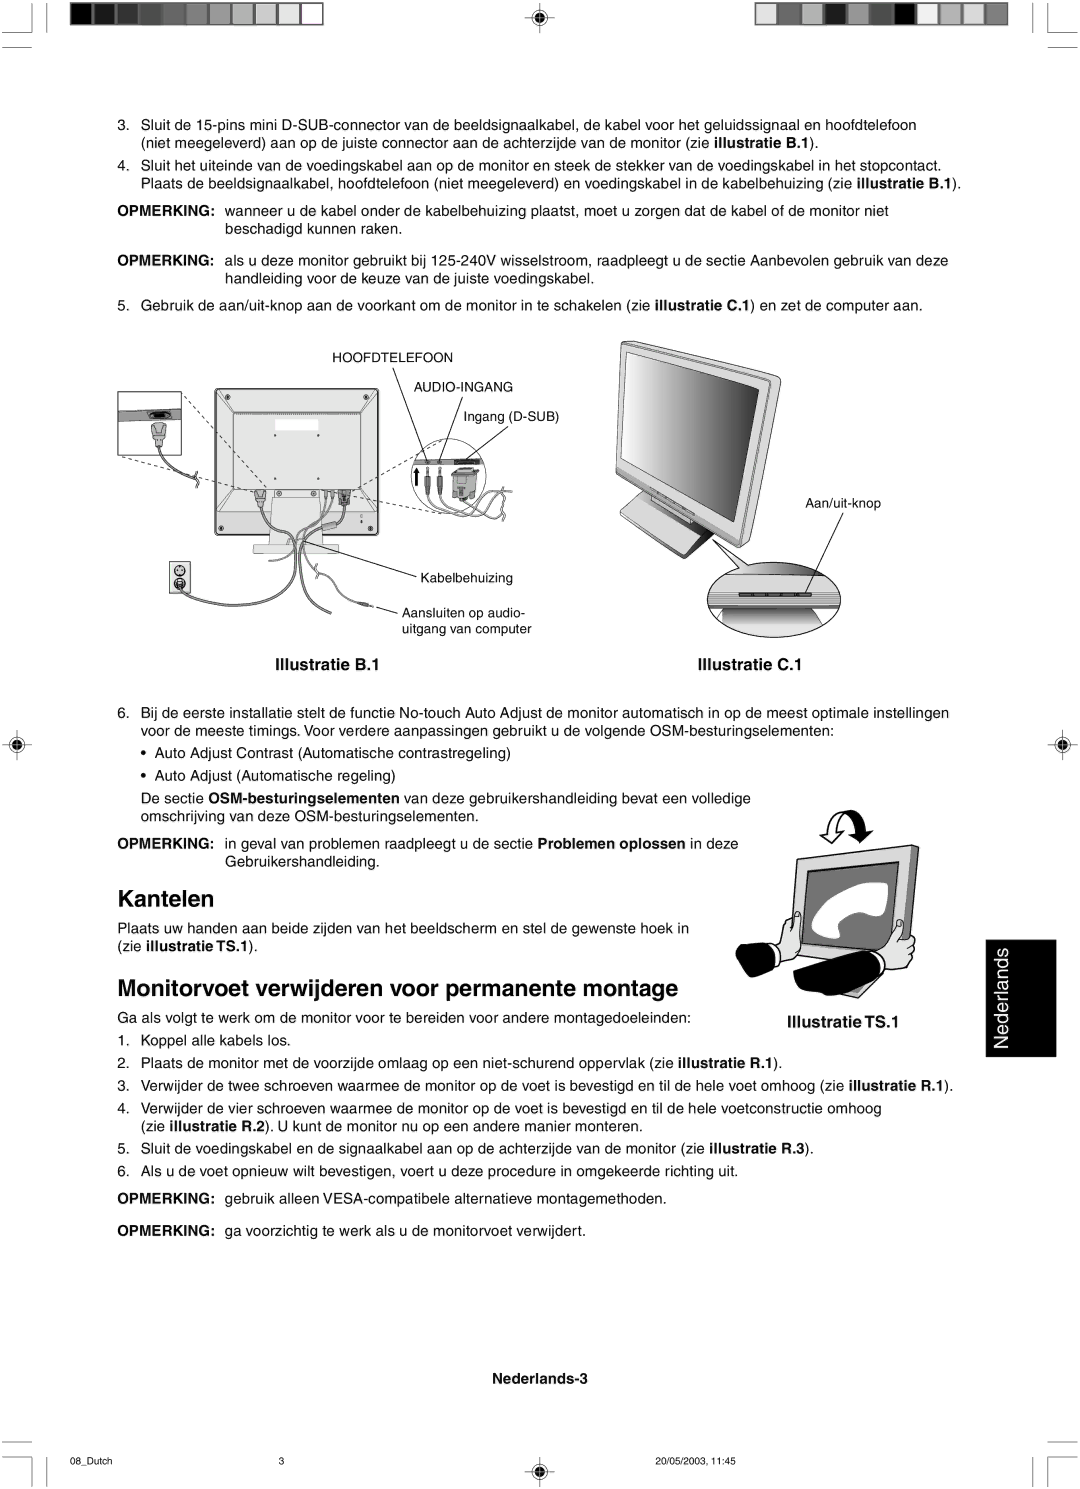
LCD71VM, LCD51VM specifications
The NEC LCD51VM and LCD71VM are part of NEC's high-performance digital signage solutions, designed to deliver superior image quality and compelling visual experiences. These models are particularly notable for their innovative features, advanced technologies, and versatility, making them suitable for various applications, from retail displays to corporate environments.One of the standout features of the NEC LCD51VM and LCD71VM is their exceptional image clarity. Both models utilize high-resolution panels that support full HD display capabilities, ensuring sharp images and vibrant colors. The LCD51VM has a screen size of 51 inches, while the LCD71VM boasts a larger 71-inch display, allowing for enhanced visibility in large spaces. The use of advanced LED backlighting technology contributes to improved brightness and contrast, ensuring that the content is easily viewable in various lighting conditions.
In addition to exceptional visual performance, these displays come equipped with advanced connectivity options. They support a range of input sources, including HDMI, DisplayPort, and DVI, making it easy to connect multimedia devices. The integration of an optional OPS (Open Pluggable Specification) slot further enhances their versatility, allowing users to install additional computing power or media players without the need for extra cabling.
Both models also emphasize durability and reliability, featuring a robust design that can withstand the rigors of continuous operation. The commercial-grade components ensure long-lasting performance, making them ideal for 24/7 applications. Furthermore, the screens are designed with anti-glare technology to minimize reflections, thereby improving visibility in bright environments.
Moreover, the NEC LCD51VM and LCD71VM incorporate sophisticated image processing technologies. Features such as image scaling, advanced color calibration, and automatic brightness adjustment ensure that the displays consistently provide optimal performance under varying conditions. This capability is especially beneficial for dynamic content that requires timely updates.
User-friendly features also set these models apart. They come with a comprehensive suite of management tools, enabling easy content scheduling and remote monitoring. This functionality streamlines the operation and maintenance of digital signage networks, providing content managers with greater control.
In summary, the NEC LCD51VM and LCD71VM are prime examples of cutting-edge digital signage technology. With their impressive display performance, robust build quality, extensive connectivity options, and advanced management tools, these models are engineered to meet the demands of modern visual communication in diverse environments. Whether used for promotional displays, wayfinding, or corporate presentations, they deliver exceptional results that enhance viewer engagement and contribute to success in digital signage applications.