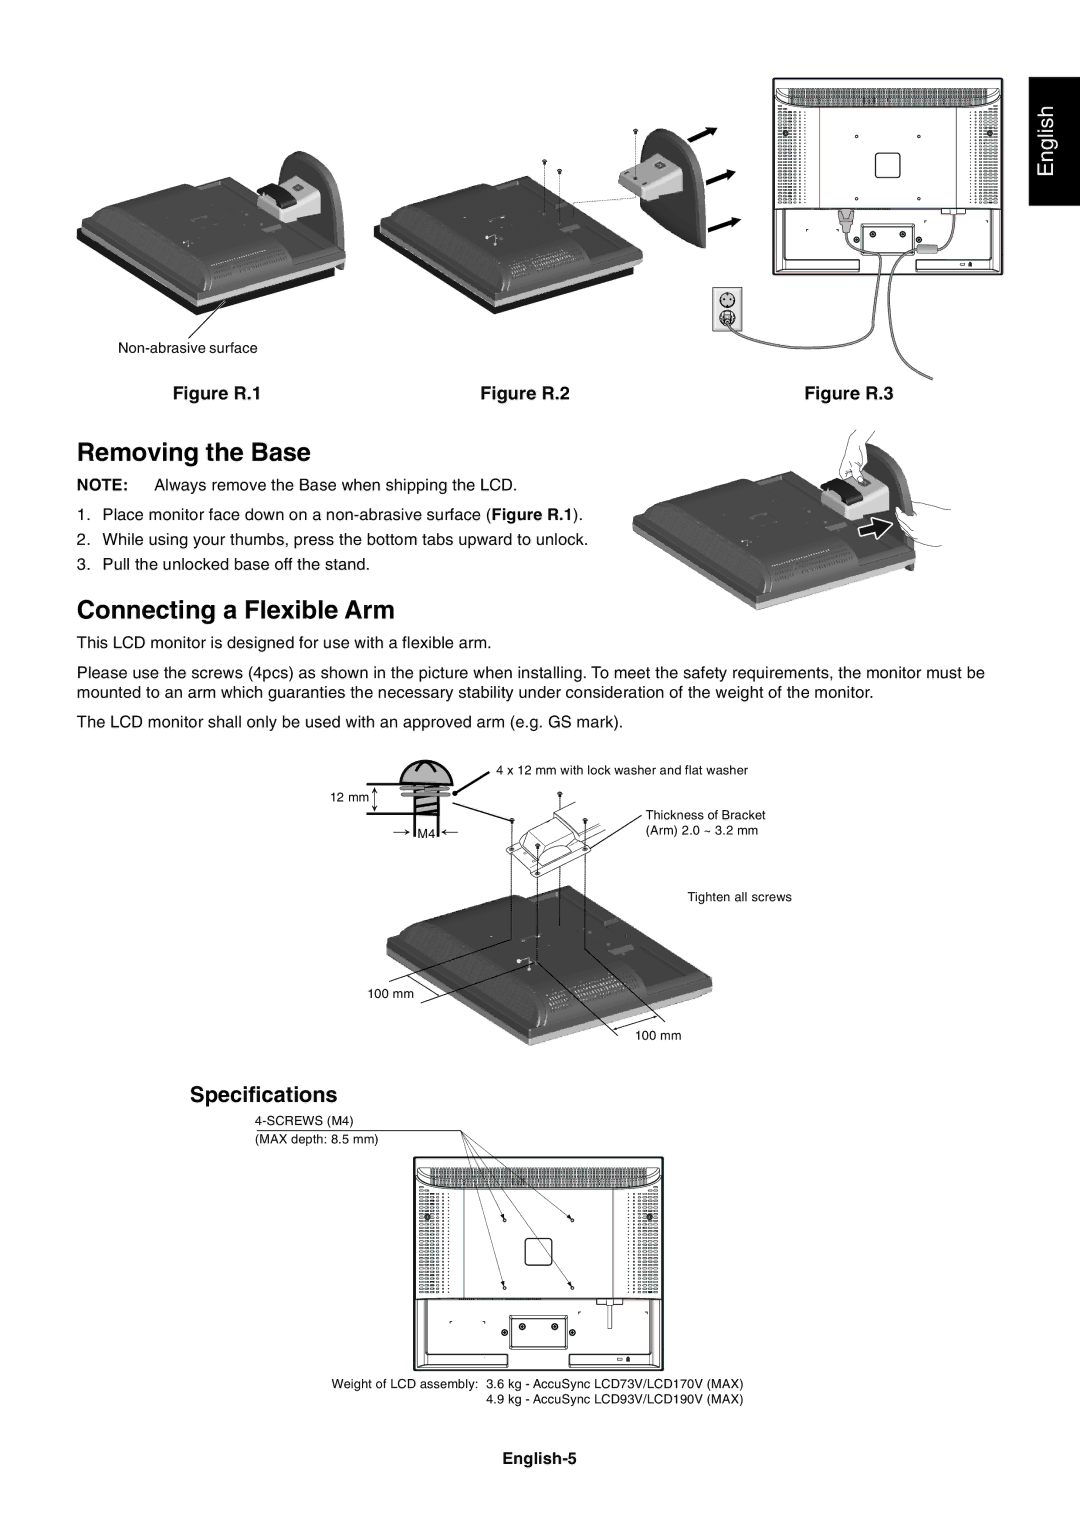
LCD170V, LCD73V, LCD93V, LCD190V specifications
The NEC LCD series has made a significant impact in the world of display technology, encompassing models such as the LCD73V, LCD190V, LCD170V, and LCD93V. Each of these monitors is designed to deliver exceptional performance while addressing the diverse needs of users in professional and personal environments.The NEC LCD73V is a 17-inch display that stands out for its sharp image quality and remarkable color accuracy. Utilizing a 1280x1024 native resolution, it employs advanced TFT LCD technology to enhance viewing angles and provide vibrant visuals. The monitor features a quick response time, making it an ideal choice for fast-paced applications such as gaming and video editing. Additionally, the LCD73V includes NEC’s Eye Care technology, which reduces eye strain by minimizing blue light emissions and flicker.
Moving to the LCD190V, this 19-inch display elevates the user experience with its broader screen real estate. The model supports a 1280x1024 resolution, providing clear and focused images suitable for various professional applications. With its robust design, the LCD190V integrates a versatile connectivity option, including both VGA and DVI inputs, ensuring compatibility with multiple systems. The monitor's ambient light sensor automatically adjusts brightness for optimal viewing comfort under varying conditions.
The NEC LCD170V offers a solid blend of performance and reliability. At 17 inches, it also supports a 1280x1024 resolution and adopts similar TFT technology for improved color performance and stability. This model prioritizes energy efficiency, making it an environmentally friendly choice suitable for long hours of use. Its sleek design and compact footprint make it an excellent fit for office environments or smaller workspaces, providing efficient use of desk space.
Lastly, the NEC LCD93V caters to entry-level users while still delivering impressive visual quality. With a 19-inch screen and a resolution of 1280x1024, it strikes a balance between affordability and performance. This monitor features a simplistic design yet provides adequate display capabilities for everyday tasks such as browsing, word processing, and multimedia consumption.
In summary, the NEC LCD series displays, including the LCD73V, LCD190V, LCD170V, and LCD93V, feature an array of technologies and design characteristics that prioritize performance, eye comfort, and compatibility, making them suitable for a wide range of applications in both professional and casual settings.