NetComm NB5PLUS4W QuickStart Guide for Mac
4.If you want to use this Mac in more than place (perhaps at home as well as at your workplace) or on more than one network, you can achieve this easily by setting up a Location for each place or network. Swapping Locations then becomes a simple matter of selecting the appropriate Location. If you wish to do this, you will need to click on the “Location”
5.Give your New Location a meaningful name and click OK. Make sure that the Location you have just created is displayed in the Location
6.If you do not wish to set up more than one Location, make sure that the Location
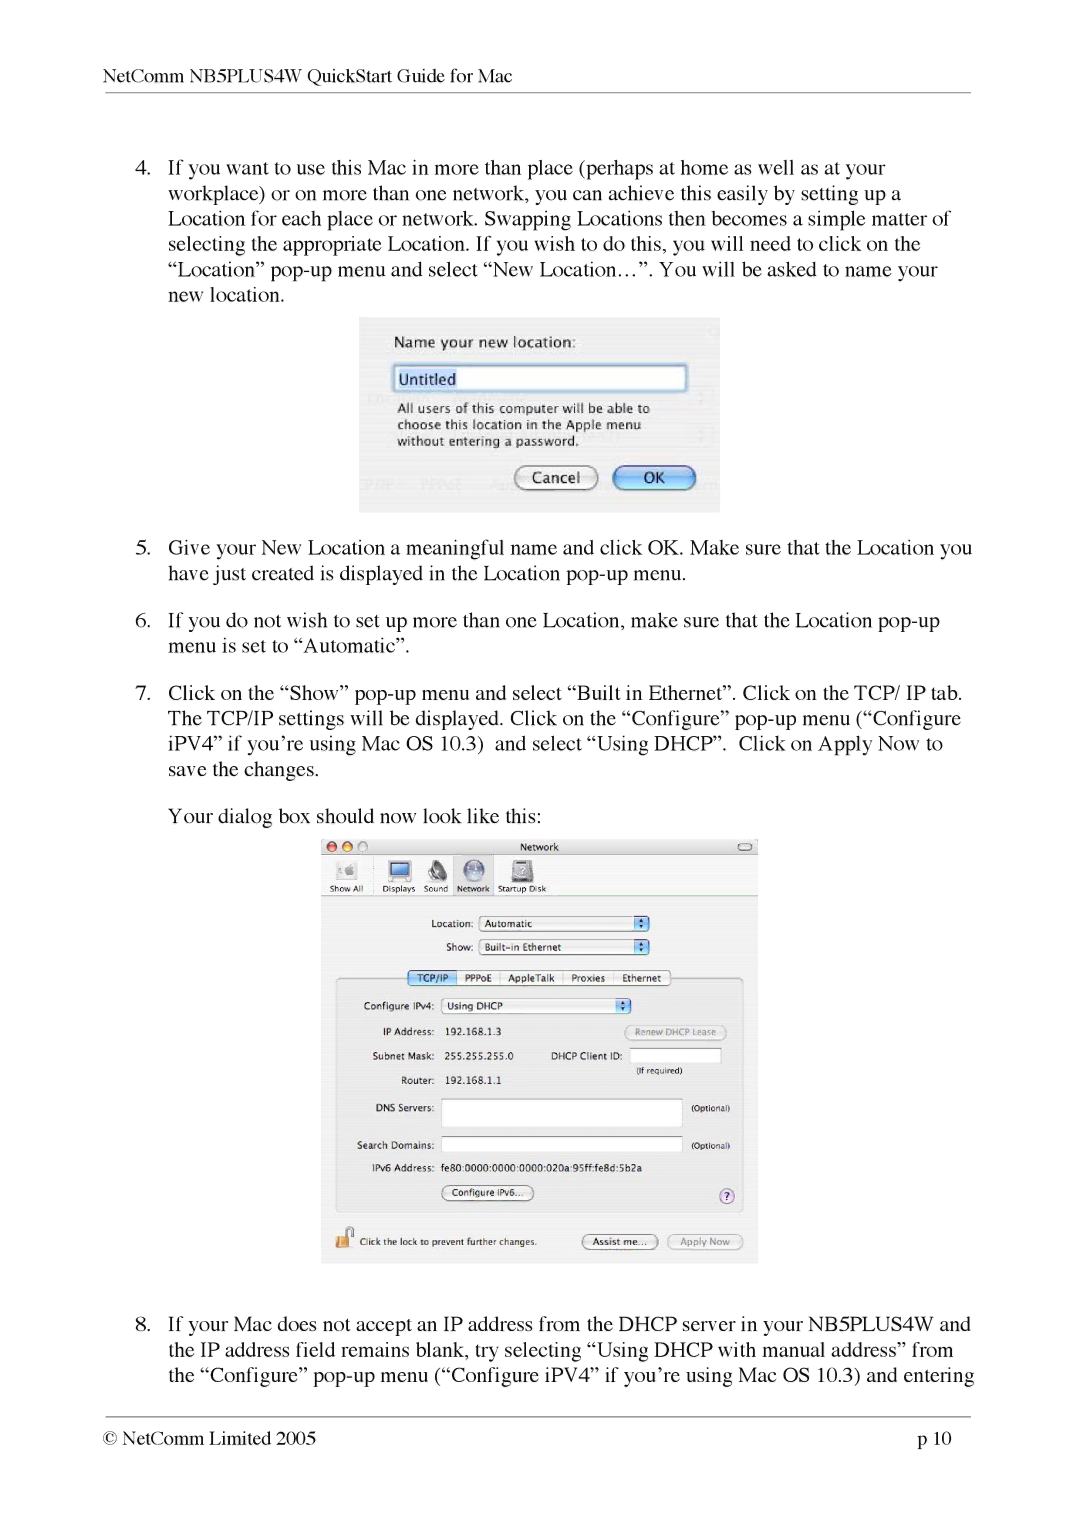
7.Click on the “Show”
Your dialog box should now look like this:
8.If your Mac does not accept an IP address from the DHCP server in your NB5PLUS4W and the IP address field remains blank, try selecting “Using DHCP with manual address” from the “Configure”
© NetComm Limited 2005 | p 10 |