1- Body of the device
2- Adapter rail with 7/8’’ Weaver prism encompassing:
3- Fastening screws
4- Insert rest
5- Insert
6- Clamp (2 pcs.)
7- Clamp screw (2 pcs.)
(Newcon Optik supplies all parts of the alignment).
Installation of the device is performed as follows:
•Check the elevation of the fastening screws (2), pulling the rail
(3)to the body of the device (1) above the upper surface of the rail. The elevation must not exceed the depth of the dead threaded holes in the body of the device. In order to meet this requirement you can cut the threaded part of the screws;
•Prepare the glue according to its preparation instruction (the glue need to be of certain strength not less than 200 kg/cm2, for example epoxy), and put it on the surface (A) of the plate. The surface of the screws must remain free of glue. This is especially important for possibility to repair the device or to remove the binding rail for installation on a different rifle;
•Apply a hermetic substance (of silicone type) on the thread of the screws (3);
•Fix the rail to the body of the scope with the help of the screws
(3)cut at the required length;
•Remove excessive glue (that is pushed out in the points where the rail is connected to the body of the device) with the help of dry cloth and
•Place the scope on the rail of the rifle so that your eye coincides with the edge of the Eyepiece Guard or in case of a large caliber
12
6. INSTALLING ON A HUNTING RIFLE
Night vision device DN482/483 may be used as a nighttime hunting scope.
Recommendation. The usage of night vision riflescopes for hunting may be limited or illegal in your area. Please, check with local authorities prior to usage.
Device may be used with various mounts that facilitates reliable fixation of the device to a particular rifle.
For convenient installation the device is supplied without stiff fixation of the binding to the device, and in most cases that enables to perform the device installation on a specific rifle model. For installation you should contact a specialised armourer workshop (gunsmith) or – if you are qualified enough – perform the installation yourself.
INSTALLATION RULES.
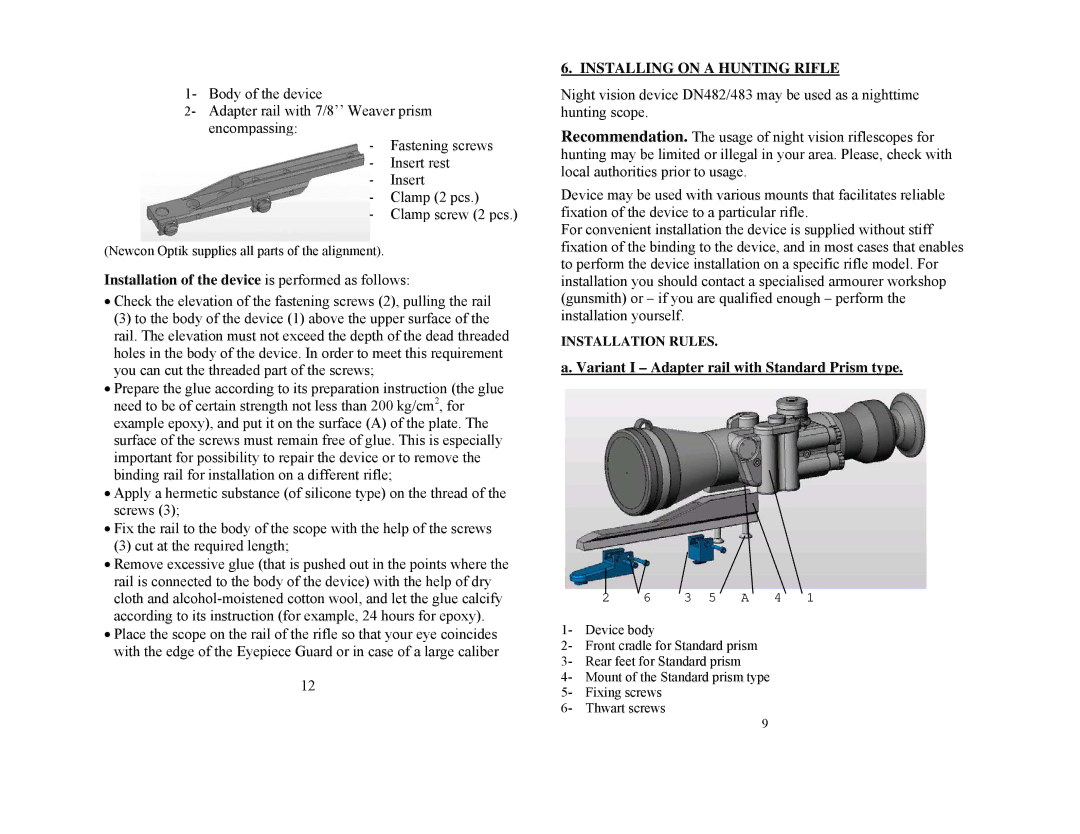
a. Variant I – Adapter rail with Standard Prism type.
2 | 6 | 3 5 A 4 1 |
1- Device body
2- Front cradle for Standard prism
3- Rear feet for Standard prism
4- Mount of the Standard prism type
5- Fixing screws
6- Thwart screws
9