| 6 |
|
|
|
|
|
| Technical |
| ||
|
|
|
| ||
|
|
| drawing of US |
| |
|
|
| clip mount |
| |
|
|
|
|
|
|
|
|
|
| 1 |
|
| 2 |
|
|
|
|
|
| 3 |
|
|
|
|
| 5 |
| 4 | |
|
|
|
| ||
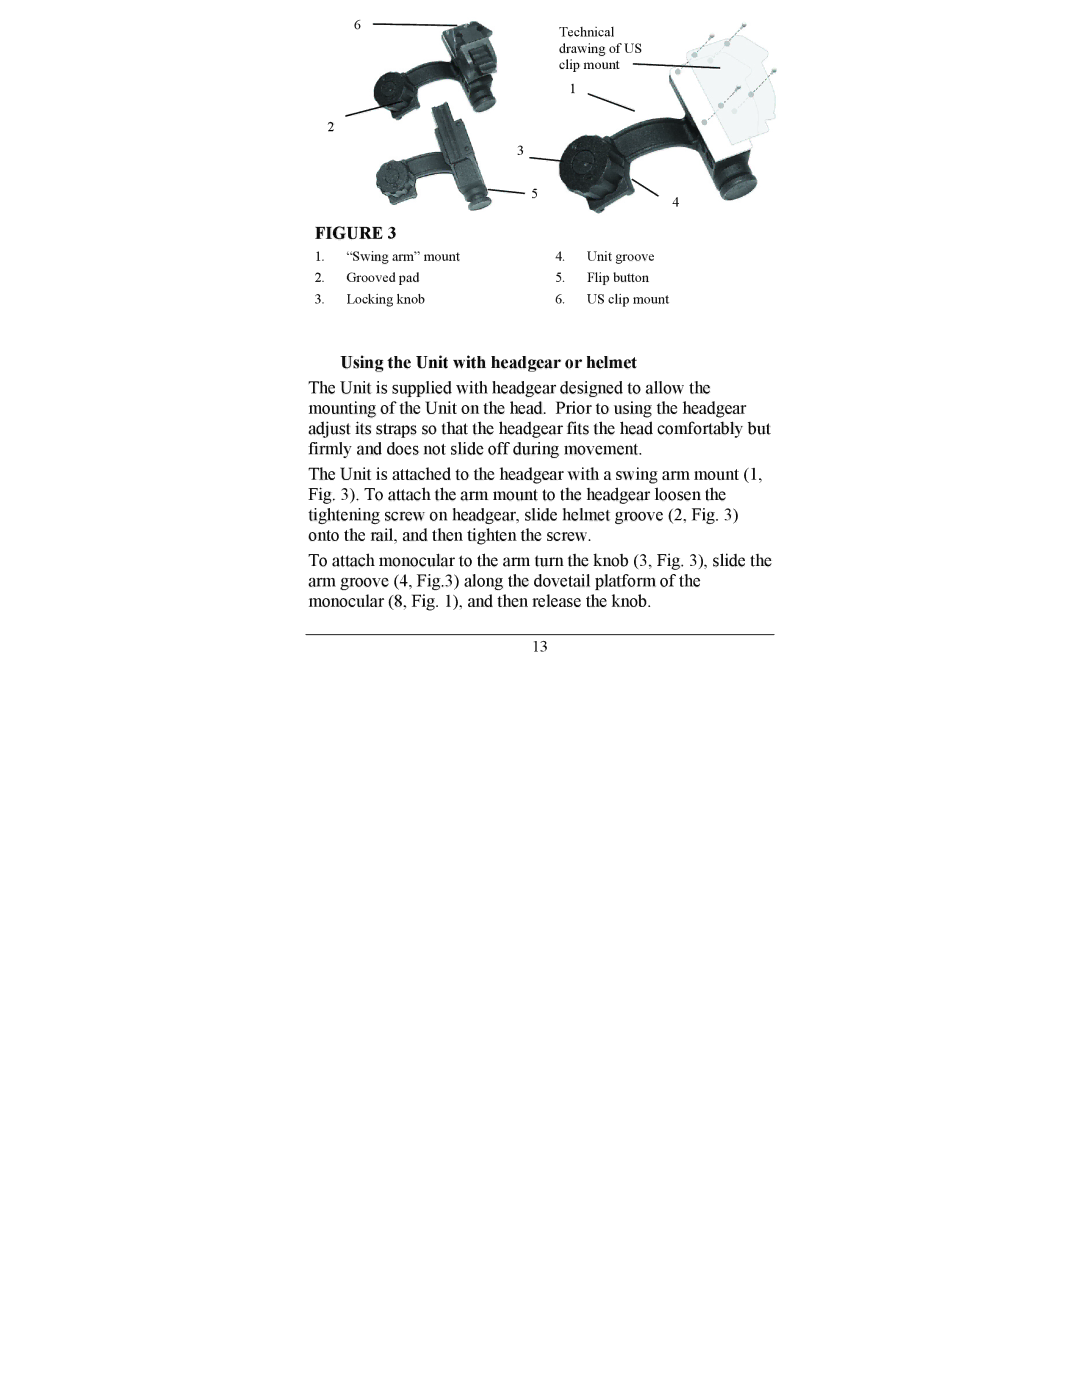
FIGURE 3 |
|
|
|
| |
1. | “Swing arm” mount | 4. | Unit groove | ||
2. | Grooved pad | 5. | Flip button | ||
3. | Locking knob | 6. | US clip mount | ||
Using the Unit with headgear or helmet
The Unit is supplied with headgear designed to allow the mounting of the Unit on the head. Prior to using the headgear adjust its straps so that the headgear fits the head comfortably but firmly and does not slide off during movement.
The Unit is attached to the headgear with a swing arm mount (1, Fig. 3). To attach the arm mount to the headgear loosen the tightening screw on headgear, slide helmet groove (2, Fig. 3) onto the rail, and then tighten the screw.
To attach monocular to the arm turn the knob (3, Fig. 3), slide the arm groove (4, Fig.3) along the dovetail platform of the monocular (8, Fig. 1), and then release the knob.
13