This section provides a step-by-step procedure on how to operate your SynScanrMhand control.

tial Setup

1.Perform the Polar alignment using the polarscope.

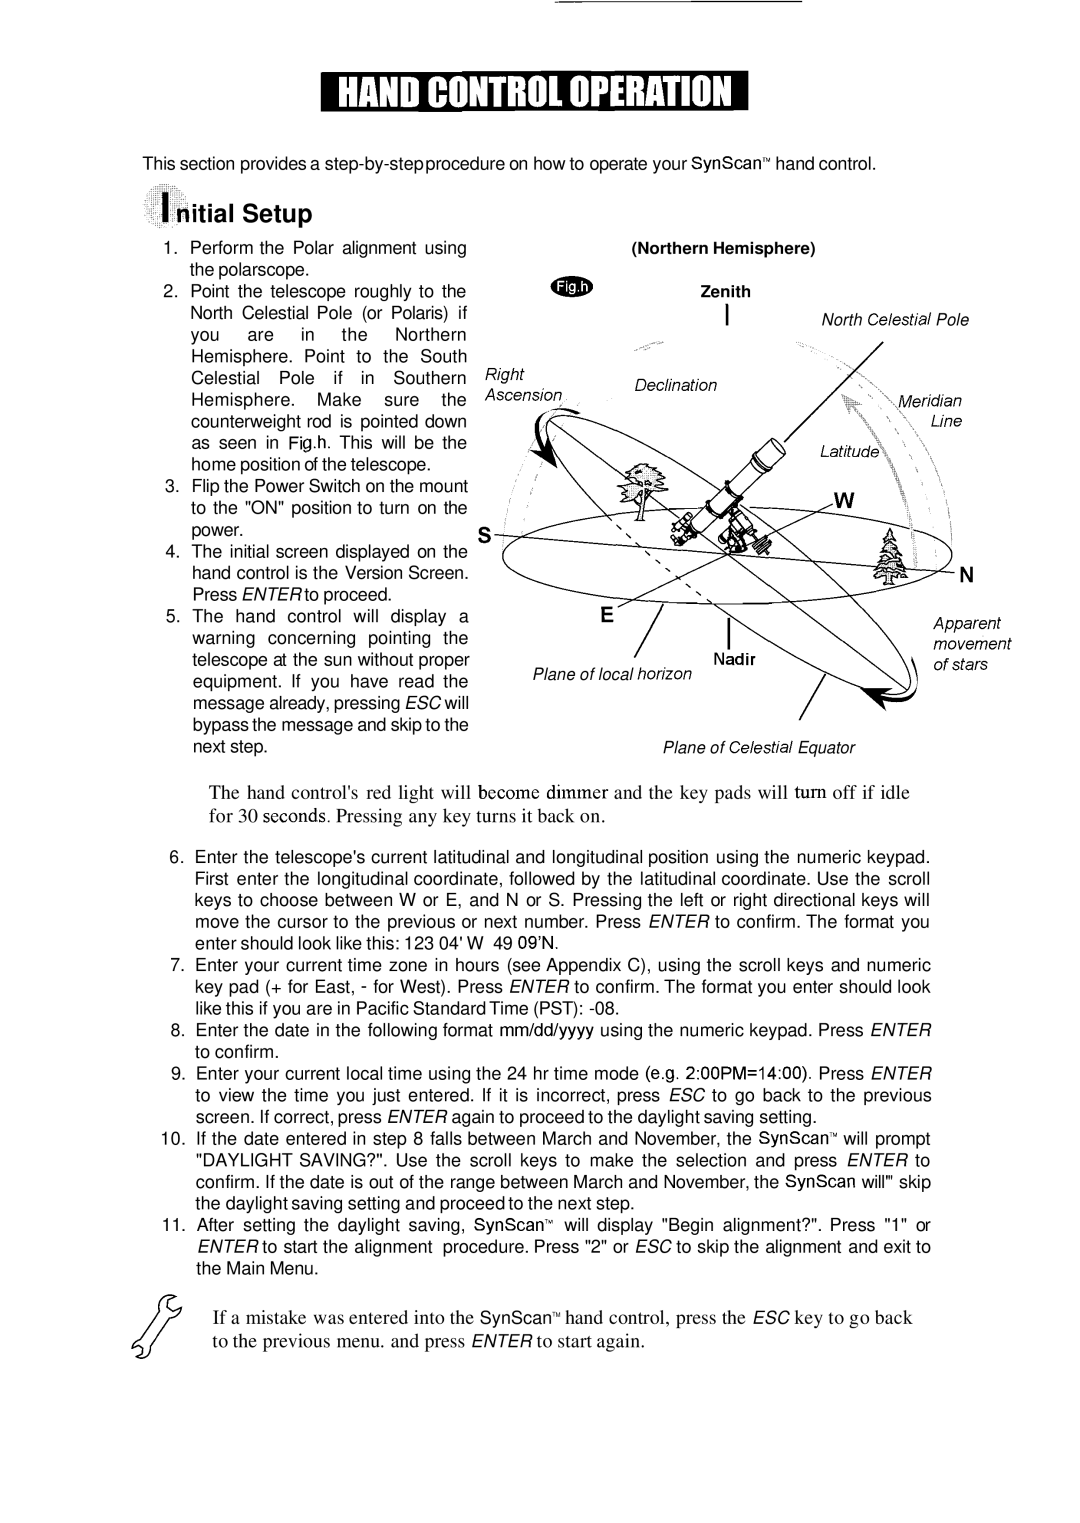
2.Point the telescope roughly to the North Celestial Pole (or Polaris) if you are in the Northern Hemisphere. Point to the South Celestial Pole if in Southern Hemisphere. Make sure the counterweight rod is pointed down as seen in Fig.h. This will be the home position of the telescope.

3.Flip the Power Switch on the mount to the "ON" position to turn on the power.

4.The initial screen displayed on the hand control is the Version Screen. Press ENTER to proceed.

5.The hand control will display a warning concerning pointing the telescope at the sun without proper equipment. If you have read the message already, pressing ESC will bypass the message and skip to the next step.


(Northern Hemisphere)


aID

Zenith


I

North Celestial Pole


Decl~natlon


Plane of local hor~zon

Plane of Celest~alEquator

The hand control's red light will become diin~nerand the key pads will turn off if idle for 30 seconds. Pressing any key turns it back on.

6.Enter the telescope's current latitudinal and longitudinal position using the numeric keypad. First enter the longitudinal coordinate, followed by the latitudinal coordinate. Use the scroll keys to choose between W or E, and N or S. Pressing the left or right directional keys will move the cursor to the previous or next number. Press ENTER to confirm. The format you enter should look like this: 123 04' W 49 09'N.

7.Enter your current time zone in hours (see Appendix C), using the scroll keys and numeric key pad (+ for East, - for West). Press ENTER to confirm. The format you enter should look like this if you are in Pacific Standard Time (PST): -08.

8.Enter the date in the following format mmlddlyyyy using the numeric keypad. Press ENTER to confirm.

9.Enter your current local time using the 24 hr time mode (e.g. 2:00PM=14:00). Press ENTER to view the time you just entered. If it is incorrect, press ESC to go back to the previous screen. If correct, press ENTER again to proceed to the daylight saving setting.

10.If the date entered in step 8 falls between March and November, the SynScanTMwill prompt "DAYLIGHT SAVING?". Use the scroll keys to make the selection and press ENTER to confirm. If the date is out of the range between March and November, the SynScan will'" skip the daylight saving setting and proceed to the next step.

11.After setting the daylight saving, SynScanTMwill display "Begin alignment?". Press "1" or ENTER to start the alignment procedure. Press "2" or ESC to skip the alignment and exit to the Main Menu.

If a mistake was entered into the SynScanTM hand control, press the ESC key to go back to the previous menu. and press ENTER to start again.

Page 5
Image 5
Nexstar SynScan instruction manual Aid, Tial Setup

SynScan specifications

The Nexstar SynScan is a highly regarded mount and telescope system, catering to both amateur astronomers and seasoned professionals alike. Renowned for its ease of use, portability, and advanced technology, it significantly enhances the stargazing experience.

One of the standout features of the Nexstar SynScan is its computerized GoTo mount. This system allows users to easily locate and track celestial objects. With an extensive database of over 40,000 celestial bodies, including stars, planets, nebulae, and galaxies, the SynScan offers an intuitive way to explore the night sky. The built-in database also includes user-defined objects, making it versatile for personalized astronomical pursuits.

The SynScan's Dual-Axis Tracking mechanism is another major advantage. It accurately tracks celestial objects as they move across the sky due to the Earth's rotation, ensuring that users can view objects for extended periods without needing to manually adjust the telescope. This functionality is particularly beneficial for astrophotography, as it reduces image blurring caused by slight movements.

In terms of technology, the Nexstar SynScan utilizes a precision motor drive and encoders to enhance tracking accuracy. The mount features AC servo motors, which provide smooth and silent operation. The included hand control is user-friendly, with a backlit screen that allows for night-time navigation without disturbing your surroundings.

The system's ease of setup and portability are important characteristics, particularly for users who wish to observe in remote locations. The Nexstar mount is lightweight and compact, making it easy to transport and assemble. Users can quickly set up the telescope in a matter of minutes, an advantage for spontaneous night-sky explorers.

Additionally, the SynScan offers various power options, including the ability to use AA batteries or an external power supply. This flexibility ensures that users can operate their telescope in different environments without worrying about finding power sources.

Lastly, the Nexstar SynScan is compatible with popular astronomy software, enabling users to enhance their observing sessions with additional features such as software-guided observations and advanced tracking capabilities. This integration with technology allows for a rich observing experience where the vastness of the universe is made more accessible.

In conclusion, the Nexstar SynScan stands out for its combination of advanced technology, user-friendliness, and portability, making it a top choice for anyone looking to delve deeper into the wonders of astronomy.